abp(net core)+easyui+efcore实现仓储管理系统——供应商管理升级之上(六十三)
abp(net core)+easyui+efcore实现仓储管理系统目录
1.在Visual Studio 2022的解决方案资源管理器中,选中“ABP.TPLMS.Web.Mvc”项目,然后单击鼠标右键,在弹出菜单中选中“设为启动项目”。按F5运行应用程序。
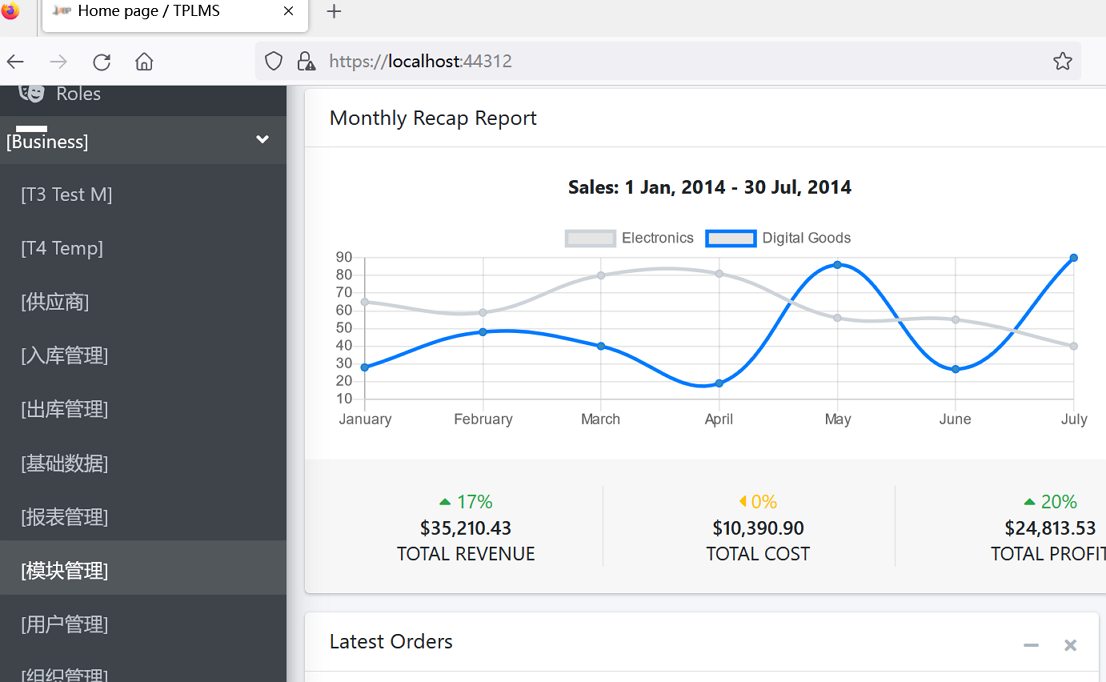
2.在浏览器将呈现登录页面,然后输入管理员用户名进行登录。浏览器跳转到首页面。如下图。
3.在主界面的菜单中,选择“Business->供应商管理”菜单项,浏览器立即报了一个错误。如下图。
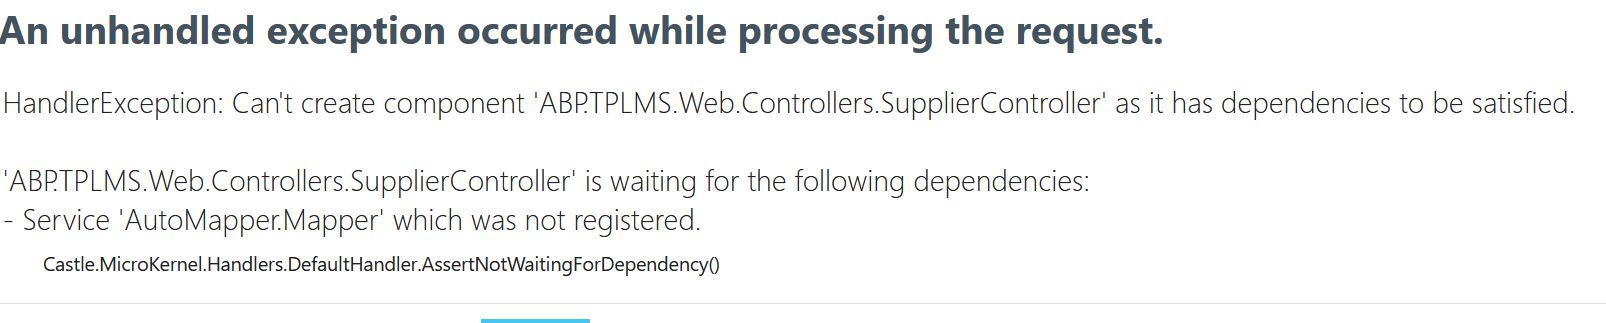
4.这是AutoMapper.Mapper方法造成的。这是由于在升级的时候,AutoMapper也升级了。由于NET模型映射器AutoMapper 9.0之后,官方宣称不再支持静态方法调用,之前直接升级编译报错无法使用。我简单的在代码的构造函数中使用注入方式,注入Mapper。现在实际运行时,发现这种方式,如果没有在startup.cs代码中预先注册,是无法使用的。原先的代码如下:
using System;

using System.Collections.Generic;

using System.Linq;

using System.Threading.Tasks;

using Abp.Application.Services.Dto;

using Abp.AspNetCore.Mvc.Authorization;

using Abp.Auditing;

using Abp.Runtime.Validation;

using ABP.TPLMS.Controllers;

using ABP.TPLMS.Suppliers;

using ABP.TPLMS.Suppliers.Dto;

using ABP.TPLMS.Web.Models.Supplier;

using Microsoft.AspNetCore.Mvc;

using Microsoft.EntityFrameworkCore;

// For more information on enabling MVC for empty projects, visit https://go.microsoft.com/fwlink/?LinkID=397860

namespace ABP.TPLMS.Web.Controllers

{

    [AbpMvcAuthorize]

    [Audited]

    public class SupplierController : TPLMSControllerBase

    {

        const int MaxNum= 10;

        // GET: /<controller>/

        [DisableAuditing]

        public async Task<IActionResult> Index()

        {

            SupplierDto cuModule=null;

            var module = (await _supplierAppService.GetAllAsync(new PagedSupplierResultRequestDto { MaxResultCount = MaxNum })).Items; // Paging not implemented yet

            if (module.Count>0)

            {

                cuModule = module.First();

            }

            var model = new SupplierListViewModel

            {

                Supplier = cuModule,

                Suppliers=module

            };

            return View(model);

        }

        private readonly ISupplierAppService _supplierAppService;

        AutoMapper.Mapper m_map;

        public SupplierController(ISupplierAppService supplierAppService,AutoMapper.Mapper map)

        {

            _supplierAppService = supplierAppService;

            m_map = map;

        }

        public async Task<ActionResult> EditSupplierModal(int supplierId)

        {

            var module = await _supplierAppService.GetAsync(new EntityDto<int>(supplierId));

            CreateUpdateSupplierDto cuSupplier = m_map.Map<CreateUpdateSupplierDto>(module);

            var model = new EditSupplierModalViewModel

            {

                Supplier = cuSupplier

            };

            return View("_EditSupplierModal", model);

        }

    }

}
5.幸好发现有一个ABP.ObjectMapper.Map方法可以使用,我们将代码修改为:
using System;

using System.Collections.Generic;

using System.Linq;

using System.Threading.Tasks;

using Abp.Application.Services.Dto;

using Abp.AspNetCore.Mvc.Authorization;

using Abp.Auditing;

using Abp.Runtime.Validation;

using ABP.TPLMS.Controllers;

using ABP.TPLMS.Suppliers;

using ABP.TPLMS.Suppliers.Dto;

using ABP.TPLMS.Web.Models.Supplier;

using Microsoft.AspNetCore.Mvc;

using Microsoft.EntityFrameworkCore;

// For more information on enabling MVC for empty projects, visit https://go.microsoft.com/fwlink/?LinkID=397860

namespace ABP.TPLMS.Web.Controllers

{

    [AbpMvcAuthorize]

    [Audited]

    public class SupplierController : TPLMSControllerBase

    {

        const int MaxNum= 10;

        // GET: /<controller>/

        [DisableAuditing]

        public async Task<IActionResult> Index()

        {

            SupplierDto cuModule=null;

            var module = (await _supplierAppService.GetAllAsync(new PagedSupplierResultRequestDto { MaxResultCount = MaxNum })).Items; // Paging not implemented yet

            if (module.Count>0)

            {

                cuModule = module.First();

            }

            var model = new SupplierListViewModel

            {

                Supplier = cuModule,

                Suppliers=module

            };

            return View(model);

        }

        private readonly ISupplierAppService _supplierAppService;

        public SupplierController(ISupplierAppService supplierAppService)

        {

            _supplierAppService = supplierAppService;

        }

        public async Task<ActionResult> EditSupplierModal(int supplierId)

        {

            var module = await _supplierAppService.GetAsync(new EntityDto<int>(supplierId));

            CreateUpdateSupplierDto cuSupplier = ObjectMapper.Map<CreateUpdateSupplierDto>(module);

            var model = new EditSupplierModalViewModel

            {

                Supplier = cuSupplier

            };

           return View("_EditSupplierModal", model);

        }

}

}
6.在Visual Studio 2022的解决方案资源管理器,按F5运行应用程序。
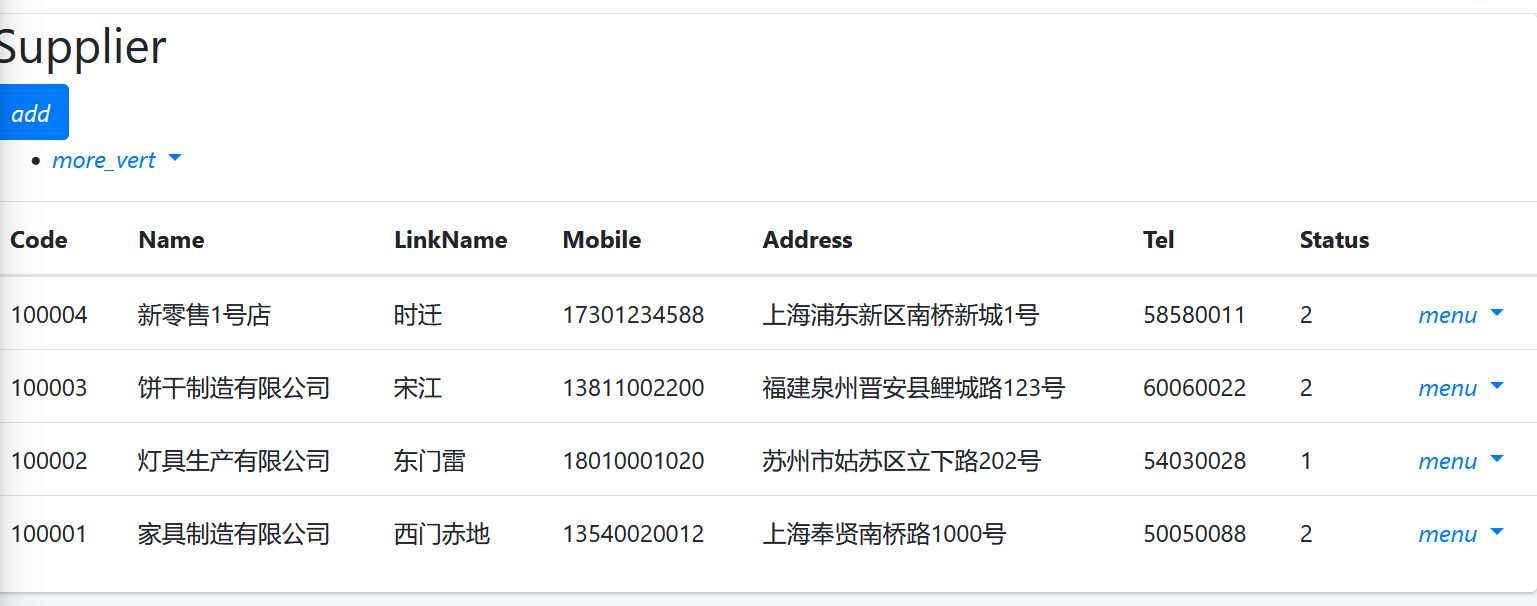
7.在浏览器将呈现登录页面,然后输入管理员用户名进行登录。浏览器跳转到首页面,在主界面的菜单中,选择“Business->供应商管理”菜单项,浏览器中呈现一个供应商信息列表页面,我们发现此页面的顶部与右边的菜单部分缺失css,样式不好看。如下图。
8. 在Visual Studio 2017的“解决方案资源管理器”中,右键单击在领域层“ABP.TPLMS.Web.Mvc”项目中的Views\Supplier目录。 找到Index.cshmtl文件,修改顶部的代码与按钮的代码。具体代码如下:
@using ABP.TPLMS.Web.Startup
@model ABP.TPLMS.Web.Models.Supplier.SupplierListViewModel @{
ViewData["Title"] = PageNames.Supplier;
} @section scripts
{
<script src="~/view-resources/Views/Supplier/Index.js" asp-append-version="true"></script> }
<section class="content-header">
<div class="container-fluid">
<div class="row">
<div class="col-sm-6">
<h1>@L("Supplier")</h1>
</div>
<div class="col-sm-4 text-sm-right">
<a id="RefreshButton" href="javascript:void(0);"><i class="fas fa-redo-alt"></i></a>
</div>
<div class="col-sm-2">
<button type="button" class="btn btn-primary btn-circle waves-effect waves-circle waves-float pull-right"
data-toggle="modal" data-target="#SupplierCreateModal">
<i class="fa fa-plus-square">Add</i>
</button> </div>
</div>
</div>
</section>
<div class="row clearfix">
<div class="col-lg-12 col-md-12 col-sm-12 col-xs-12">
<div class="card">
<div class="body table-responsive">
<table class="table">
<thead>
<tr>
<th>
@Html.DisplayNameFor(model => model.Supplier.Code)
</th>
<th>
@Html.DisplayNameFor(model => model.Supplier.Name)
</th>
<th>
@Html.DisplayNameFor(model => model.Supplier.LinkName)
</th>
<th>
@Html.DisplayNameFor(model => model.Supplier.Mobile)
</th>
<th>
@Html.DisplayNameFor(model => model.Supplier.Address)
</th>
<th>
@Html.DisplayNameFor(model => model.Supplier.Tel)
</th>
<th>
@Html.DisplayNameFor(model => model.Supplier.Status)
</th>
<th></th>
</tr>
</thead>
<tbody>
@foreach (var item in Model.Suppliers)
{
<tr>
<td>
@Html.DisplayFor(modelItem => item.Code)
</td>
<td>
@Html.DisplayFor(modelItem => item.Name)
</td>
<td>
@Html.DisplayFor(modelItem => item.LinkName)
</td>
<td>
@Html.DisplayFor(modelItem => item.Mobile)
</td>
<td>
@Html.DisplayFor(modelItem => item.Address)
</td>
<td>
@Html.DisplayFor(modelItem => item.Tel)
</td>
<td>
@Html.DisplayFor(modelItem => item.Status)
</td>
<td > <a href="#" class="btn btn-sm bg-secondary edit-supplier" data-supplier-id="@item.Id"
data-toggle="modal" data-target="#SupplierEditModal"><i class="fas fa-pencil-alt"></i>@L("Edit")</a>
<a href="#" class="btn btn-sm bg-danger delete-supplier" data-supplier-id="@item.Id"
data-supplier-name="@item.Name"><i class="fas fa-trash"></i>@L("Delete")</a> </td>
</tr>
}
</tbody>
</table> </div>
</div>
</div>
</div> <div class="modal fade" id="SupplierCreateModal" tabindex="-1" role="dialog" aria-labelledby="SupplierCreateModalLabel"
data-backdrop="static">
<div class="modal-dialog" role="document">
<div class="modal-content">
<div class="modal-header">
<h4 class="modal-title">
<span>@L("CreateNewSupplier")</span>
</h4>
</div>
<div class="modal-body">
<form name="SupplierCreateForm" role="form" class="form-validation">
<div> <div class="row clearfix">
<div class="col-sm-6">
<div class="form-group form-float">
<div class="form-line">
<label asp-for="@Model.Supplier.Code" class="form-label"></label>
<input type="text" name="Code" class="form-control" required maxlength="50" /> </div>
</div>
</div>
<div class="col-sm-6">
<div class="form-group form-float">
<div class="form-line">
<label asp-for="@Model.Supplier.Name" class="form-label"></label>
<input type="text" name="Name" class="form-control" required maxlength="50" /> </div>
</div>
</div>
</div>
<div class="row clearfix">
<div class="col-sm-12">
<div class="form-group form-float">
<div class="form-line">
<label asp-for="@Model.Supplier.Address" class="form-label"></label>
<input type="text" name="Address" class="form-control" required maxlength="255" /> </div>
</div>
</div>
</div>
<div class="row clearfix">
<div class="col-sm-6">
<div class="form-group form-float">
<div class="form-line">
<label asp-for="@Model.Supplier.LinkName" class="form-label"></label>
<input type="text" name="LinkName" class="form-control" /> </div>
</div>
</div>
<div class="col-sm-6">
<div class="form-group form-float">
<div class="form-line">
<label asp-for="@Model.Supplier.Mobile" class="form-label"></label>
<input type="text" name="Mobile" class="form-control" /> </div>
</div>
</div>
</div>
<div class="row clearfix">
<div class="col-sm-6">
<div class="form-group form-float">
<div class="form-line">
<label asp-for="@Model.Supplier.Tel" class="form-label"></label>
<input type="text" name="Tel" class="form-control" required maxlength="255" /> </div>
</div>
</div>
<div class="col-sm-6">
<div class="form-group form-float">
<div class="form-line">
<label asp-for="@Model.Supplier.Status" class="form-label"></label>
<input type="text" name="Status" class="form-control" /> </div>
</div>
</div>
</div>
<div class="row clearfix">
<div class="col-sm-6">
<div class="form-line">
<label asp-for="@Model.Supplier.Sex"></label> <input name="Sex" type="text" class="form-control" /> </div>
</div>
<div class="col-sm-6">
<div class="form-line">
<label asp-for="@Model.Supplier.Email"></label>
<input name="Email" type="text" class="form-control" /> </div>
</div>
</div> </div>
<div class="modal-footer">
<button type="button" class="btn btn-default waves-effect" data-dismiss="modal">@L("Cancel")</button>
<button type="submit" class="btn btn-primary waves-effect">@L("Save")</button>
</div>
</form>
</div>
</div>
</div>
</div> <div class="modal fade" id="SupplierEditModal" tabindex="-1" role="dialog" aria-labelledby="SupplierEditModalLabel"
data-backdrop="static">
<div class="modal-dialog" role="document">
<div class="modal-content">
</div>
</div>
</div>
abp(net core)+easyui+efcore实现仓储管理系统——供应商管理升级之上(六十三)的更多相关文章
- abp(net core)+easyui+efcore实现仓储管理系统——入库管理之七(四十三)
abp(net core)+easyui+efcore实现仓储管理系统目录 abp(net core)+easyui+efcore实现仓储管理系统——ABP总体介绍(一) abp(net core)+ ...
- abp(net core)+easyui+efcore实现仓储管理系统——使用 WEBAPI实现CURD (十三)
abp(net core)+easyui+efcore实现仓储管理系统目录 abp(net core)+easyui+efcore实现仓储管理系统——ABP总体介绍(一) abp(net core)+ ...
- abp(net core)+easyui+efcore实现仓储管理系统——出库管理之四(五十三)
abp(net core)+easyui+efcore实现仓储管理系统目录 abp(net core)+easyui+efcore实现仓储管理系统--ABP总体介绍(一) abp(net core)+ ...
- abp(net core)+easyui+efcore实现仓储管理系统——使用 WEBAPI实现CURD (十四)
abp(net core)+easyui+efcore实现仓储管理系统目录 abp(net core)+easyui+efcore实现仓储管理系统——ABP总体介绍(一) abp(net core)+ ...
- abp(net core)+easyui+efcore实现仓储管理系统——使用 WEBAPI实现CURD (十五)
core)+easyui+efcore实现仓储管理系统目录 abp(net core)+easyui+efcore实现仓储管理系统——ABP总体介绍(一) abp(net core)+easyui+e ...
- abp(net core)+easyui+efcore实现仓储管理系统——菜单 (十六)
系统目录 abp(net core)+easyui+efcore实现仓储管理系统——ABP总体介绍(一) abp(net core)+easyui+efcore实现仓储管理系统——解决方案介绍(二) ...
- abp(net core)+easyui+efcore实现仓储管理系统——菜单-下(十七)
实现仓储管理系统目录 abp(net core)+easyui+efcore实现仓储管理系统——ABP总体介绍(一) abp(net core)+easyui+efcore实现仓储管理系统——解决方案 ...
- abp(net core)+easyui+efcore实现仓储管理系统——EasyUI前端页面框架 (十八)
目录 abp(net core)+easyui+efcore实现仓储管理系统——ABP总体介绍(一) abp(net core)+easyui+efcore实现仓储管理系统——解决方案介绍(二) ab ...
- abp(net core)+easyui+efcore实现仓储管理系统——EasyUI之货物管理一 (十九)
abp(net core)+easyui+efcore实现仓储管理系统目录 abp(net core)+easyui+efcore实现仓储管理系统——ABP总体介绍(一) abp(net core)+ ...
- abp(net core)+easyui+efcore实现仓储管理系统——EasyUI之货物管理二 (二十)
abp(net core)+easyui+efcore实现仓储管理系统目录 abp(net core)+easyui+efcore实现仓储管理系统——ABP总体介绍(一) abp(net core)+ ...
随机推荐
- 2.3Dmax界面_视图调整
一.试图模型显示效果的切换 '默认是真实显示效果' 线框模式 快捷键F3 ----> 真实显示效果和线框显示效果的切换(切换到线框显示效果再按F3就切换到了真实显示效果). 线面模式 快捷键F4 ...
- c++中的构造函数,拷贝构造函数和赋值函数
1.拷贝构造和赋值函数的区别: 1)拷贝构造函数是一个对象初始化一块内存区域,这块内存就是新对象的内存区,而赋值函数是对于一个已经被初始化的对象来进行赋值操作. 2)一般来说在数据成员包含指针对象的时 ...
- 修改linux服务器时间
date -s "20220104 11:07:05" &&hwclock --systohc
- C++ accumulate()函数的用法
accumulate定义在 numeric 中,作用有两个,一个是累加求和,另一个是自定义类型数据的处理. 头文件 #include <numeric> 原型 默认求累加和 templat ...
- C# 微信开发 微信号接入 (附完整源码)(1)
1. 首先配置微信服务器设置 a) 企业号配置信息 (详见:ConfigurationManager类) b) 企业号服务器配置: ConfigurationManager ...
- 《MySQL是怎样运行的》第八章小结
- 入门IDEA
Hello world psvm sout public class HelloWord { public static void main(String[] args) { System.out.p ...
- DVWA-Insecure CAPTCHA(不安全的验证码)
Insecure CAPTCHA,意思为不安全的验证码 全称为Completely Automated Public Turing Test to Tell Computers and Humans ...
- 在Linux中安装containerd作为kubernetes的容器运行时
概述 从kubernetes1.24开始的版本移除了内置的docker支持,用户可以自行选择需要使用的容器运行时,比如containerd.CRI-O.Docker Engine等等,这里我们采用二进 ...
- 搭建良好编写体验的webgl编程环境 vscode+vit
因为webgl代码是以字符串的形式嵌入在javascript代码中,这对于我们编写webgl代码的体验不友好,本文介绍如何搭建友好webgl编程环境: 需要安装的vscode插件 WebGL GLSL ...