abp(net core)+easyui+efcore实现仓储管理系统——使用 WEBAPI实现CURD (十四)
abp(net core)+easyui+efcore实现仓储管理系统目录
abp(net core)+easyui+efcore实现仓储管理系统——ABP总体介绍(一)
abp(net core)+easyui+efcore实现仓储管理系统——解决方案介绍(二)
abp(net core)+easyui+efcore实现仓储管理系统——领域层创建实体(三)
abp(net core)+easyui+efcore实现仓储管理系统——定义仓储并实现 (四)
abp(net core)+easyui+efcore实现仓储管理系统——创建应用服务(五)
abp(net core)+easyui+efcore实现仓储管理系统——展现层实现增删改查之控制器(六)
abp(net core)+easyui+efcore实现仓储管理系统——展现层实现增删改查之列表视图(七)
abp(net core)+easyui+efcore实现仓储管理系统——展现层实现增删改查之增删改视图(八)
abp(net core)+easyui+efcore实现仓储管理系统——展现层实现增删改查之菜单与测试(九)
abp(net core)+easyui+efcore实现仓储管理系统——多语言(十)
abp(net core)+easyui+efcore实现仓储管理系统——使用 WEBAPI实现CURD (十一)
abp(net core)+easyui+efcore实现仓储管理系统——使用 WEBAPI实现CURD (十二)
abp(net core)+easyui+efcore实现仓储管理系统——使用 WEBAPI实现CURD (十三)
上接(abp(net core)+easyui+efcore实现仓储管理系统——使用 WEBAPI实现CURD (十三)),在这一篇文章中我们实现新增供应商的相关功能。
九、新增供应商
(一) 创建js文件
我们先来看一下 “ABP.TPLMS.Web.Mvc”项目中的wwwroot目录下的view-resources\Users目录中的Index.js文件,然后参照此文件来写新增供应商的脚本文件。
1. 在Visual Studio 2017的“解决方案资源管理器”中,找到展现层“ABP.TPLMS.Web.Mvc”项目中的wwwroot目录下的view-resources目录。使用鼠标右键单击此目录,在弹出菜单中选择“添加” > “新建文件夹”。并重命名为“Supplier”。
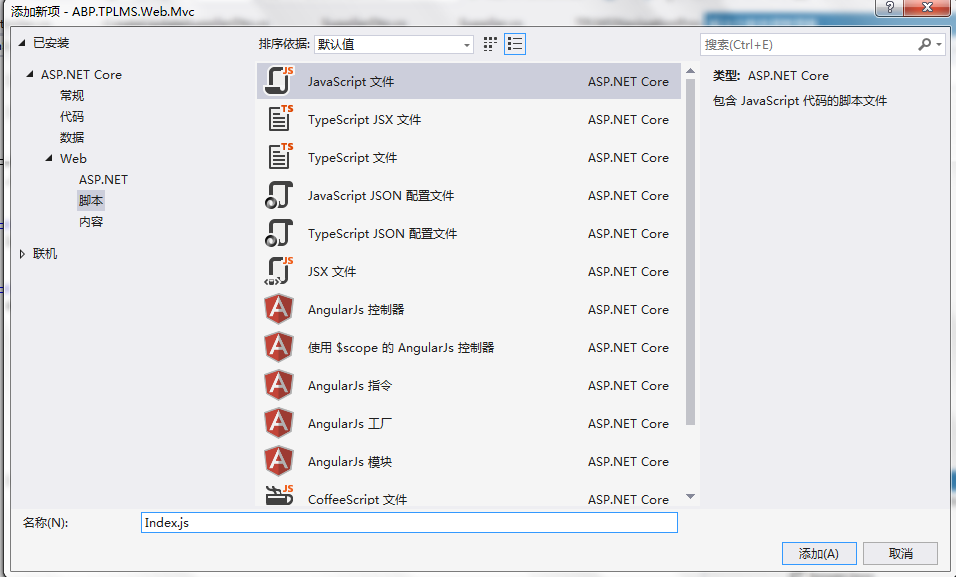
2. 在Visual Studio 2017的“解决方案资源管理器”中,鼠标右键单击“Supplier”文件夹,然后选择“添加” > “新建项…”。 在“添加新项-ABP.TPLMS.Web.Mvc”对话框中,选择“javascript文件”,并将名称命名为Index.js。如下图。
3. 在Index.js文件中,我们写入如下代码。
(function() {

    $(function() {

        var _supplierService = abp.services.app.supplier;

        var _$modal = $('#SupplierCreateModal');

        var _$form = _$modal.find('form');

        _$form.validate({

        });

        $('#RefreshButton').click(function () {

            refreshModuleList();

        });

        $('.delete-supplier').click(function () {

            var userId = $(this).attr("data-supplier-id");

            var userName = $(this).attr('data-supplier-name');

            deleteSupplier(userId, userName);

        });

        $('.edit-supplier').click(function (e) {

            var supplierId = $(this).attr("data-supplier-id");

            e.preventDefault();

            $.ajax({

                url: abp.appPath + 'Supplier/EditSupplierModal?supplierId=' + supplierId,

                type: 'POST',

                contentType: 'application/html',

                success: function (content) {

                    $('#SupplierEditModal div.modal-content').html(content);

                },

                error: function (e) { }

            });

        });

        _$form.find('button[type="submit"]').click(function (e) {

            e.preventDefault();

            if (!_$form.valid()) {

                return;

            }

            var supplier = _$form.serializeFormToObject(); //serializeFormToObject is defined in main.js

            abp.ui.setBusy(_$modal);

            _supplierService.create(supplier).done(function () {

                _$modal.modal('hide');

                location.reload(true); //reload page to see new user!

            }).always(function () {

                abp.ui.clearBusy(_$modal);

            });

        });

        _$modal.on('shown.bs.modal', function () {

            _$modal.find('input:not([type=hidden]):first').focus();

        });

        function refreshSupplierList() {

            location.reload(true); //reload page to see new user!

        }

        function deleteSupplier(supplierId, supplierName) {

            abp.message.confirm(

                abp.utils.formatString(abp.localization.localize('AreYouSureWantToDelete', 'TPLMS'), supplierName),

                function (isConfirmed) {

                    if (isConfirmed) {

                        _supplierService.delete({

                            id: supplierId

                        }).done(function () {

                            refreshSupplierList();

                        });

                    }

                }

            );

        }

    });

})();
4. 在Visual Studio 2017的“解决方案资源管理器”中,找到“ABP.TPLMS.Web.Mvc”项目中的Views目录下的Supplier目录中的Index.cshtml文件。双击打开此文件,并写入以下代码,引用脚本。
@section scripts    {

        <script src="~/view-resources/Views/Supplier/Index.js" asp-append-version="true"></script>   }
(二)创建新增供应商视图
1. 在Visual Studio 2017的“解决方案资源管理器”中,找到“ABP.TPLMS.Web.Mvc”项目中的Views目录下的Supplier目录中的Index.cshtml文件。双击打开此文件,并写入以下代码。
<div class="modal fade" id="SupplierCreateModal" tabindex="-1" role="dialog"
aria-labelledby="SupplierCreateModalLabel" data-backdrop="static">

    <div class="modal-dialog" role="document">

        <div class="modal-content">

            <div class="modal-header">

                <h4 class="modal-title">

                    <span>@L("CreateNewSupplier")</span>

                </h4>

            </div>

            <div class="modal-body">

                <form name="SupplierCreateForm" role="form"  class="form-validation">

                    <div>

                        <div class="row clearfix">

                            <div class="col-sm-6">

                                <div class="form-group form-float">

                                    <div class="form-line">

                                        <label asp-for="@Model.Supplier.Code" class="form-label"></label>

                                        <input type="text" name="Code" class="form-control" required maxlength="50" />

                                    </div>

                                </div>

                            </div>

                            <div class="col-sm-6">

                                <div class="form-group form-float">

                                    <div class="form-line">

                                        <label asp-for="@Model.Supplier.Name" class="form-label"></label>

                                        <input type="text" name="Name" class="form-control" required maxlength="50" />

                                    </div>

                                </div>

                            </div>

                        </div>

                        <div class="row clearfix">

                            <div class="col-sm-12">

                                <div class="form-group form-float">

                                    <div class="form-line">

                                        <label asp-for="@Model.Supplier.Address" class="form-label"></label>

                                        <input type="text" name="Address" class="form-control" required maxlength="255" />

                                    </div>

                                </div>

                            </div>

                        </div>

                        <div class="row clearfix">

                            <div class="col-sm-6">

                                <div class="form-group form-float">

                                    <div class="form-line">

                                        <label asp-for="@Model.Supplier.LinkName" class="form-label"></label>

                                        <input type="text" name="LinkName" class="form-control" />

                                    </div>

                                </div>

                            </div>

                            <div class="col-sm-6">

                                <div class="form-group form-float">

                                    <div class="form-line">

                                        <label asp-for="@Model.Supplier.Mobile" class="form-label"></label>

                                        <input type="text" name="Mobile" class="form-control" />

                                    </div>

                                </div>

                            </div>

                        </div>

                        <div class="row clearfix">

                            <div class="col-sm-6">

                                <div class="form-group form-float">

                                    <div class="form-line">

                                        <label asp-for="@Model.Supplier.Tel" class="form-label"></label>

                                        <input type="text" name="Tel" class="form-control" required maxlength="255" />

                                    </div>

                                </div>

                            </div>

                            <div class="col-sm-6">

                                <div class="form-group form-float">

                                    <div class="form-line">

                                         <label asp-for="@Model.Supplier.Status" class="form-label"></label>

                                        <input type="text" name="Status" class="form-control" />

                                    </div>

                                </div>

                            </div>

                        </div>

                        <div class="row clearfix">

                            <div class="col-sm-6">

                                <div class="form-line">

                                    <label asp-for="@Model.Supplier.Sex"></label>

                                    <input name="Sex" type="text" class="form-control" />

                                </div>

                            </div>

                            <div class="col-sm-6">

                                <div class="form-line">

                                    <label asp-for="@Model.Supplier.Email"></label>

                                    <input name="Email" type="text" class="form-control" />

                                </div>

                            </div>

                        </div>

                    </div>

                    <div class="modal-footer">

                        <button type="button" class="btn btn-default waves-effect" data-dismiss="modal">@L("Cancel")</button>

                        <button type="submit" class="btn btn-primary waves-effect">@L("Save")</button>

                    </div>

                </form>

            </div>

        </div>

    </div>

</div>
2. 在Visual Studio 2017中按F5运行应用程序。登录之后,点击“Supplier”目录,我们可以看到供应商列表页面。然后点击供应商列表页面中的新增按钮。如下图。
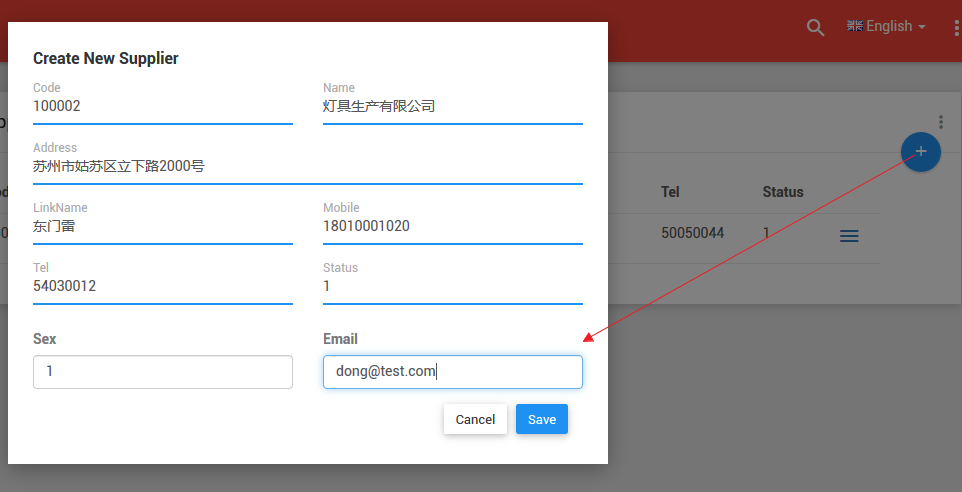
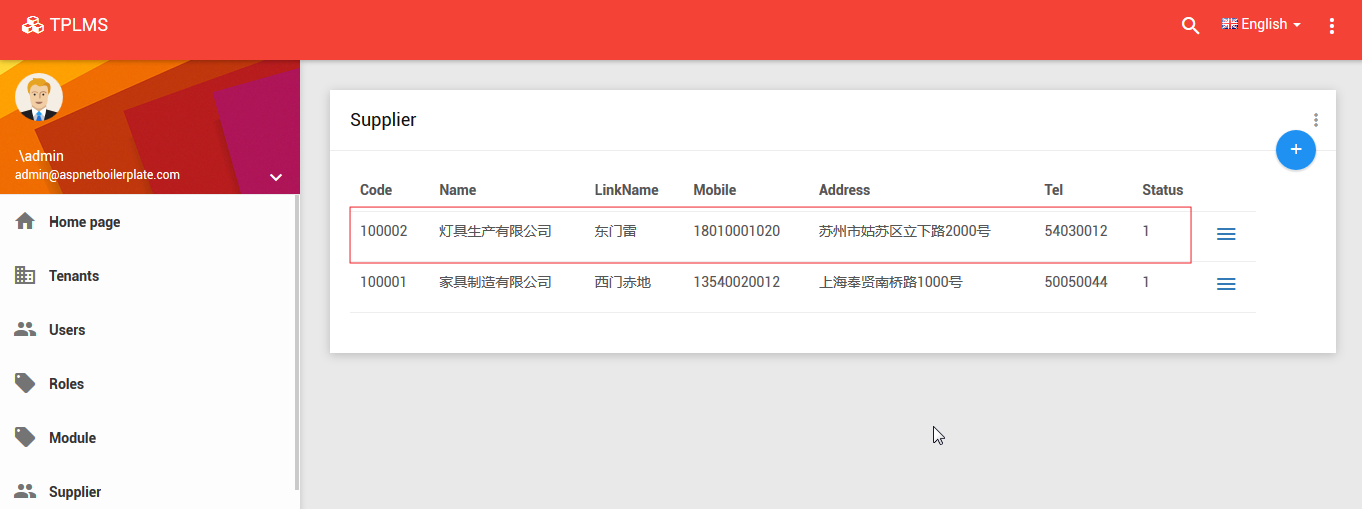
3. 在“Create New Supplier”页面中我们输入完信息之后,点击“Save”按钮。数据保存到数据库,应用会刷新供应商列表页面。如下图。
abp(net core)+easyui+efcore实现仓储管理系统——使用 WEBAPI实现CURD (十四)的更多相关文章
- abp(net core)+easyui+efcore实现仓储管理系统——使用 WEBAPI实现CURD (十五)
core)+easyui+efcore实现仓储管理系统目录 abp(net core)+easyui+efcore实现仓储管理系统——ABP总体介绍(一) abp(net core)+easyui+e ...
- abp(net core)+easyui+efcore实现仓储管理系统——使用 WEBAPI实现CURD (十二)
abp(net core)+easyui+efcore实现仓储管理系统目录 abp(net core)+easyui+efcore实现仓储管理系统——ABP总体介绍(一) abp(net core)+ ...
- abp(net core)+easyui+efcore实现仓储管理系统——使用 WEBAPI实现CURD (十三)
abp(net core)+easyui+efcore实现仓储管理系统目录 abp(net core)+easyui+efcore实现仓储管理系统——ABP总体介绍(一) abp(net core)+ ...
- abp(net core)+easyui+efcore实现仓储管理系统——出库管理之五(五十四)
abp(net core)+easyui+efcore实现仓储管理系统目录 abp(net core)+easyui+efcore实现仓储管理系统--ABP总体介绍(一) abp(net core)+ ...
- abp(net core)+easyui+efcore实现仓储管理系统——使用 WEBAPI实现CURD (十一)
abp(net core)+easyui+efcore实现仓储管理系统目录 abp(net core)+easyui+efcore实现仓储管理系统——ABP总体介绍(一) abp(net core)+ ...
- abp(net core)+easyui+efcore实现仓储管理系统——出库管理之三(五十二)
abp(net core)+easyui+efcore实现仓储管理系统目录 abp(net core)+easyui+efcore实现仓储管理系统--ABP总体介绍(一) abp(net core)+ ...
- abp(net core)+easyui+efcore实现仓储管理系统——出库管理之六(五十五)
abp(net core)+easyui+efcore实现仓储管理系统目录 abp(net core)+easyui+efcore实现仓储管理系统--ABP总体介绍(一) abp(net core)+ ...
- Abp(net core)+easyui+efcore实现仓储管理系统——出库管理之七(五十六)
abp(net core)+easyui+efcore实现仓储管理系统目录 abp(net core)+easyui+efcore实现仓储管理系统--ABP总体介绍(一) abp(net core)+ ...
- abp(net core)+easyui+efcore实现仓储管理系统——菜单 (十六)
系统目录 abp(net core)+easyui+efcore实现仓储管理系统——ABP总体介绍(一) abp(net core)+easyui+efcore实现仓储管理系统——解决方案介绍(二) ...
随机推荐
- 分布式事务(4)---RocketMQ实现分布式事务项目
RocketMQ实现分布式事务 有关RocketMQ实现分布式事务前面写了一篇博客 1.RocketMQ实现分布式事务原理 下面就这个项目做个整体简单介绍,并在文字最下方附上项目Github地址. 一 ...
- Bzoj 2288 生日礼物题解
2288: [POJ Challenge]生日礼物 Time Limit: 10 Sec Memory Limit: 128 MBSubmit: 856 Solved: 260[Submit][S ...
- linux weblogic12.1.3.0卸载过程
主要是一开始以为跟之前版本一样有uninstall.sh,但却找不到. 最后google 才发现改了个名字,deinstall.sh 可能后面的版本都是这个脚本了吧. 先进入脚本目录,命令:cd /h ...
- Spring 注解编程之 AnnotationMetadata
在上篇文章 Spring 注解编程之模式注解 中我们讲到 Spring 模式注解底层原理,依靠 AnnotationMetadata 接口判断是否存在指定元注解. 这篇文章我们主要深入 Annotat ...
- 网页缓存相关的HTTP头部信息详解
前言 之前看完了李智慧老师著的<大型网站技术架构-核心原理与案例分析>这本书,书中多次提起浏览器缓存的话题,恰是这几天生产又遇到了一个与缓存的问题,发现自己书是没少看,正经走心的内容却不多 ...
- [leetcode] 63. Unique Paths II (medium)
原题 思路: 用到dp的思想,到row,col点路径数量 : path[row][col]=path[row][col-1]+path[row-1][col]; 遍历row*col,如果map[row ...
- iOS 图解弹幕功能的实现
先来看一张效果图(LICEcap录制的有点卡, 凑合看) 理一下大概流程: 接下来实现: 弹幕视图从底部弹上来, 依次动画向上滚动, 出屏幕就移除加入重用队列, 下次使用. 定义相关属性: 1. 根据 ...
- linux初学者-iscsi篇
linux初学者-iscsi篇 之前介绍过网络文件共享系统NFS和CIFS.在系统中,设备也是可以共享的,这就是iSCSI,它可以用来建立和管理IP存储设备.主机和客户机等之间的相互 ...
- [解决方案]IIS配置后报错404,500,502等系列问题
很多时候刚部署完服务器的IIS以后,第一次部署站点都会出现形形色色,各种各样的报错问题,但这些问题大同小异,我这里就给大家提供的解决的方案,以达到以不变应万变的效果 目的:让大家学会处理类似问题的方法 ...
- iOS程序员 如何提升核心竞争力,防止自己被裁员?
前言: 核心竞争力最早由普拉哈拉德和加里·哈默尔两位教授提出,通常认为核心竞争力,即企业或个人相较于竞争对手而言所具备的竞争优势与核心能力差异, 说白了就是你的优势,而且最好是独一无二的的优势,这就是 ...