Vue2.5开发去哪儿网App 详情页面开发
一,banner 图的设计
1. 新建detail的路由
import Detail from '@/pages/detail/Detail'

......

{

      path: '/detail',

      name: 'Detail',

      component: Detail

    }
Detail.vue
<template>

  <div>

    <detail-banner></detail-banner>

  </div>

</template>

<script>

import DetailBanner from './components/Banner'

export default {

  name: 'Detail',

  components: {

    DetailBanner

  }

}

</script>

<style>

</style>
新建 Banner.vue组件
<template>
<div class="banner">
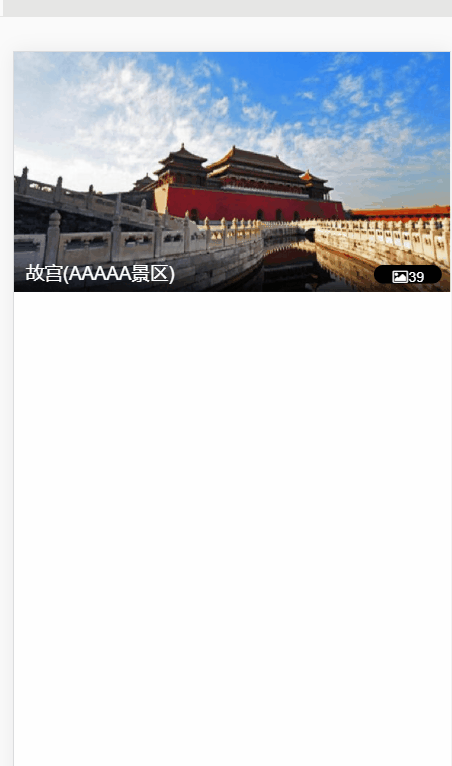
<img src="http://img1.qunarzz.com/sight/p0/1409/19/adca619faaab0898245dc4ec482b5722.jpg_600x330_f922b488.jpg"
class="banner-img" alt="">
<div class="banner-info">
<div class="banner-title">故宫(AAAAA景区)</div>
<div class="banner-number"><span class="iconfont banner-icon"></span>39</div>
</div>
</div>
</template> <script>
export default {
name: 'DetailBanner'
}
</script> <style lang="stylus" scoped>
.banner
position relative
overflow hidden
height 0
padding-bottom 55%
.banner-img
width 100%
.banner-info
position absolute
color #ffffff
left 0
right 0
bottom 0
line-height .6rem
background-image linear-gradient(top,rgba(0,0,0,0),rgba(0,0,0,0.8))
display flex
.banner-title
font-size .32rem
padding 0 .2rem
flex 1
.banner-number
margin .14rem
padding 0 .3rem
line-height .4rem
height .32rem
font-size .24rem
border-radius .2rem
background rgba(0, 0, 0, 8)
.banner-icon
font-size .24rem
padding .02rem
</style>

二,公用图片画廊组件
1. 创建一个公用组件 Gallary.vue
使用 vue-awesome-swiper 完成图片滚动
<template>

  <div class="container" @click="HandleClick">

    <div class="wrapper">

      <swiper :options="swiperOption">

        <!-- slides -->

        <swiper-slide v-for="(item,index) in imgs" :key="index">

          <img class="gallery-img" :src="item" alt="">

        </swiper-slide>

        <!-- Optional controls -->

        <div class="swiper-pagination"  slot="pagination"></div>

      </swiper>

    </div>

  </div>

</template>

<script>

export default {

  name: 'CommonGallary',

  props: {

    imgs: {

      type: Array

    }

  },

  methods: {

    HandleClick () {

      // 关闭

      this.$emit('close')

    }

  },

  data () {

    return {

      swiperOption: {

        loop: true,

        pagination: '.swiper-pagination',

        paginationType: 'fraction',

        // observer启动动态检查器(OB/观众/观看者),当改变swiper的样式(例如隐藏/显示)或者修改swiper的子元素时,自动初始化swiper。

        // 默认false

        observer: true,

        observeParents: true

      }

    }

  }

}

</script>

<style lang="stylus" scoped>

  .container >>> .swiper-container

    overflow inherit

  .container

    display flex

    flex-direction column

    justify-content: center

    background-color #000

    position fixed

    top 0

    left 0

    right 0

    bottom 0

    z-index 999

    .wrapper

      padding-bottom 100%

      height 0

      width 100%

      .gallery-img

        width 100%

      .swiper-pagination

        color #fff

        bottom -1rem

</style>
2. Banner.vue
定义变量 showGallary 负责照片墙的显示与否
<common-gallary @close="HandleClose" :imgs="imgs" v-show="showGallary"></common-gallary>
监听变化,传入图片数据,显示与否
<template>
<div>
<div class="banner">
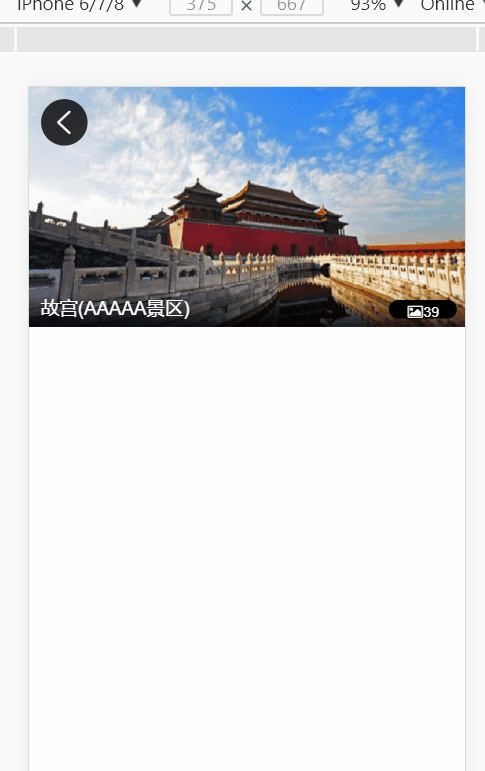
<img v-show="!showGallary" @click="handleImgClick" src="http://img1.qunarzz.com/sight/p0/1409/19/adca619faaab0898245dc4ec482b5722.jpg_600x330_f922b488.jpg"
class="banner-img" alt="">
<div class="banner-info">
<div class="banner-title">故宫(AAAAA景区)</div>
<div class="banner-number"><span class="iconfont banner-icon"></span>39</div>
</div>
</div>
<common-gallary @close="HandleClose" :imgs="imgs" v-show="showGallary"></common-gallary>
</div>
</template> <script>
import CommonGallary from 'common/gallary/Gallary'
export default {
name: 'DetailBanner',
data () {
return {
imgs: [
'http://img1.qunarzz.com/sight/p0/1510/8e/8eea8eb6f41698290.img.jpg_r_800x800_83a5fe3a.jpg',
'http://img1.qunarzz.com/sight/p0/1510/ca/ca60a080020329ef90.img.jpg_350x240_9ff2208e.jpg',
'http://img1.qunarzz.com/sight/p0/1510/cc/ccafbdaac21bdbf790.img.jpg_350x240_c35f8451.jpg'
],
showGallary: false
}
},
methods: {
handleImgClick () {
this.showGallary = true
},
HandleClose () {
this.showGallary = false
}
},
components: {
CommonGallary
}
}
</script> <style lang="stylus" scoped>
.banner
position relative
overflow hidden
height 0
padding-bottom 55%
.banner-img
width 100%
.banner-info
position absolute
color #ffffff
left 0
right 0
bottom 0
line-height .6rem
background-image linear-gradient(top,rgba(0,0,0,0),rgba(0,0,0,0.8))
display flex
.banner-title
font-size .32rem
padding 0 .2rem
flex 1
.banner-number
margin .14rem
padding 0 .3rem
line-height .4rem
height .32rem
font-size .24rem
border-radius .2rem
background rgba(0, 0, 0, 8)
.banner-icon
font-size .24rem
padding .02rem
</style>
三,header 渐隐渐现效果
后退符号制作:
<router-link tag="div" to="/" class="header-abs">
<div class="iconfont back-icon header-abs-back"></div>
</router-link>
显示详情:
<div class="header-fixed" v-show="!showAbs">
<router-link to="/">
<div class="iconfont back-icon header-fixed-back"></div>
</router-link>
景点详情
</div>
当下滑一定距离,header-fixed 显示出来
添加绑定滚动事件
  methods: {

    handleScroll () {

      console.log(document.documentElement.scrollTop)

    }

  },

  activated () {

    window.addEventListener('scroll', this.handleScroll)

  }

当滚动> 60 时,显示出来
    handleScroll () {

      const top = document.documentElement.scrollTop

      if (top > 60) {

        this.showAbs = false

      } else {

        this.showAbs = true

      }

    }
渐隐渐现制作:
opacityStyle // 渐隐渐现变量

给header-fixed绑定 :style="opacityStyle"
handleScroll () {

      const top = document.documentElement.scrollTop

      if (top > 60) {

        let opacity = top / 140

        opacity = opacity > 1 ? 1 : opacity

        this.opacityStyle = { opacity }

        this.showAbs = false

      } else {

        this.showAbs = true

      }

    }

<template>
<div>
<router-link v-show="showAbs" tag="div" to="/" class="header-abs">
<div class="iconfont back-icon header-abs-back"></div>
</router-link>
<div class="header-fixed" v-show="!showAbs" :style="opacityStyle">
<router-link to="/">
<div class="iconfont back-icon header-fixed-back"></div>
</router-link>
景点详情
</div>
</div>
</template> <script>
export default {
name: 'DetailHeader',
data () {
return {
showAbs: true,
opacityStyle: {
opacity: 0
}
}
},
methods: {
handleScroll () {
const top = document.documentElement.scrollTop
if (top > 60) {
let opacity = top / 140
opacity = opacity > 1 ? 1 : opacity
this.opacityStyle = { opacity }
this.showAbs = false
} else {
this.showAbs = true
}
}
},
activated () {
window.addEventListener('scroll', this.handleScroll)
}
}
</script> <style lang="stylus" scoped>
@import "~styles/varibles.styl"
.header-abs
position: absolute
left .2rem
top .2rem
width .8rem
height .8rem
line-height .8rem
border-radius .4rem
text-align center
background rgba(0,0,0,.8)
.header-abs-back
color #ffffff
font-size .4rem
.header-fixed
position fixed
top 0
left 0
right 0
overflow hidden
height $headerHeight
line-height $headerHeight
color #ffffff
background $bgColor
text-align center
font-size .32rem
.header-fixed-back
color #ffffff
position absolute
top 0
left 0
width .64rem
</style>
Header.vue
四,对全局事件解绑
因为绑定了 window.addEventListener(......)
对其他组件也产生影响
  activated () {

    window.addEventListener('scroll', this.handleScroll)

  },
  // 解绑

  deactivated () {

    window.removeEventListener('scroll', this.handleScroll)

  }
五,递归组件实现详情页列表
例如有以下数据:
      list: [

        {

          title: '成人票',

          children: [

            {

              title: '特惠双人票'

            },

            {

              title: '三人票',

              children: [

                {

                  title: '包午餐三人票'

                }

              ]

            }

          ]

        },

        {

          title: '学生票',

          children: [

            {

              title: '学生票七日游'

            }

          ]

        },

        {

          title: '儿童票'

        },

        {

          title: '特惠票'

        }

      ]
新建LIst.vue
   <div class="item" v-for="(item,index) in list" :key="index">

     <div class="item-title border-bottom">

       <span class="item-title-icon"></span>

       {{item.title}}

     </div>

     <div v-if="item.children" class="children">
// 多层遍历

       <detail-list :list="item.children"></detail-list>

     </div>

   </div>
<template>

  <div>

   <div class="item" v-for="(item,index) in list" :key="index">

     <div class="item-title border-bottom">

       <span class="item-title-icon"></span>

       {{item.title}}

     </div>

     <div v-if="item.children" class="children">

       <detail-list :list="item.children"></detail-list>

     </div>

   </div>

  </div>

</template>

<script>

export default {

  name: 'DetailList',

  props: {

    list: Array

  }

}

</script>

<style lang="stylus" scoped>

  .item-title

    line-height .8rem

    font-size .32rem

    padding 0 .2rem

  .item-title-icon

    display: inline-block;

    width: .36rem;

    height: .36rem;

    background: url(http://s.qunarzz.com/piao/image/touch/sight/detail.png) 0 -.45rem no-repeat;

    margin-right: .1rem;

    background-size: .4rem 3rem

    position relative

    left .06rem

    top: .06rem

  .children

    padding 0 .5rem

</style>
List.vue

Vue2.5开发去哪儿网App 详情页面开发的更多相关文章
- Vue2.5开发去哪儿网App 城市列表开发之 兄弟组件间联动及列表性能优化
一, 兄弟组件间联动 1. 点击城市字母,左侧对应显示 给遍历的 字母 添加一个点击事件: Alphabet.vue @click="handleLetterClick" ha ...
- Vue2.5开发去哪儿网App 城市列表开发
一,城市选择页面路由配置 ...
- Vue2.5 开发去哪儿网App
Vue2.5开发去哪儿网App 技术栈和主要框架
- Vue2.5开发去哪儿网App 从零基础入门到实战项目
第1章 课程介绍本章主要介绍课程的知识大纲,学习前提,讲授方式及预期收获. 1-1 课程简介 试看第2章 Vue 起步本章将快速讲解部分 Vue 基础语法,通过 TodoList 功能的编写,在熟悉基 ...
- Vue2.5开发去哪儿网App 首页开发
主页划 5 个组件,即 header icon swiper recommend weekend 一. header区域开发 1. 安装 stylus npm install stylus --s ...
- Vue2.5开发去哪儿网App 城市列表开发之 Vuex实现数据共享及高级使用
一,数据共享 1. 安装: npm install vuex --save 2. 在src目录下 新建state文件夹,新建index.js文件 3. 创建一个 store import Vue f ...
- Vue2.5开发去哪儿网App 第五章笔记 上
1.css动画原理 .fade-enter{ opacity: 0; } .fade-enter-active{ transition: opacity 2s; } .fade-leave-to{ o ...
- Vue2.5开发去哪儿网App 搜索功能完成
效果展示: Search.vue: <div class="search-content" ref="search" v-show="keywo ...
- Vue2.5开发去哪儿网App 第五章笔记 下
1. 多个元素或组件的过渡 多个元素的过渡: <style> .v-enter,.v-leace-to{ opacity: 0; } .v-enter-active,.v-leave-ac ...
随机推荐
- 安装zookeeper(单机,伪集群)
1.登陆zookeeper官网下载 https://zookeeper.apache.org/ zookeeper-3.4.8.tar.gz 解压:tar -zxvf zookeeper-3.4.8. ...
- Bootstrap方法为页面添加一个弹出框
<!DOCTYPE html> <html> <head> <meta charset="utf-8"> <title> ...
- Html5与Css3知识点拾遗(四)
web图像 JPEG:适用于大多数照片,颜色较多,可接受质量损失的图像 PNG-8:适用标识.重复的图案以及其他颜色较少的图像或具有连续颜色的图像 PNG-24:不支持颜色更多的图像,适用与颜色丰富且 ...
- oracle数据库创建分区表
参考资料:http://blog.chinaunix.net/uid-21943216-id-4062400.html 一.建按月自增分区表:1.1建表SQL> create table mon ...
- iowait过高处理
网管告警: 告警主机:YiDHLWJKFZ-js-app- 主机IP:192.168.***.*** 告警项目:system.cpu.util[,iowait] 告警时间: :: 告警等级:Warni ...
- .NET Core微服务之路:文章系列和内容索引汇总 (v0.52)
微服务架构,对于从事JAVA架构的童鞋来说,早已不是什么新鲜的事儿,他们有鼎鼎大名的Spring Cloud这样的全家桶框架支撑,包含微服务核心组件如 1. Eureka:实现服务注册与发现. 2. ...
- ReactNative学习笔记(二)基础进阶
一个最简单的HelloWorld页面 先不多解释,直接上代码: import React, { Component } from 'react'; import {AppRegistry, Style ...
- three.js 一幅图片多个精灵
https://blog.csdn.net/zhulx_sz/article/details/79105359 核心代码 // 把一幅外部图片中包含的5种精灵存入一个精灵材质数组 var sprite ...
- 2018CCPC-女生专场
(咕咕咕,咕了快一年的bu题.. A.CCPC直播 传送:http://acm.hdu.edu.cn/showproblem.php?pid=6297 题意:rt. 分析:模拟. #include&l ...
- 3.复杂的viewpager
实现这样的效果: 1.主页面布局 <LinearLayout xmlns:android="http://schemas.android.com/apk/res/android&quo ...