
PS 滤镜— — 万花筒效果
    clc;

    clear all;

    close all;

    addpath('E:\PhotoShop Algortihm\Image Processing\PS Algorithm');

    I=imread('4.jpg');

    I=double(I);

    Image=I/255;

    sz=size(Image);

    % set the parameters

    radius = 150;

    angle = pi/4;

    angle2=pi/4;

    sides=10;

    centerX = 0.5;   % set the center of the circle, proportion of the image size

    centerY = 0.5;

    iWidth=sz(2);

    iHeight=sz(1);

    icenterX=iWidth*centerX;

    icenterY=iHeight*centerY;

    Image_new=Image;

    for i=1:sz(1)

        for j=1:sz(2)

            dx=j-icenterX;

            dy=i-icenterY;

            r=sqrt(dy*dy+dx*dx);

            theta=atan2(dy, dx)-angle-angle2;

            temp_theta=theta/pi*sides*0.5 ;

            theta=triangle(temp_theta);

            if (radius)

                c=cos(theta);

                radius_c=radius/c;

                r=radius_c * triangle(r/radius_c);

            end

            theta=theta+angle;

            x=r * cos(theta)+icenterX;

            y=r * sin(theta)+icenterY;

            if (x<=1)     x=1;  end

            if (x>=sz(2)) x=sz(2)-1; end;

            if (y>=sz(1)) y=sz(1)-1; end;

            if (y<1) y=1;     end;

    % % %         if (x<=1)     continue;  end

    % % %         if (x>=sz(2))   continue; end;

    % % %         if (y>=sz(1))  continue; end;

    % % %         if (y<1)  continue;     end;

            x1=floor(x);

            y1=floor(y);

            p=x-x1;

            q=y-y1;

            Image_new(i,j,:)=(1-p)*(1-q)*Image(y1,x1,:)+p*(1-q)*Image(y1,x1+1,:)...

                +q*(1-p)*Image(y1+1,x1,:)+p*q*Image(y1+1,x1+1,:);

        end

    end

    imshow(Image_new)

imwrite(Image_new, 'out.jpg');参考来源:http://www.jhlabs.com/index.html
原图:
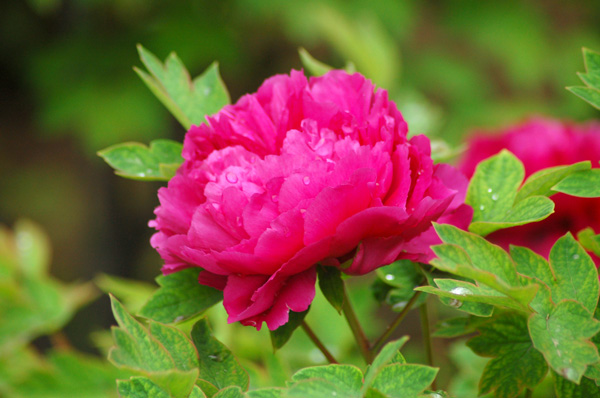
效果图:


PS 滤镜— — 万花筒效果的更多相关文章
- Python: PS 滤镜--万花筒效果
本文用 Python 实现 PS 的一种滤镜效果,称为万花筒.也是对图像做各种扭曲变换,最后图像呈现的效果就像从万花筒中看到的一样: 图像的效果可以参考之前的博客: http://blog.csdn. ...
- PS 滤镜— —挤压效果
clc; clear all; close all; addpath('E:\PhotoShop Algortihm\Image Processing\PS Algorithm'); I=imread ...
- PS 滤镜— —Marble 效果
clc; clear all; close all; addpath('E:\PhotoShop Algortihm\Image Processing\PS Algorithm'); I=imread ...
- PS 滤镜— —水波效果
clc; clear all; close all; addpath('E:\PhotoShop Algortihm\Image Processing\PS Algorithm'); I=imread ...
- PS 滤镜— — sparkle 效果
clc; clear all; close all; addpath('E:\PhotoShop Algortihm\Image Processing\PS Algorithm'); I=imread ...
- PS 滤镜— —球面化效果
clc; clear all; close all; addpath('E:\PhotoShop Algortihm\Image Processing\PS Algorithm'); I=imread ...
- PS滤镜— —波浪效果
clc; clear all; close all; addpath('E:\PhotoShop Algortihm\Image Processing\PS Algorithm'); I=imread ...
- OpenCV——PS滤镜 水波效果
// define head function #ifndef PS_ALGORITHM_H_INCLUDED #define PS_ALGORITHM_H_INCLUDED #include < ...
- Python: PS 滤镜--旋涡特效
本文用Python 实现 PS 滤镜的旋涡特效,具体的算法原理和效果可以参考之前的博客: http://blog.csdn.net/matrix_space/article/details/42215 ...
随机推荐
- mysql 时间函数date_format
http://toptree.iteye.com/blog/812642今天,在开发邮件系统的时候发现有很多的邮件没有发送成功,想手动把数据修改.找了mysql 的日期函数 获得的pubtime为St ...
- TI C66x DSP 系统events及其应用 - 5.9(IST重定位)
RESET中断的获取包必须位于0地址处,然后其它中断的获取包能够位于不论什么256字(1k字节边界)对齐的程序空间.IST的位置由ISTP寄存器中的ISTB字段决定. IST又一次定位举例: 1,将I ...
- Android有关surfaceView又一次创建的问题。
近期在做一个Android视频播放器的项目.遇到一个问题,就是锁屏之后.surfaceview就会被销毁掉,然后就会出现各种错误.到csdn论坛去发帖提问,各种所谓的大神都说,解锁屏在又一次创建一个, ...
- iostat命令具体解释——linux性能分析
之前总结uptime和free命令,今天继续来总结一下iostat.给自己留个笔记.同一时候也希望对大家实用. 版本号信息: sysstat version 9.0.4 (C) S ...
- linux中likely()和unlikely()
likely()与unlikely()在2.6内核中,随处可见,那为什么要用它们?它们之间有什么区别呢?首先明确: if (likely(value))等价于if (value) if (unlike ...
- 基于IAP和网口升级固件
基于IAP和网口升级固件 一. 需求引入 现有嵌入式设备:基于ARM Cortex-M3处理器.带以太网通讯功能. 为减少设备维护成本节省宝贵的时间和金钱,须要设计网口升级固件功能. 本文描 ...
- 一个用消息队列 的人,不知道为啥用 MQ,这就有点尴尬
消息队列 为什么写这篇文章? 博主有两位朋友分别是小A和小B: 小A,工作于传统软件行业(某社保局的软件外包公司),每天工作内容就是和产品聊聊需求,改改业务逻辑.再不然就是和运营聊聊天,写几个SQL, ...
- python 基础 7.0 import 导入
一. python 常用内置模块的使用(datetime,logging,os,command) 在日常的开发工作中,我们要写很多的python 代码,如果都写在一个文件中,会导致代码特别 ...
- EasyDSS流媒体解决方案之多方式虚拟直播方法
EasyDSS_Solution虚拟直播 EasyDSS_Solution虚拟直播,是EasyDSS流媒体解决方案提供的虚拟直播方案.可以通过三种方式创建虚拟直播. (1)点播的视频文件: (2)本地 ...
- Golang 环境变量及工作区概念
GOROOT go的安装路径 GOPATH 可以有多个目录,每个目录就是一个工作区,放置源码文件,以及安装后的归档文件和可执行文件: 第一个工作区比较重要,go get会自动从一些主流公用代码仓库下载 ...