吴裕雄 python 神经网络——TensorFlow 训练过程的可视化 TensorBoard的应用
#训练过程的可视化 ,TensorBoard的应用
#导入模块并下载数据集
import tensorflow as tf
from tensorflow.examples.tutorials.mnist import input_data #设置超参数
max_step=1000
learning_rate=0.001
dropout=0.9 # 用logdir明确标明日志文件储存路径
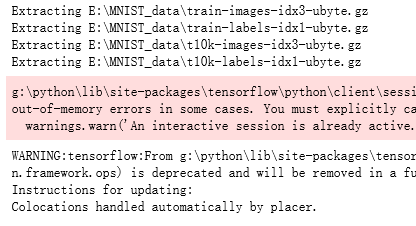
#训练过程中的数据储存在E:\\MNIST_data\\目录中,通过这个路径指定--log_dir
data_dir='E:\\MNIST_data\\'
log_dir='E:\\mnist_with_summaries\\'
mnist=input_data.read_data_sets(data_dir,one_hot=True)
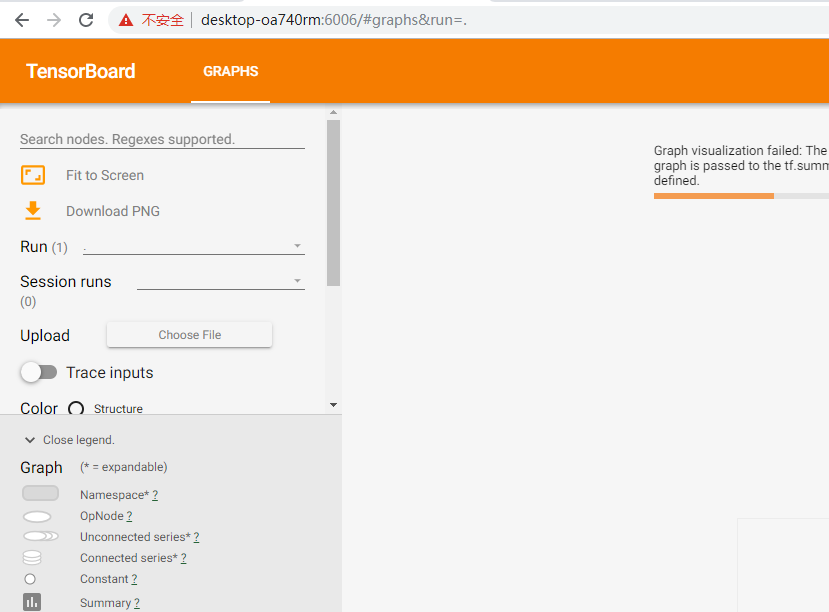
sess=tf.InteractiveSession() #本句的含义是使图可视化,sess.graph是对图的定义
#使用以上指定的路径创建摘要的文件写入符(FileWrite)
file_write=tf.summary.FileWriter(log_dir,sess.graph) def variable_summaries(var, name):
"""对每一个张量添加多个摘要描述"""
with tf.name_scope('summaries'):
tf.summary.histogram(name, var)
mean = tf.reduce_mean(var)
#均值
tf.summary.scalar('mean/' + name, mean)
stddev = tf.sqrt(tf.reduce_mean(tf.square(var - mean)))
#标准差
tf.summary.scalar('stddev/' + name, stddev)
# 最大值
tf.summary.scalar('max',tf.reduce_max(var))
# 最小值
tf.summary.scalar('min', tf.reduce_min(var))
tf.summary.histogram('histogram', var) def nn_layer(input_tensor, input_dim, output_dim, layer_name, act=tf.nn.relu):
with tf.name_scope(layer_name):
"""为确保计算图中各个层的分组,给每一层添加一个name_scope"""
with tf.name_scope('weights'):
weights = tf.Variable(tf.truncated_normal([input_dim, output_dim], stddev=0.1))
variable_summaries(weights, layer_name + '/weights')
with tf.name_scope('biases'):
biases = tf.Variable(tf.constant(0.0, shape=[output_dim]))
variable_summaries(biases, layer_name + '/biases')
with tf.name_scope('Wx_plus_b'):
preactivate = tf.matmul(input_tensor, weights) + biases
# 激活前的直方图
tf.summary.histogram(layer_name + '/pre_activations', preactivate)
activations = act(preactivate, name='activation')
# 记录神经网络节点输出在经过激活函数之后的分布。
# 激活后的直方图
tf.summary.histogram(layer_name + '/activations', activations)
return activations #构建回归模型,输入原始真实值(group truth),采用sotfmax函数拟合,并定义损失函数和优化器
#定义回归模型
x = tf.placeholder(tf.float32, [None, 784])
activations = nn_layer(x,784,10,"x")
#训练模型
#使用InteractiveSession()创建交互式上下文tf会话,这里的会话是默认
#在tf.Tensor.eval 和tf.Operation.run中都可以使用该会话来运行操作(OP)
sess = tf.InteractiveSession()
#注意:之前的版本中使用的是 tf.initialize_all_variables 作为初始化全局变量,已被弃用,更新后的采用一下命令
tf.global_variables_initializer().run() for _ in range(1000):
batch_xs, batch_ys = mnist.train.next_batch(100)
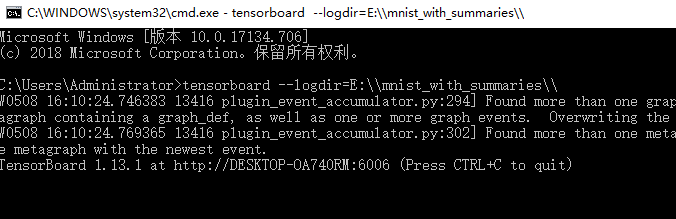
sess.run(activations, feed_dict={x: batch_xs}) #运行tensorboard命令,打开浏览器,查看模型训练过程中的可视化结果,
#在终端输入下命令:
#tensorboard --logdir=E:\\mnist_with_summaries\\
吴裕雄 python 神经网络——TensorFlow 训练过程的可视化 TensorBoard的应用的更多相关文章
- 吴裕雄 python 神经网络——TensorFlow训练神经网络:不使用滑动平均
import tensorflow as tf from tensorflow.examples.tutorials.mnist import input_data INPUT_NODE = 784 ...
- 吴裕雄 python 神经网络——TensorFlow训练神经网络:不使用隐藏层
import tensorflow as tf from tensorflow.examples.tutorials.mnist import input_data INPUT_NODE = 784 ...
- 吴裕雄 python 神经网络——TensorFlow训练神经网络:不使用激活函数
import tensorflow as tf from tensorflow.examples.tutorials.mnist import input_data INPUT_NODE = 784 ...
- 吴裕雄 python 神经网络——TensorFlow训练神经网络:不使用指数衰减的学习率
import tensorflow as tf from tensorflow.examples.tutorials.mnist import input_data INPUT_NODE = 784 ...
- 吴裕雄 python 神经网络——TensorFlow训练神经网络:不使用正则化
import tensorflow as tf from tensorflow.examples.tutorials.mnist import input_data INPUT_NODE = 784 ...
- 吴裕雄 python 神经网络——TensorFlow训练神经网络:全模型
import tensorflow as tf from tensorflow.examples.tutorials.mnist import input_data INPUT_NODE = 784 ...
- 吴裕雄 python 神经网络——TensorFlow训练神经网络:MNIST最佳实践
import os import tensorflow as tf from tensorflow.examples.tutorials.mnist import input_data INPUT_N ...
- 吴裕雄 python 神经网络——TensorFlow训练神经网络:花瓣识别
import os import glob import os.path import numpy as np import tensorflow as tf from tensorflow.pyth ...
- 吴裕雄 python 神经网络——TensorFlow训练神经网络:卷积层、池化层样例
import numpy as np import tensorflow as tf M = np.array([ [[1],[-1],[0]], [[-1],[2],[1]], [[0],[2],[ ...
随机推荐
- Codeforces Round #623 (Div. 1, based on VK Cup 2019-2020 - Elimination Round, Engine)A(模拟,并查集)
#define HAVE_STRUCT_TIMESPEC #include<bits/stdc++.h> using namespace std; pair<]; bool cmp( ...
- 小匠_碣 第三周期打卡 Task06~Task08
Task06:批量归一化和残差网络:凸优化:梯度下降 批量归一化和残差网络 对输入的标准化(浅层模型) 处理后的任意一个特征在数据集中所有样本上的均值为0.标准差为1. 标准化处理输入数据使各个特征的 ...
- JAVA 注解教程(二)元注解
简介 元注解是可以注解到注解上的注解,或者说元注解是一种基本注解,但是它能够应用到其它的注解上面 元注解有 @Retention.@Documented.@Target.@Inherited.@Rep ...
- Zenject与UniRx结合实现跨线程通信Signal
修改Zenject下ProfileBlock.cs源码, 取消有关UnityEngine.Profiling.Profiler的代码. 然后使用Zenject的Signal: // 定义Signal ...
- C语言 fputs
C语言 fputs #include <stdio.h> int fputs(const char * str, FILE * stream); 功能:将str所指定的字符串写入到stre ...
- socket 异步I/O
# 客服端 # -*- coding: utf-8 -*- import socket import threading # from collections import deque # q = d ...
- opencv:边缘保留滤波
EPF滤波概述 均值与滤波的缺点:并没有考虑中心像素点对整个输出像素的贡献,实际上锚定的那个点贡献应该是最大的 高斯滤波的缺点:当边缘值梯度很大的时候,应减少中心像素点的权重,而高斯滤波没有考虑 边缘 ...
- AS报错:Class kotlin.reflect.jvm.internal.FunctionCaller$FieldSetter can not access a member of class com.android.build.gradle.tasks.ManifestProcessorTask with modifiers "private"
删除所有.gradle文件夹 失效缓存/重新启动
- oracle11g UNDO使用率高,且unexpire过高
1.查看使用率: col USED_PER for a60 SELECT A.TABLESPACE_NAME AS TABLESPACE_NAME, ,) AS TOTAL_GB, ,) AS FRE ...
- sqli-libs(46-53关)
Less_46 补充知识:MySQL知识 SQL语句中,asc是指定列按升序排列,desc则是指定列 按降序排列: Select * from users order by 1 desc; 使用降序进 ...