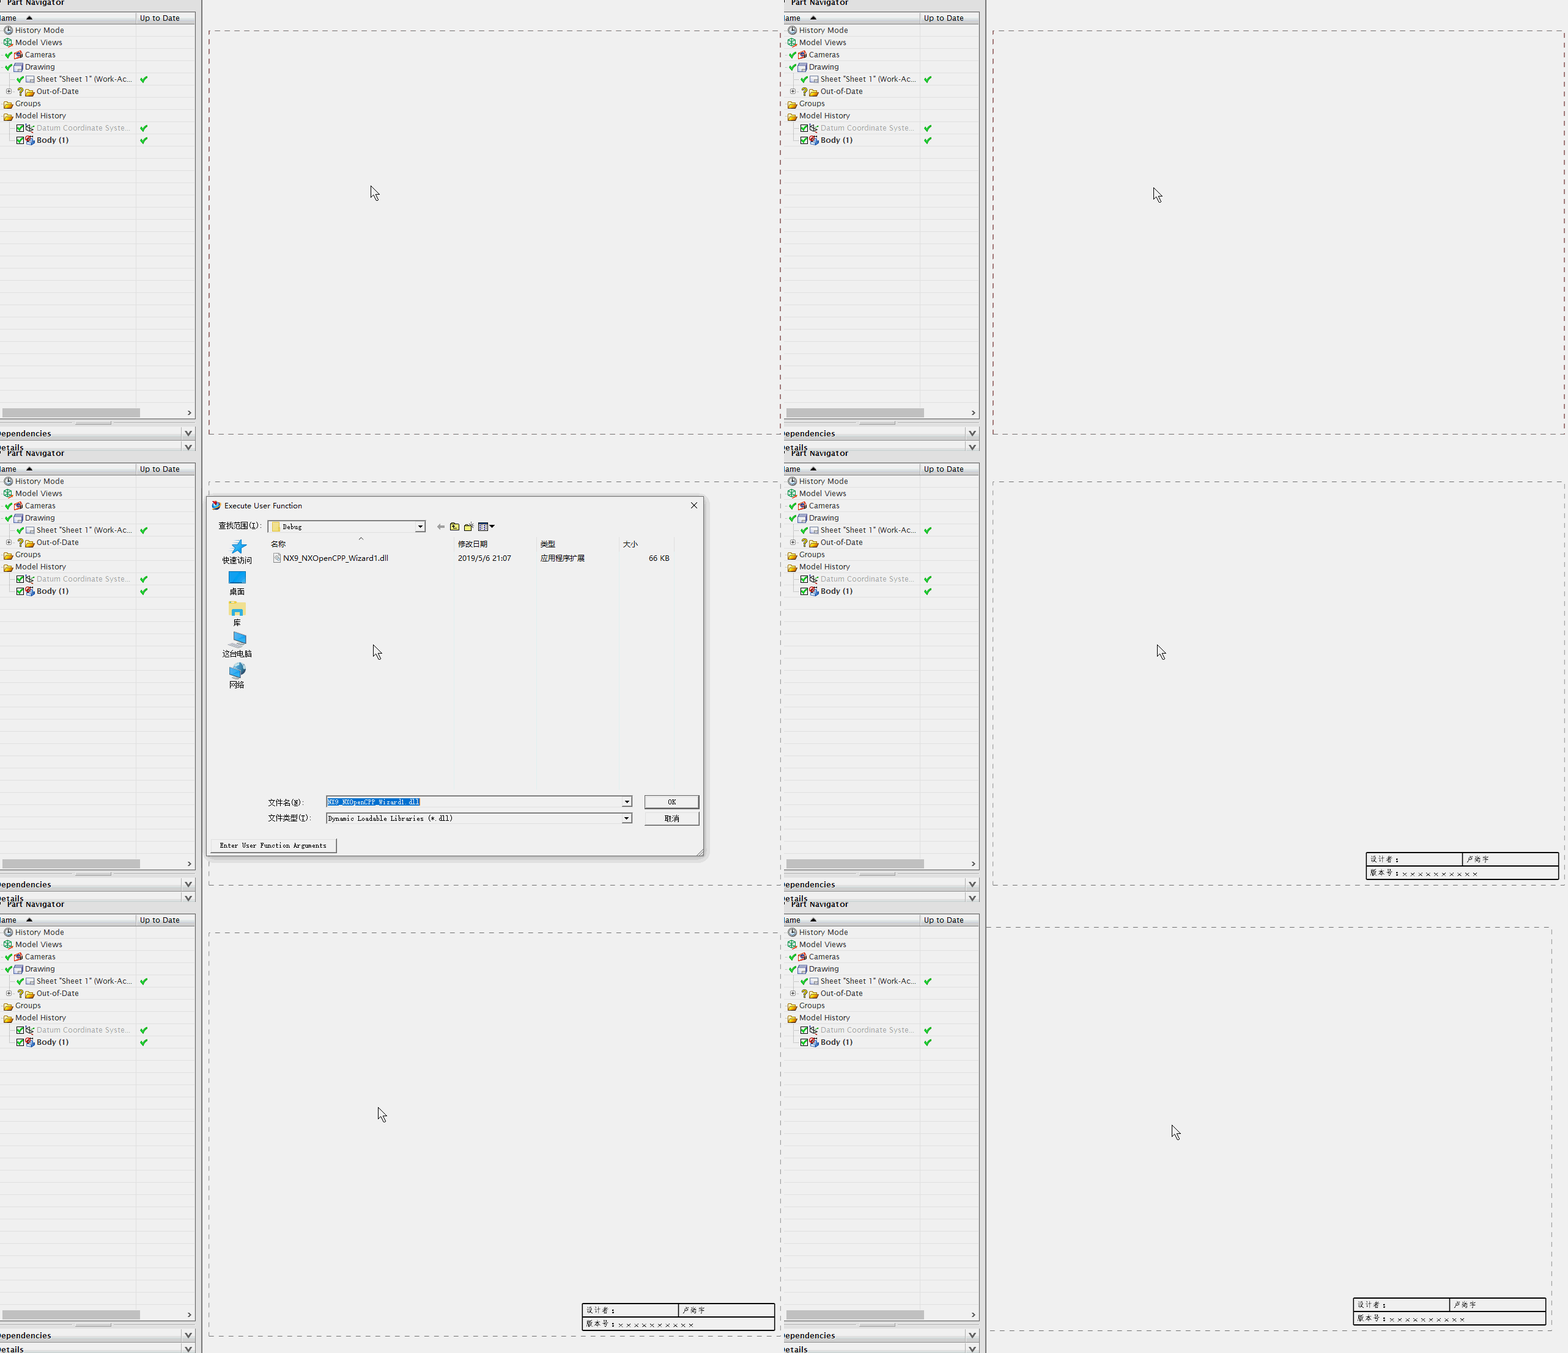
NX二次开发-UFUN工程图表格注释设置单元格首选项UF_TABNOT_set_cell_prefs
 NX9+VS2012

 #include <uf.h>

 #include <uf_tabnot.h>

 #include <NXOpen/Part.hxx>

 #include <NXOpen/PartCollection.hxx>

 #include <NXOpen/Session.hxx>

 #include <NXOpen/Annotations_TableSectionCollection.hxx>

 #include <NXOpen/Annotations_AnnotationManager.hxx>

 #include <NXOpen/FontCollection.hxx>

 UF_initialize();

 //创建表格注释

 Annotations::TableSection *nullAnnotations_TableSection(NULL);

 Annotations::TableSectionBuilder *tableSectionBuilder1;

 tableSectionBuilder1 = workPart->Annotations()->TableSections()->CreateTableSectionBuilder(nullAnnotations_TableSection);

 NXOpen::Point3d TablePoint(194.0, 17.0, 0.0);

 tableSectionBuilder1->Origin()->SetOriginPoint(TablePoint);

 tableSectionBuilder1->SetNumberOfColumns();

 tableSectionBuilder1->SetNumberOfRows();

 tableSectionBuilder1->SetRowHeight(20.0);

 tableSectionBuilder1->SetColumnWidth();

 tableSectionBuilder1->Commit();

 NXObject *nXObject1;

 nXObject1 = tableSectionBuilder1->Commit();

 tableSectionBuilder1->Destroy();

 //section转tag

 tag_t TabularNote = NULL_TAG;

 UF_TABNOT_ask_tabular_note_of_section(nXObject1->Tag(), &TabularNote);

 //获取第一行的Tag

 tag_t Row0Tag = NULL_TAG;

 UF_TABNOT_ask_nth_row(TabularNote, , &Row0Tag);

 //获取第二行的Tag

 tag_t Row1Tag = NULL_TAG;

 UF_TABNOT_ask_nth_row(TabularNote, , &Row1Tag);

 //获取第一列的Tag

 tag_t Column0Tag = NULL_TAG;

 UF_TABNOT_ask_nth_column(TabularNote, , &Column0Tag);

 //获取第二列的Tag

 tag_t Column1Tag = NULL_TAG;

 UF_TABNOT_ask_nth_column(TabularNote, , &Column1Tag);

 //得到第一行第一列单元格的Tag

 tag_t Cell0Tag = NULL_TAG;

 UF_TABNOT_ask_cell_at_row_col(Row0Tag, Column0Tag, &Cell0Tag);

 //得到第一行第二列单元格的Tag

 tag_t Cell1Tag = NULL_TAG;

 UF_TABNOT_ask_cell_at_row_col(Row0Tag, Column1Tag, &Cell1Tag);

 //得到第二行第一列单元格的Tag

 tag_t Cell2Tag = NULL_TAG;

 UF_TABNOT_ask_cell_at_row_col(Row1Tag, Column0Tag, &Cell2Tag);

 //得到第二行第二列单元格的Tag

 tag_t Cell3Tag = NULL_TAG;

 UF_TABNOT_ask_cell_at_row_col(Row1Tag, Column1Tag, &Cell3Tag);

 //写文本

 UF_TABNOT_set_cell_text(Cell0Tag, "设计者:");

 UF_TABNOT_set_cell_text(Cell1Tag, "卢尚宇");

 //合并最底下的单元格

 UF_TABNOT_merge_cells(Cell2Tag, Cell3Tag);

 //获取合并单元格的行Tag

 tag_t MergeRowTag = NULL_TAG;

 UF_TABNOT_ask_nth_row(TabularNote, , &MergeRowTag);

 //获取合并单元格的列Tag

 tag_t MergeColumnTag = NULL_TAG;

 UF_TABNOT_ask_nth_column(TabularNote, , &MergeColumnTag);

 tag_t MergeCellTag = NULL_TAG;

 UF_TABNOT_ask_cell_at_row_col(MergeRowTag, MergeColumnTag, &MergeCellTag);

 //写文本

 UF_TABNOT_set_cell_text(MergeCellTag, "版本号:xxxxxxxxxx");

 //检索默认单元格首选项

 UF_TABNOT_cell_prefs_t  cell_prefs;

 UF_TABNOT_ask_default_cell_prefs(&cell_prefs);

 //设置单元格首选项

 int fontIndex1 = workPart->Fonts()->AddFont("chinesef_fs", NXOpen::FontCollection::TypeNx);//更改字体

 cell_prefs.text_font = fontIndex1; //字体

 UF_TABNOT_set_cell_prefs(Cell0Tag, &cell_prefs);

 UF_TABNOT_set_cell_prefs(Cell1Tag, &cell_prefs);

 UF_TABNOT_set_cell_prefs(MergeCellTag, &cell_prefs);

 UF_terminate();

NX二次开发-UFUN工程图表格注释设置单元格首选项UF_TABNOT_set_cell_prefs的更多相关文章
- NX二次开发-UFUN工程图表格注释section转tag函数UF_TABNOT_ask_tabular_note_of_section
NX9+VS2012 #include <uf.h> #include <uf_tabnot.h> #include <NXOpen/Part.hxx> #incl ...
- NX二次开发-UFUN工程图表格注释获取某一行的tag函数UF_TABNOT_ask_nth_row
NX9+VS2012 #include <uf.h> #include <uf_tabnot.h> #include <NXOpen/Part.hxx> #incl ...
- NX二次开发-UFUN工程图表格注释获取某一列的tag函数UF_TABNOT_ask_nth_column
NX9+VS2012 #include <uf.h> #include <uf_tabnot.h> #include <NXOpen/Part.hxx> #incl ...
- NX二次开发-UFUN工程图表格注释获取某一行某一列的tag函数UF_TABNOT_ask_cell_at_row_col
NX9+VS2012 #include <uf.h> #include <uf_tabnot.h> #include <NXOpen/Part.hxx> #incl ...
- NX二次开发-UFUN工程图表格注释写入文本内容UF_TABNOT_set_cell_text
NX9+VS2012 #include <uf.h> #include <uf_tabnot.h> #include <NXOpen/Part.hxx> #incl ...
- NX二次开发-UFUN工程图表格注释检索默认单元格首选项UF_TABNOT_ask_default_cell_prefs
NX9+VS2012 #include <uf.h> #include <uf_tabnot.h> #include <NXOpen/Part.hxx> #incl ...
- NX二次开发-UFUN读取表格注释内容UF_TABNOT_ask_cell_text
NX11+VS2013 #include <uf.h> #include <uf_ui.h> #include <uf_tabnot.h> #include < ...
- NX二次开发-读取图纸表格注释与部件属性关联的名字
NX11+VS2013 #include <uf.h> #include <uf_ui.h> #include <uf_tabnot.h> #include < ...
- NX二次开发-UFUN工程图导入视图UF_DRAW_import_view
NX9+VS2012 #include <uf.h> #include <uf_draw.h> #include <uf_obj.h> #include <u ...
随机推荐
- 常见条码类型介绍(Code 39、Code 128、EAN-8、EAN-13、EAN-128、ISSN、TIF、TIF-14、UPC(A)、UPC(E))
常见条码类型,如下: 1.Code 39 Code 39,又称为"Code 3 of 9",是非零售市场中最常用的格式,用于盘存和跟踪.Code 39码编码规则简单,误码率低.所能 ...
- Delphi中的线程类(转)
Delphi中的线程类 (转) Delphi中有一个线程类TThread是用来实现多线程编程的,这个绝大多数Delphi书藉都有说到,但基本上都是对 TThread类的几个成员作一简单介绍,再说明一下 ...
- 一:unittest框架配合selenium工具之CSS_selector定位。
做了自动化测试这么久了,一直没有梳理到元素定位这一块的内容,其重要性不言而喻.趁着周末有时间,梳理一下. 1,通过id定位 driver.find_element_by_css_selector(&q ...
- 关于RF做自动化大致流程的梳理
RF只是一个框架,类似于单元测试框架,可以实现对用例的有效管理.结合其它第三方库,可以进行,接口,数据库,APP的自动化测试.结合JENKINS,还可以进行有效的持续集成. 本文不讲调用第三方库的哪些 ...
- 转-C++之手写strcpy
转自:strcpy函数的实现 知strcpy函数的原型是: char *strcpy(char *dst, const char *src); 实现strcpy函数 解释为什么要返回char * 假如 ...
- Access数据库中自动编号字段重置为1
在清空一张ACESS数据库表后,在重添加数据之前,希望此表的自动编号能从1开始,怎么办呢? 下面的方法告诉我们,除了通过转存数据库表的方法外,还有几种更简单的方法: 方法一(前提:数据库表可带内容进行 ...
- SPSS聚类分析:K均值聚类分析
SPSS聚类分析:K均值聚类分析 一.概念:(分析-分类-K均值聚类) 1.此过程使用可以处理大量个案的算法,根据选定的特征尝试对相对均一的个案组进行标识.不过,该算法要求您指定聚类的个数.如果知道, ...
- linux 创建多级目录 mkdir -p
原文地址:http://www.dutor.net/index.php/2010/06/cmd-mkdir-p/ mkdir的-p选项允许你一次性创建多层次的目录,而不是一次只创建单独的目录.例如,我 ...
- 在VMware软件下创建CentOs虚拟机
1.创建新的虚拟机. 打开VMware软件,点击主页内创建新的虚拟机 2.进入新建虚拟机向导 点击典型,点击下一步 3.在下一步中单击稍后安装操作系统 点击下一步 4.选择操作系统类型 因为CentO ...
- python颜色
# python终端显示彩色字符类,可以调用不同的方法# 选择不同的颜色.使用方法看示例代码就很容易明白.# --------------------------------------------- ...
