实战SpringBoot Admin
长话短说哦,直接查看下文吧
声明
见名知意,实战SpringBoot Admin,实战!实战!实战!该文章环绕SpringBoot Admin的重点功能(邮件通知、可视化)来讲解。
先锋
在写该文章之前,我也是查阅了一些关于SpringBoot Admin的文章的,一言难尽,不太理想啊(无法解决实际问题)…嗐…就让我来做这个先锋吧
前提
Spring Cloud 版本:Finchley.RELEASE(支持SpringBoot 2.x.x以上版本)
SpringBoot Admin版本:2.0.1
SpringBoot版本:2.0.2.RELEASE
Centos版本:7.x
SpringBoot Admin
介绍
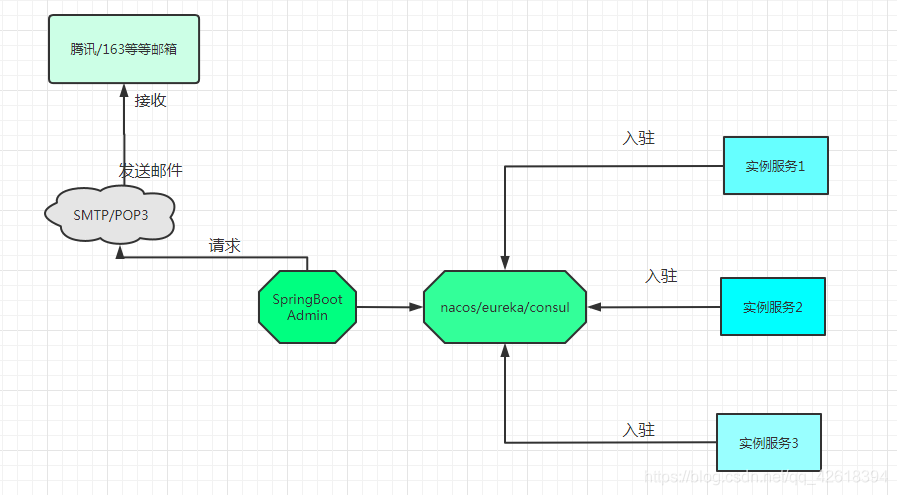
SpringBoot Admin是一个社区项目.用于管理和监控SpringBoot应用程序,注册到SpringBoot Admin服务端可以通过HTTP的方式或使用SpringCloud(eureka、consul、nacos)等
这个图是我自己画的,只是简单的画了一下,画的不太好,请见谅
服务端的搭建
搭建SpringBoot Admin的服务端,注意依赖的版本,如果没有带版本的话那么依赖版本的默认版本会根据应用程序的版本支持来定义
pom.xml文件中的依赖
		<!--SpringBoot Admin服务端 -->

		<dependency>

			<groupId>org.jolokia</groupId>

			<artifactId>jolokia-core</artifactId>

		    <jolokia.version>1.5.0</jolokia.version>

		</dependency>

		<dependency>

			<groupId>de.codecentric</groupId>

			<artifactId>spring-boot-admin-starter-server</artifactId>

			<version>2.0.1</version>

		</dependency>

		<!-- SpringBoot Admin的ui界面 -->

		<dependency>

			<groupId>de.codecentric</groupId>

			<artifactId>spring-boot-admin-server-ui</artifactId>

			<version>2.0.2</version>

		</dependency>

		<!--安全,保护SpringBoot Admin,使用时详细讲解-->

		<dependency>

			<groupId>org.springframework.boot</groupId>

			<artifactId>spring-boot-starter-security</artifactId>

		    <version>2.0.2.RELEASE</version>

		</dependency>
- 1
- 2
- 3
- 4
- 5
- 6
- 7
- 8
- 9
- 10
- 11
- 12
- 13
- 14
- 15
- 16
- 17
- 18
- 19
- 20
- 21
- 22
- 23
配置文件的配置(yml格式)
#端口号

server:

  port: 28820

spring:

#微服务实例名称

  application:

    name: POWERSERVICE-DOCKER

---

#设置SpringBootAdmin的属性

spring:

  boot:

    admin:

      ui:

        title: 'power-monitoring'

#设置security的用户名和密码

  security:

    user:

      name: admin

      password: admin12345

---

#设置SpringBoot Admin的邮箱通知

spring:

  mail:

#邮箱服务器地址

    host: smtp.exmail.qq.com

#邮箱用户名

    username: xxxxx

#邮箱密码

    password: xxxxx

    port: 465

#stmp的方式开启

    properties:

      mail.smtp.auth:  true

      mail.host: smtp.exmail.qq.com

#设置smtp格式的SSL方式的端口号

      smtp.socketFactory.port: 465

#使用SSL的方式发送

      mail.smtp.socketFactory.class: javax.net.ssl.SSLSocketFactory

#发送邮箱

  boot:

    admin:

      notify:

        mail:

#邮箱发件人

          from: xxxxx

#邮箱接收人,多个地址逗号隔开

          to:

            - xxxxx
- 1
- 2
- 3
- 4
- 5
- 6
- 7
- 8
- 9
- 10
- 11
- 12
- 13
- 14
- 15
- 16
- 17
- 18
- 19
- 20
- 21
- 22
- 23
- 24
- 25
- 26
- 27
- 28
- 29
- 30
- 31
- 32
- 33
- 34
- 35
- 36
- 37
- 38
- 39
- 40
- 41
- 42
- 43
- 44
- 45
- 46
- 47
- 48
- 49
到这里就先停一下,我讲解一下配置文件中几个配置原因,授人以鱼不如授人以渔
配置解释一(security的配置):security是Spring社区下的,属于安全方面,它可以和SpringBoot Admin搭配使用,保证了SpringBoot Admin的安全性(官方也是推荐搭配使用的).
配置解释二(SSLSocketFactory类):该SSLSocketFactory类实现了SSL协议(中途还要使用JavaMailSender、JavaMailSenderImpl、MailSenderAutoConfiguration这些类或接口来实现发送邮件功能)
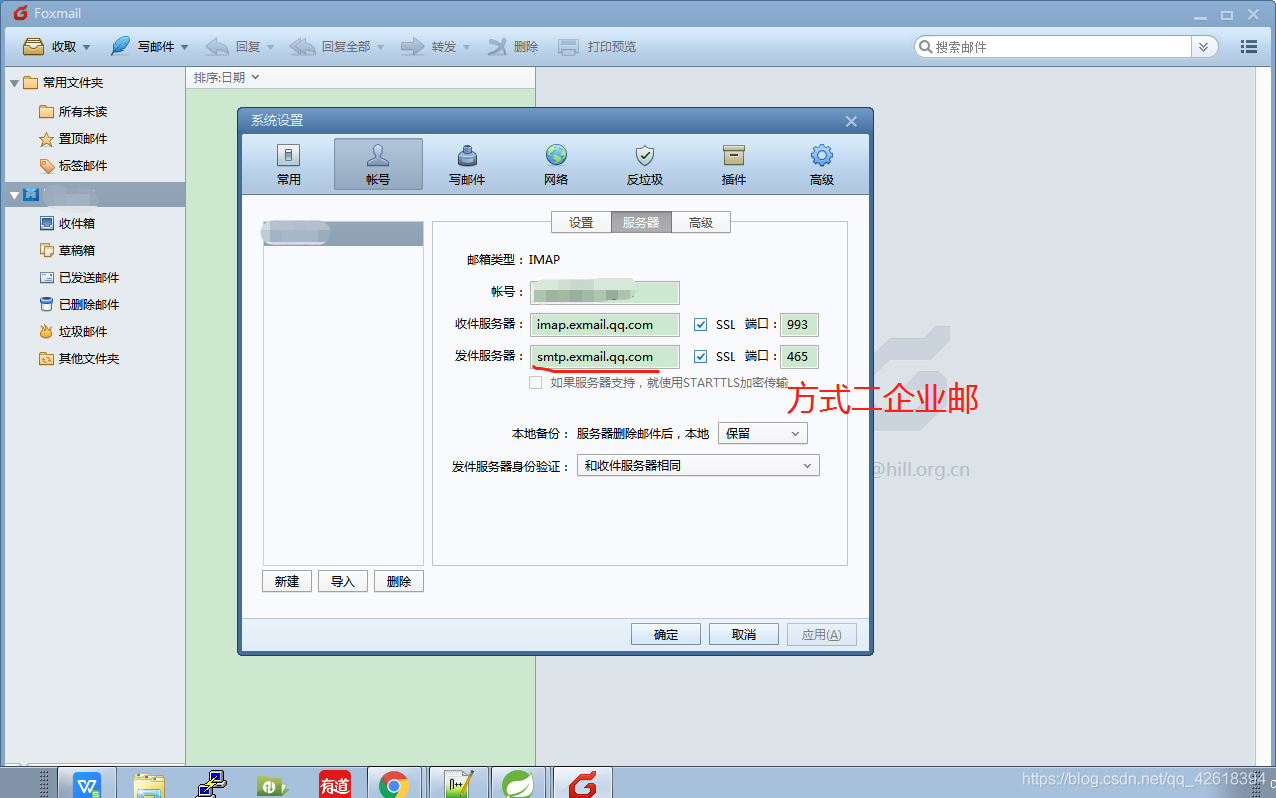
配置解释三(SMTP格式):这个实际上就很简单了,我用过两个方式,163和腾讯企业邮,不过需要注意(谨防采坑),注意①STMP方式的SSL协议的端口(465)或非SSL协议的端口(25)都是通用(163/腾讯企业邮等等)的 注意②如果要是用腾讯企业邮的话是要输入邮箱账户以及邮箱密码,而如果要是使用163邮箱的话是要输入邮箱账户和授权码的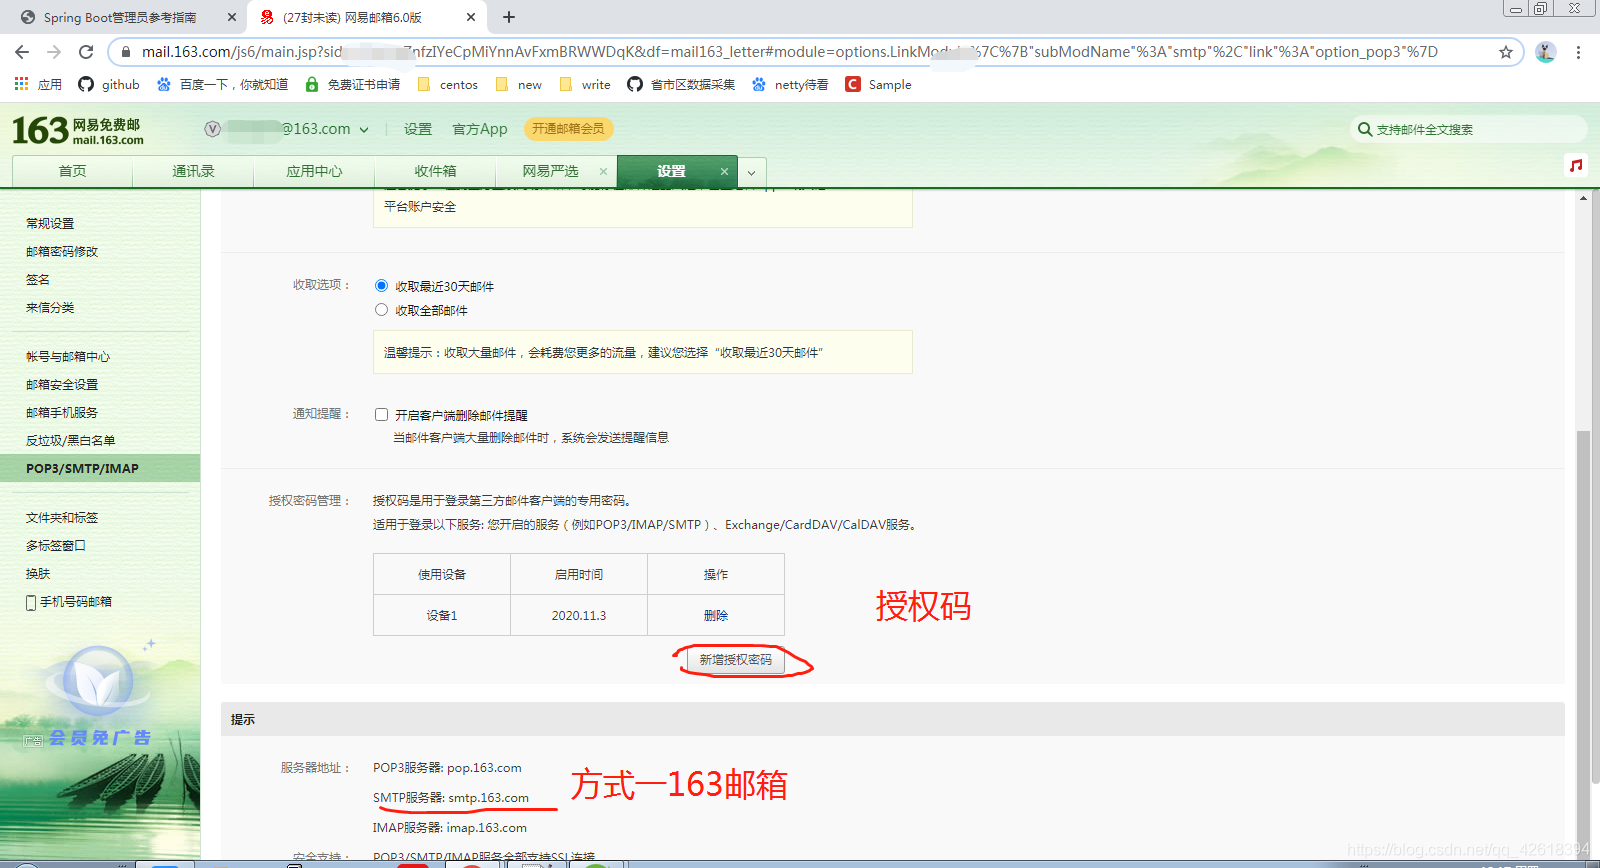
配置SpringBoot Admin服务端启动类
@EnableAutoConfiguration

@Configuration

@EnableAdminServer

@SpringBootApplication(exclude = DataSourceAutoConfiguration.class)

public class Admin_power extends WebSecurityConfigurerAdapter {

	private final String contextPath;

	public Admin_power(AdminServerProperties adminServerProperties) {

		this.contextPath = adminServerProperties.getContextPath();

	}

	@Override

	protected void configure(HttpSecurity http) throws Exception {

		// 跨域设置 客户端通过instances注册(为后续docker做准备)

		http.csrf().csrfTokenRepository(CookieCsrfTokenRepository.withHttpOnlyFalse())

				.ignoringAntMatchers(contextPath + "/instances");

		http.authorizeRequests().antMatchers(contextPath + "/assets/**").permitAll(); // 静态资源

		http.authorizeRequests().anyRequest().authenticated(); //认证

		// spring-boot-admin-server-ui

		http.formLogin().loginPage("/login").permitAll();

		http.logout().logoutUrl("/logout").logoutSuccessUrl("/login");

		// basic认证

		http.httpBasic();

	}

	public static void main(String[] args) {

		SpringApplication.run(Admin_power.class, args);

	}

}
- 1
- 2
- 3
- 4
- 5
- 6
- 7
- 8
- 9
- 10
- 11
- 12
- 13
- 14
- 15
- 16
- 17
- 18
- 19
- 20
- 21
- 22
- 23
- 24
- 25
- 26
- 27
- 28
- 29
- 30
- 31
- 32
- 33
启动类配置解释: 与Security搭配使用(实现拦截功能,登录功能),代码不是我自己编写的,SpringBoot Admin官方提供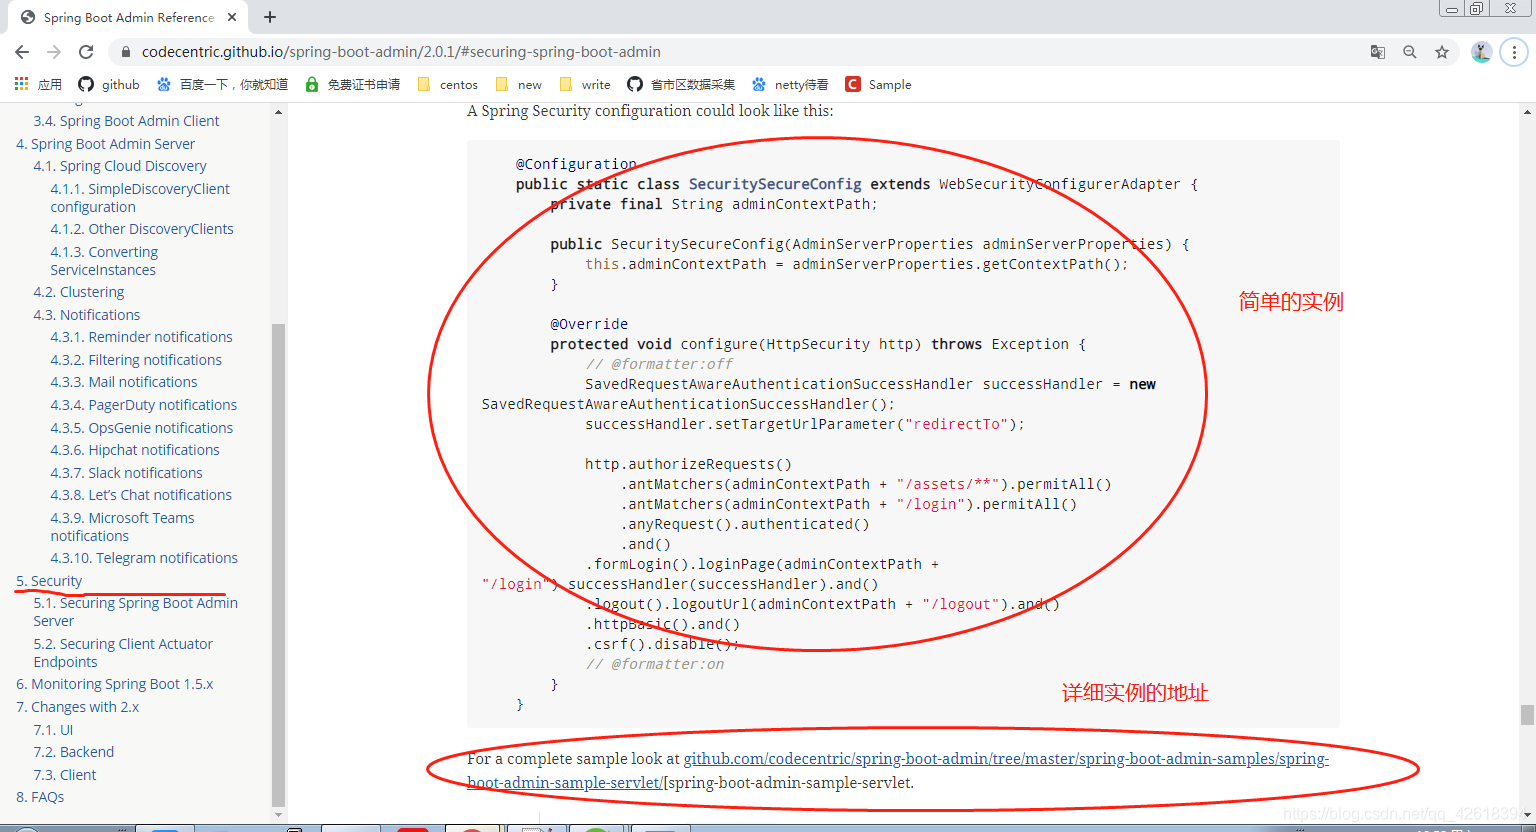
本地测试
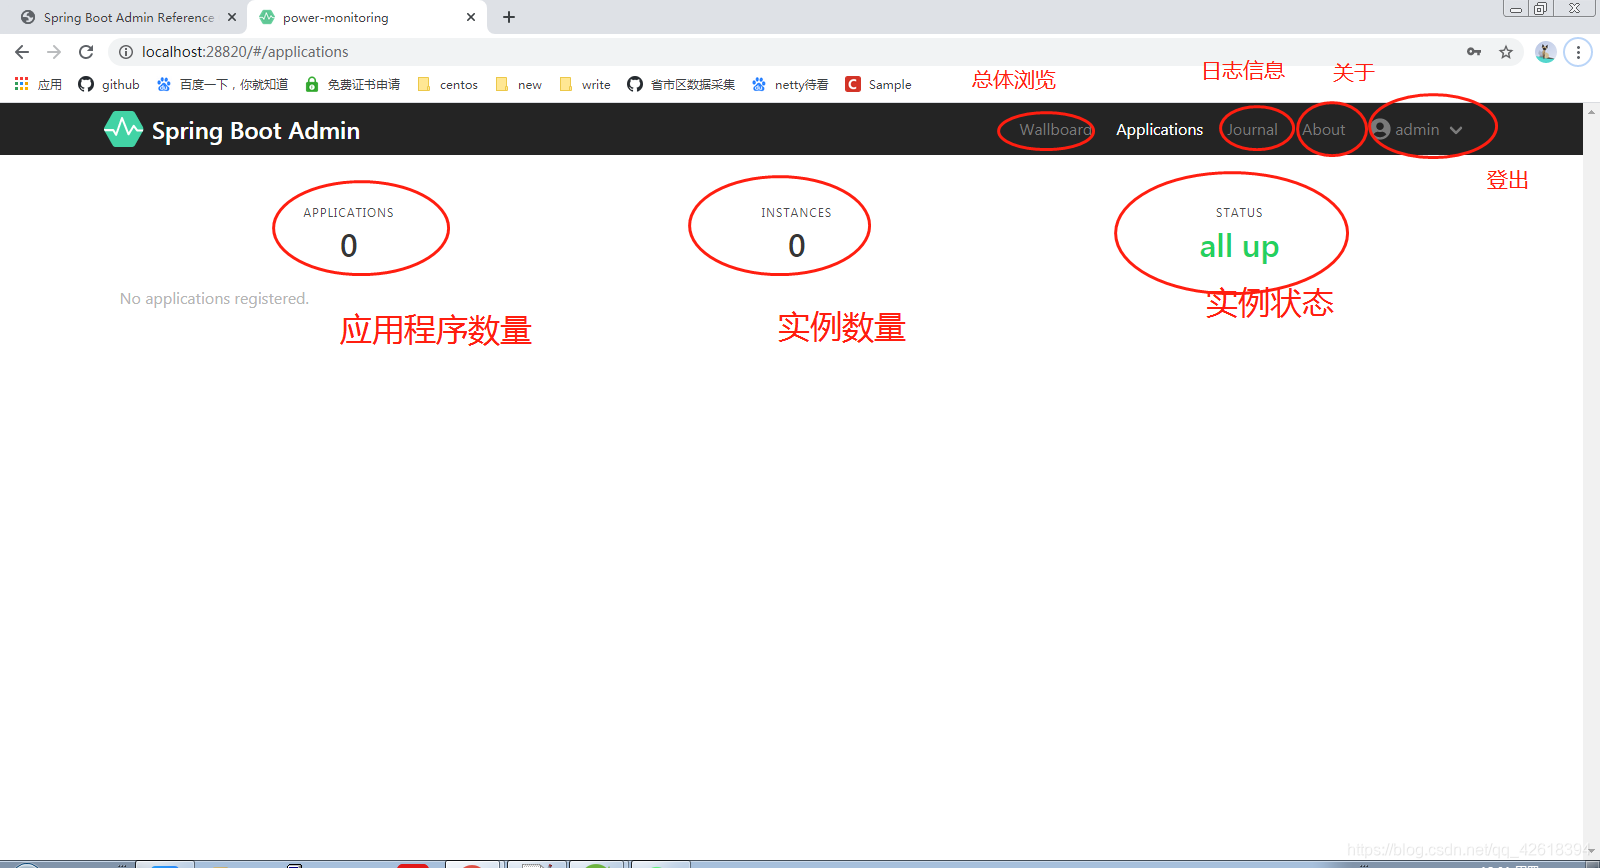
到这里的话,就代表SpringBoot Admin服务端已经配置好了(注意项目自己创建),先在本地测试下,如果没问题的话就部署到云端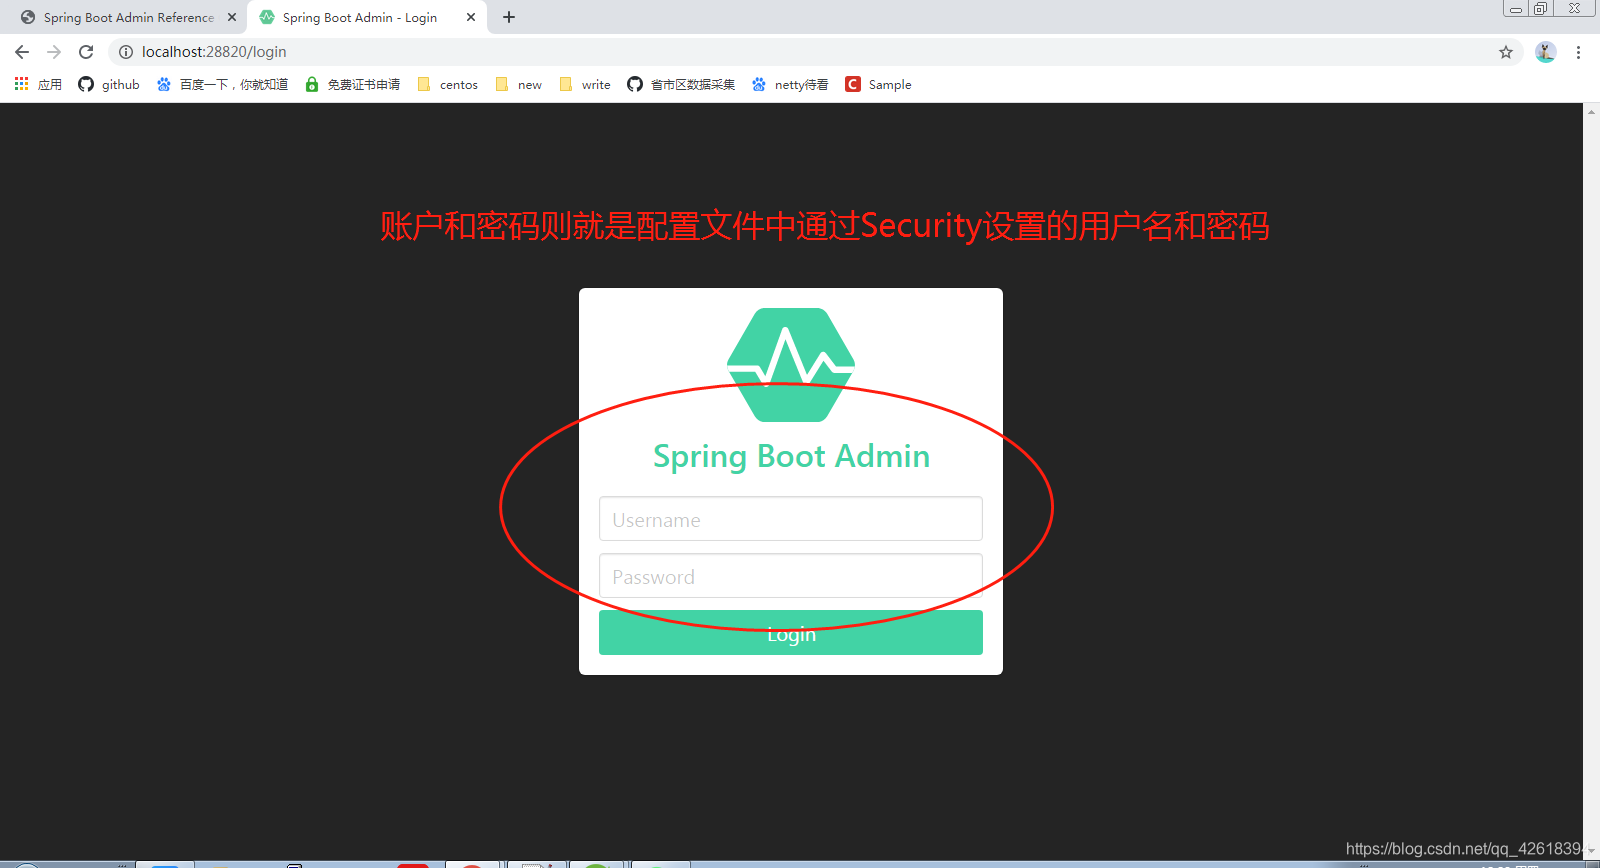
打包发布
我打包的话是通过cmd命令的(jar包)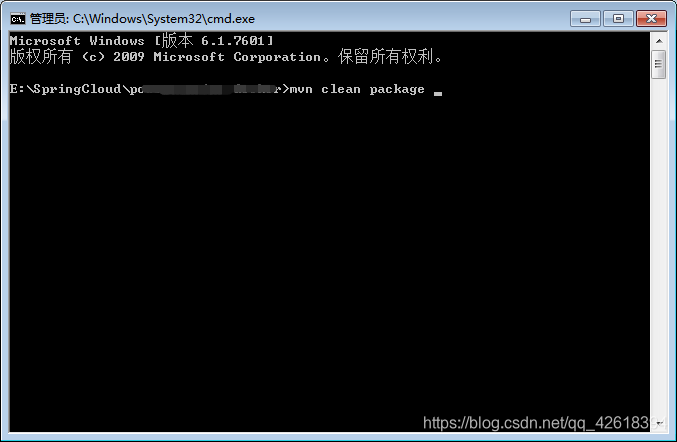
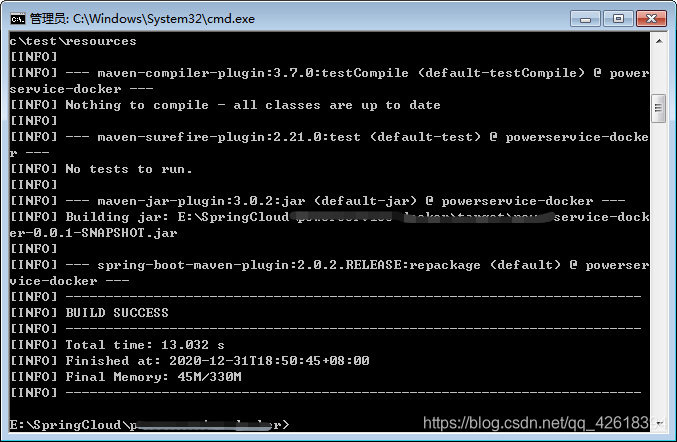
将打好的jar包上传到云端服务器中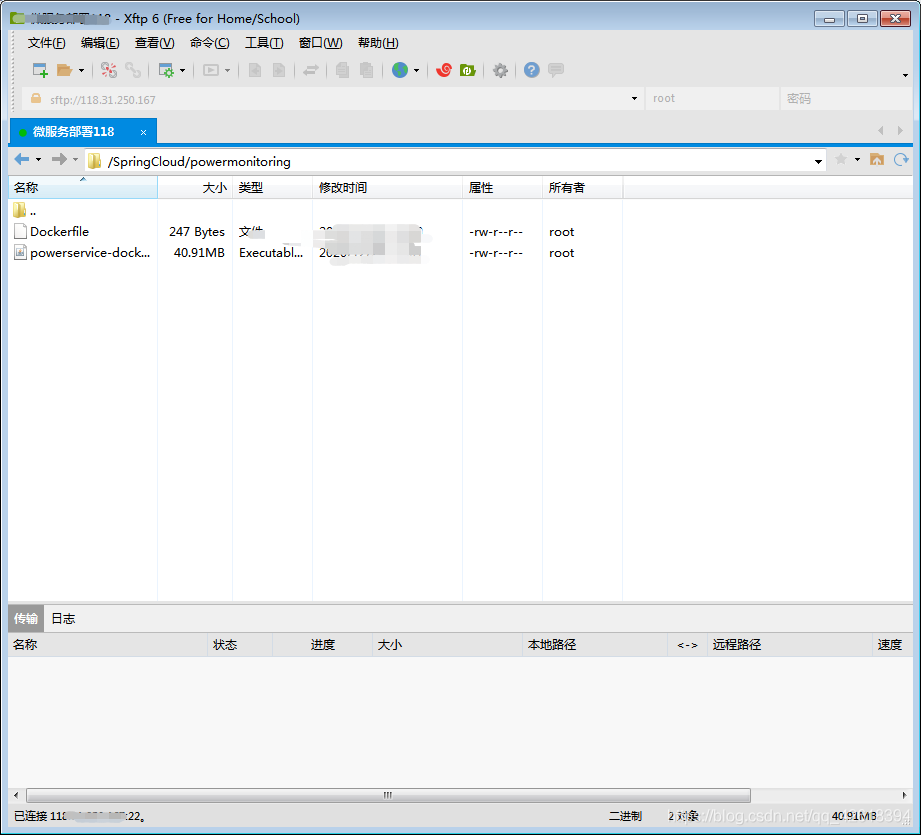
通过docker来进行打包命令(步骤:打包>>>生成镜像>>>运行镜像),打包过程就不演示了,详细可以查看docker官网中的命令讲解
我生成的镜像包的名称命名为"powdockeradmin",接下来开始运行镜像包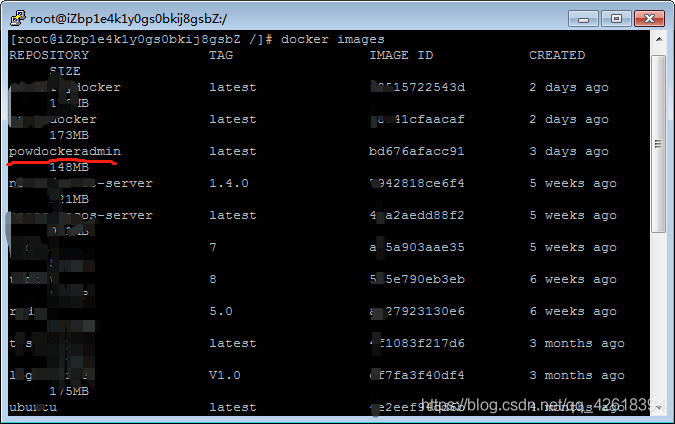
docker run -d -p 28820:28820  powdockeradmin  运行镜像

docker  ps   								  查看运行的镜像

docker logs --since     10m   容器id		  查看指定容器的日志
- 1
- 2
- 3
需要注意: 端口号是对外映射的,我这里在是提前开放好公网出方向的端口了,所以如果你们无法访问的话,查看一下是否没有开放端口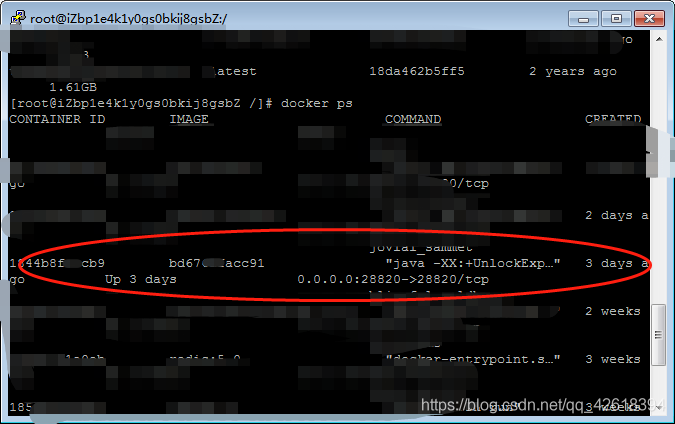
外网测试
外网测试也是通的,这也就意味着SpringBoot Admin的服务端已经拿下了,接下来就需要配置客户端了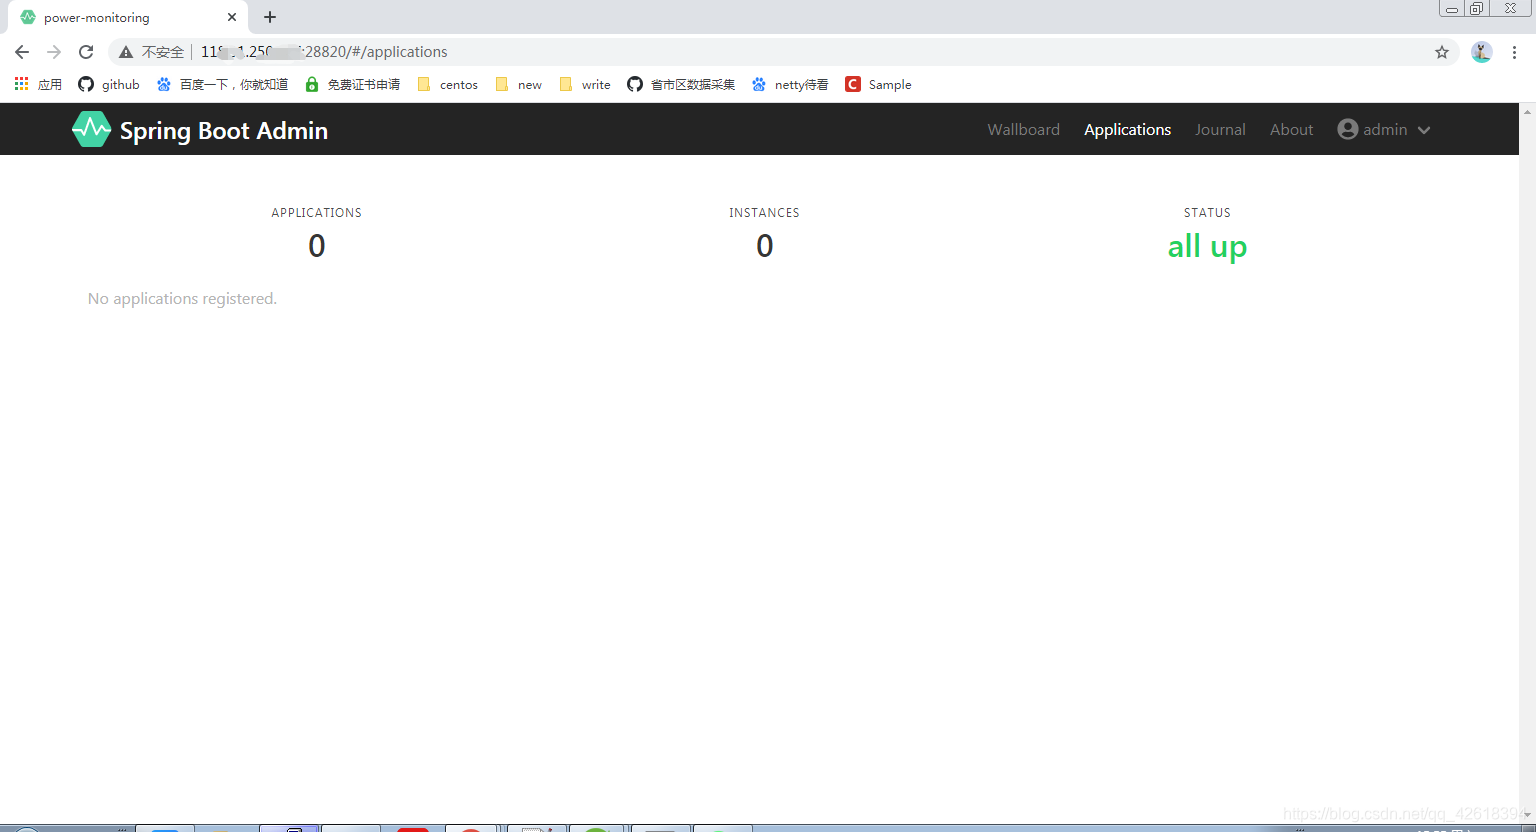
客户端的搭建
搭建SpringBoot Admin的客户端相对来讲就会简单很多,只需要在配置文件中做一些配置即可,但是需要注意一点就是,我在上文中服务端的启动类中有配置过跨域设置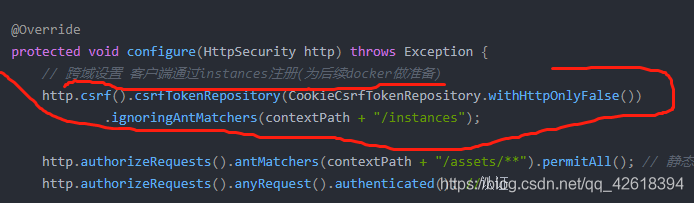
这也就意味着配置文件中需要添加关于instance的配置,也正是因为这一点,才可以客户端服务才可以入驻成功,否则无法入驻成功(因为一直无法识别,无法识别有效的主机地址)
配置文件的配置(yml格式)
#监控服务配置
spring:
boot:
admin:
client:
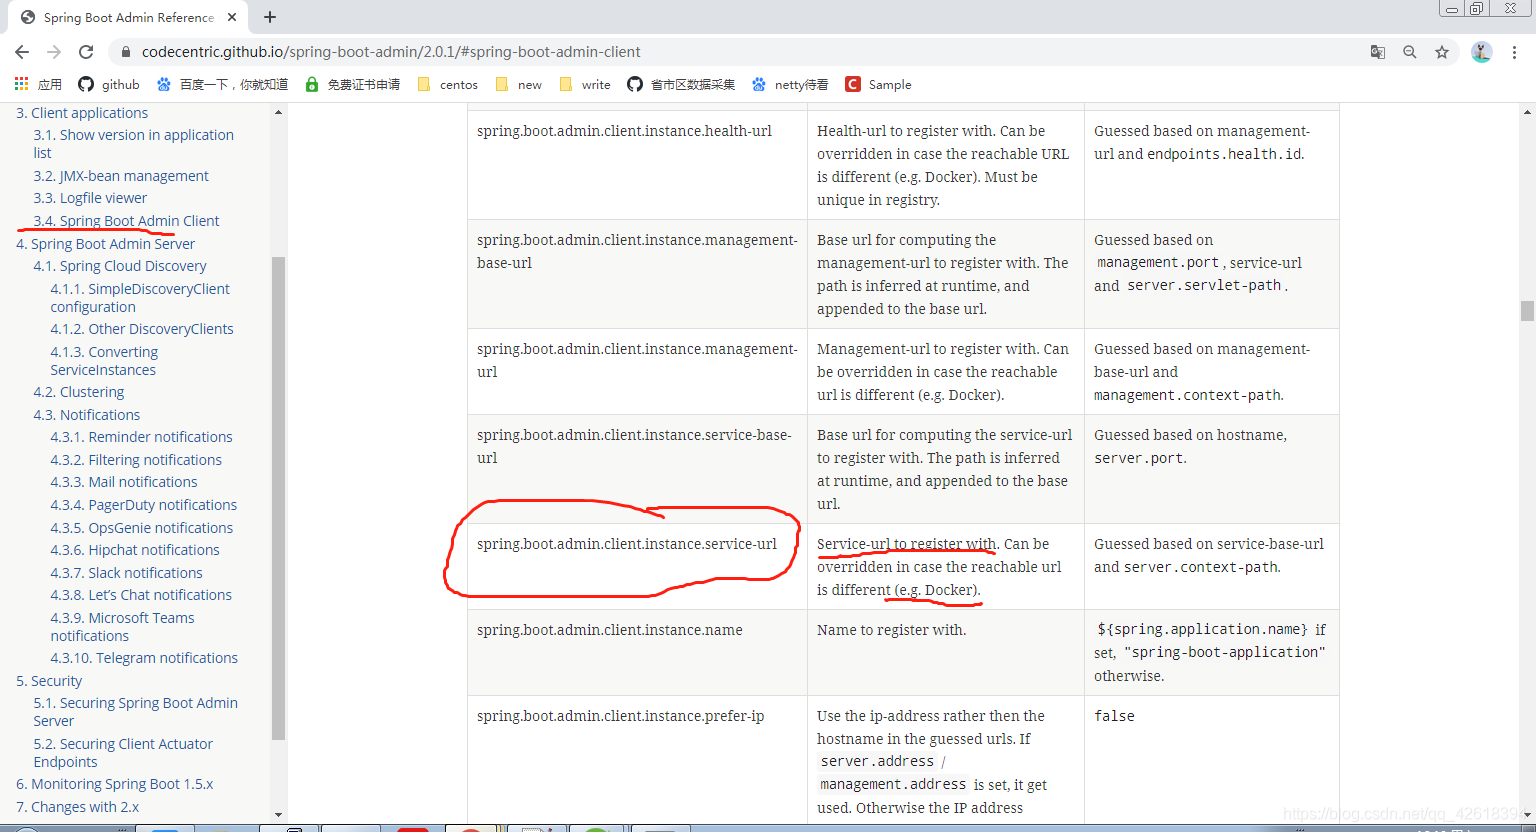
#服务入驻SpringBoot Admin的地址
url:
- SpringBoot Admin服务端的地址
#要注册的服务网址
instance:
service-url: 注册服务端的服务网址(docker地址) 地址+端口
username: admin
password: admin12345
management:
endpoints:
web:
exposure:
include: '*'
- 1
- 2
- 3
- 4
- 5
- 6
- 7
- 8
- 9
- 10
- 11
- 12
- 13
- 14
- 15
- 16
- 17
- 18
pom.xml文件的依赖
		<!-- SpringBoot Admin客户端 -->

		<dependency>

			<groupId>org.jolokia</groupId>

			<artifactId>jolokia-core</artifactId>

		</dependency>

		<dependency>

			<groupId>de.codecentric</groupId>

			<artifactId>spring-boot-admin-starter-client</artifactId>

			<version>2.0.1</version>

		</dependency>

		<!-- SpringBoot Admin的ui界面 -->

		<dependency>

			<groupId>de.codecentric</groupId>

			<artifactId>spring-boot-admin-server-ui</artifactId>

			<version>2.0.1</version>

		</dependency>
- 1
- 2
- 3
- 4
- 5
- 6
- 7
- 8
- 9
- 10
- 11
- 12
- 13
- 14
- 15
- 16
我这里是创建了两个客户端的实例服务,并将它们都上传到服务器中,并且打包成镜像运行了起来,镜像启动之后,可以通过以下命令获取容器在docker中ip地址,然后配置到instance下的service-url属性上
docker inspect 容器id 查看容器的详细信息
- 1
spring:

  boot:

    admin:

      client:

#服务入驻SpringBoot Admin的地址

        url:

          - SpringBoot Admin服务端地址

#要注册的服务网址

        instance:

          service-url: http://192.168.0.5:28840

        username: admin

        password: admin12345

management:

  endpoints:

    web:

      exposure:

        include: '*'
- 1
- 2
- 3
- 4
- 5
- 6
- 7
- 8
- 9
- 10
- 11
- 12
- 13
- 14
- 15
- 16
- 17
记得外网端口开放,否则外网无法访问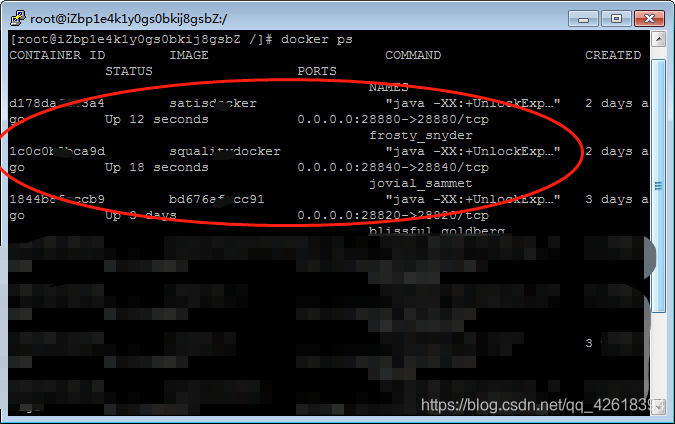
最终测试
在三个镜像(SpringBoot Admin服务端,2个客户端)都启动成功之后,就可以进行测试了,邮件通知的话已经通过配置实现了(服务的声明周期会通过邮件的方式进行通知)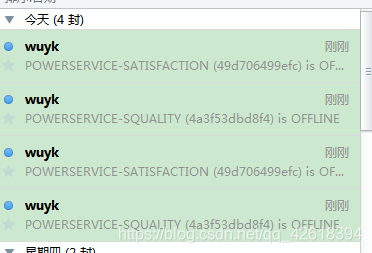

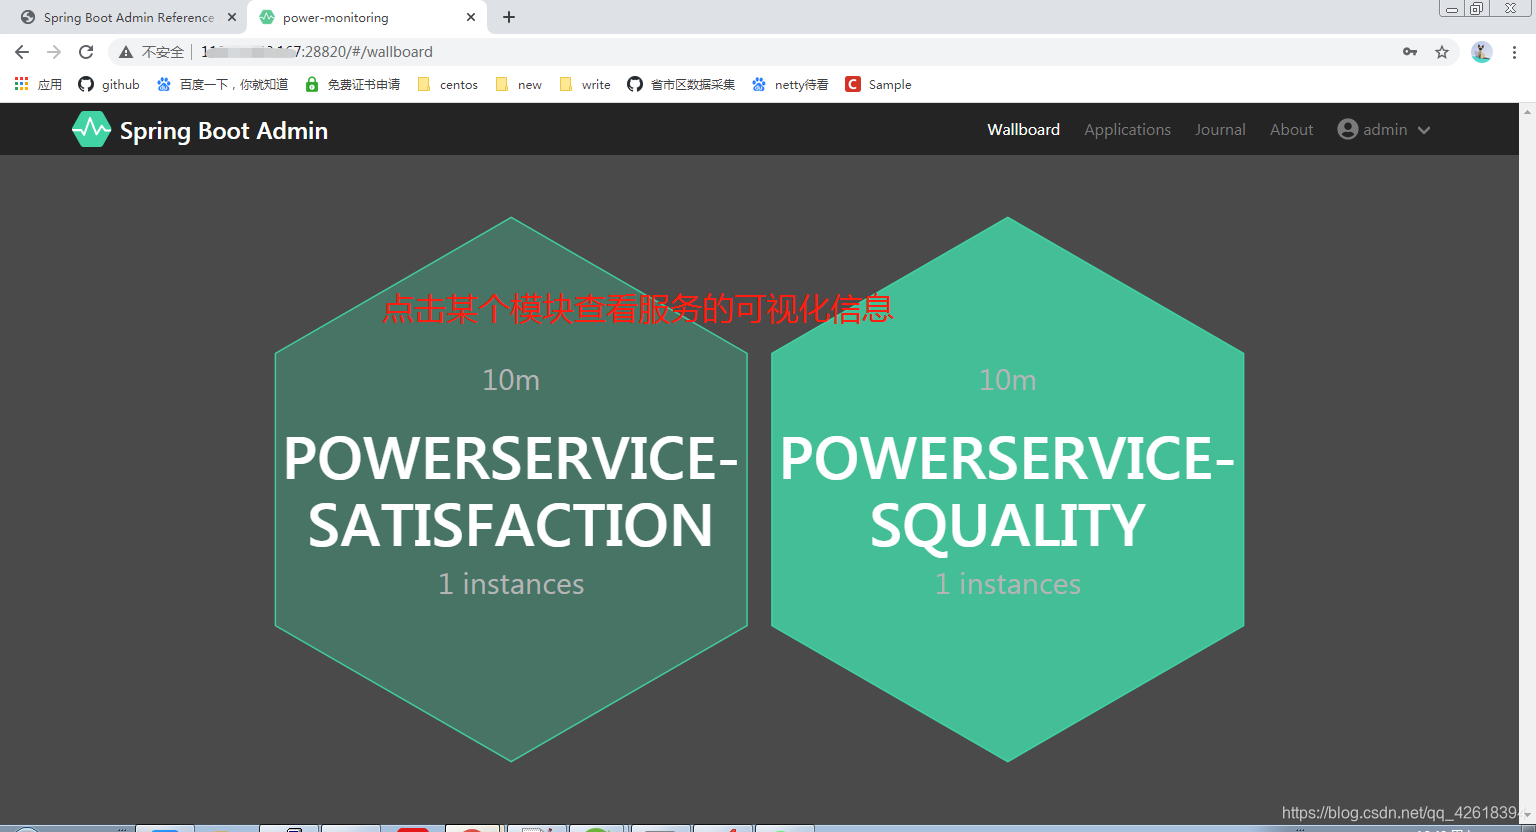
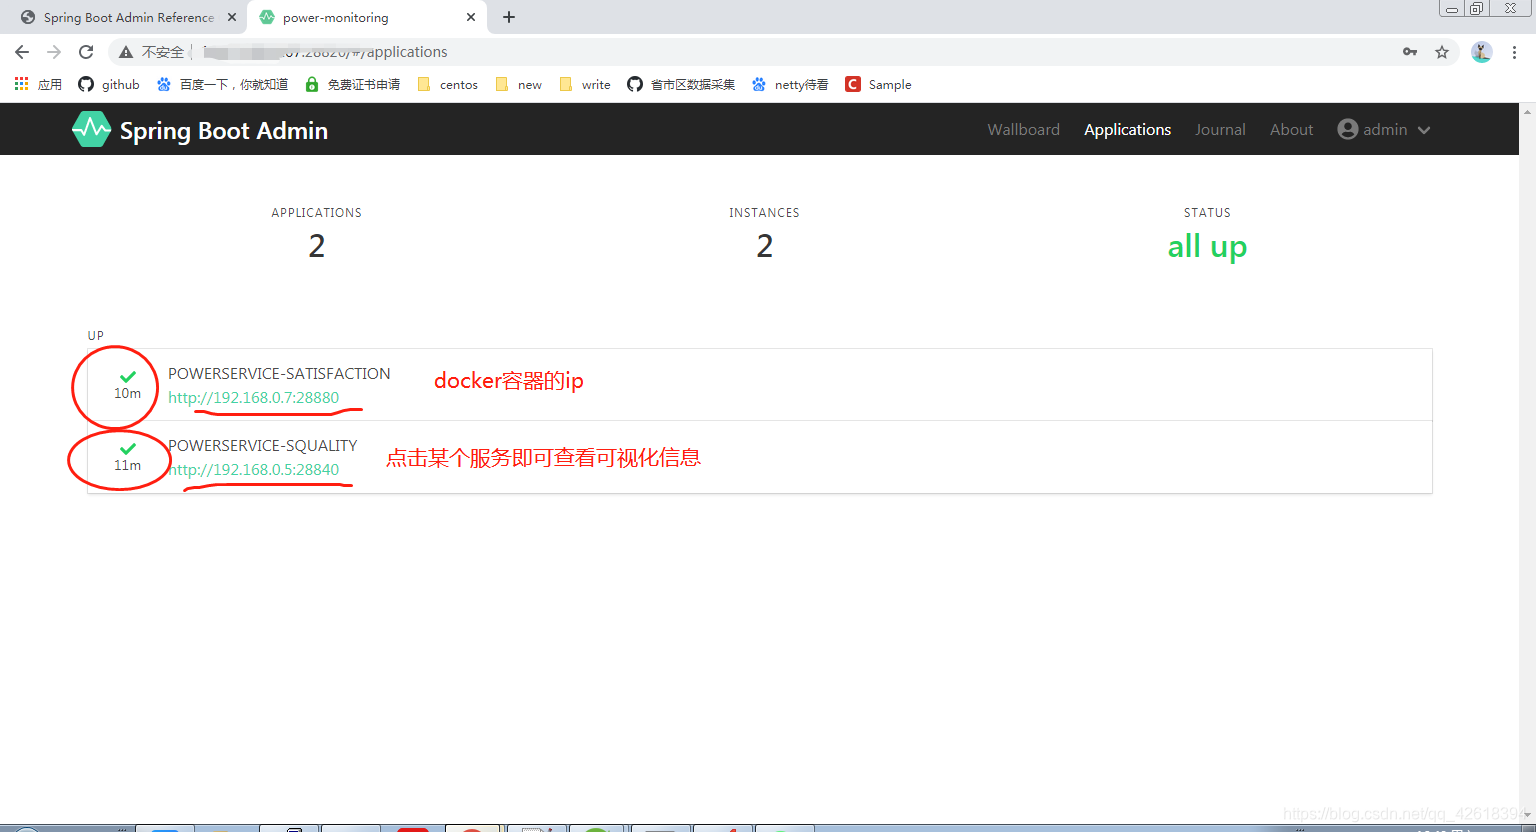
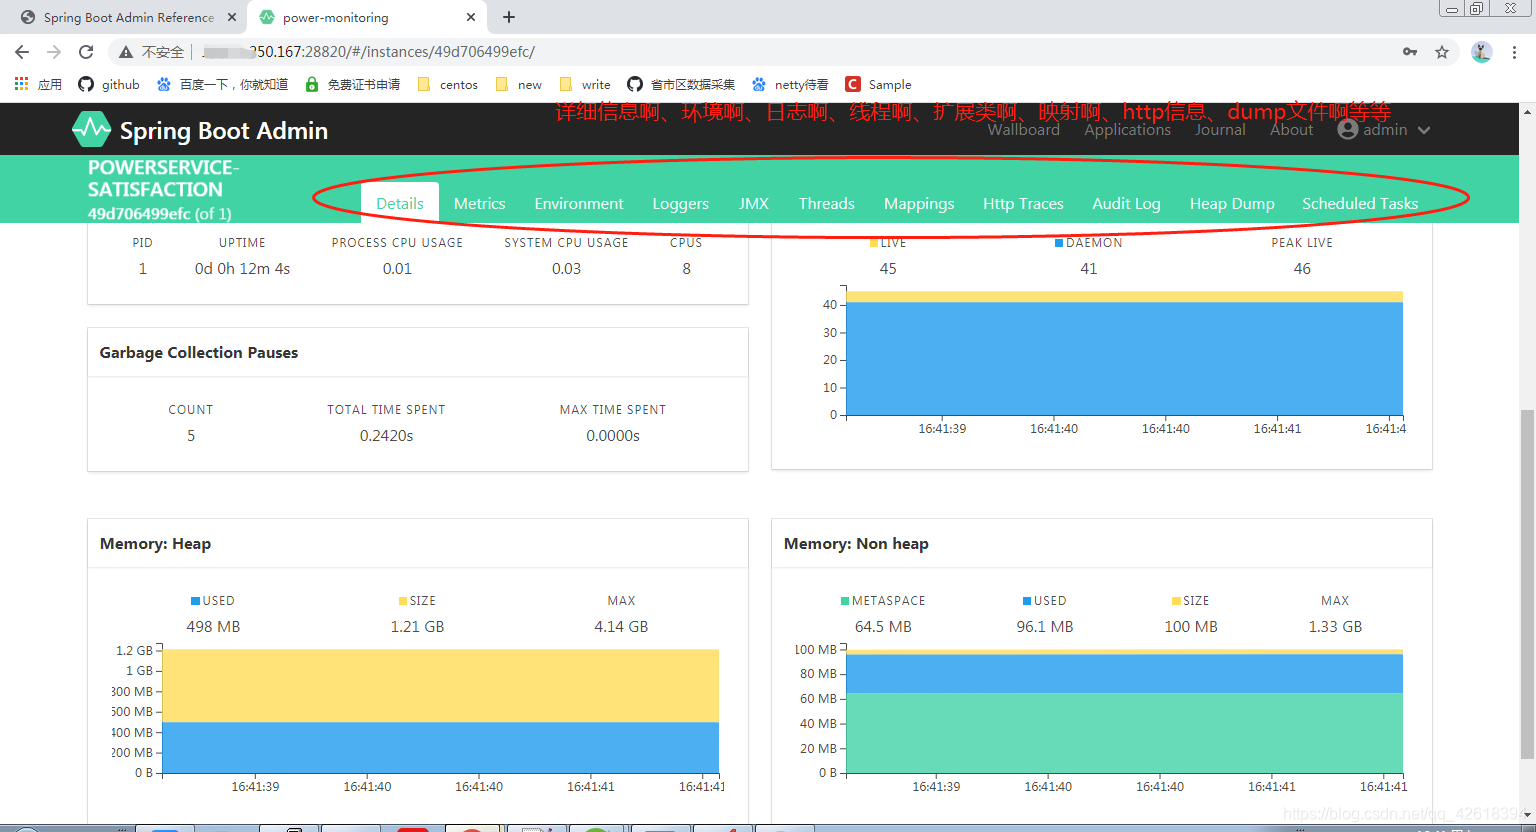
以上就是最终的测试效果
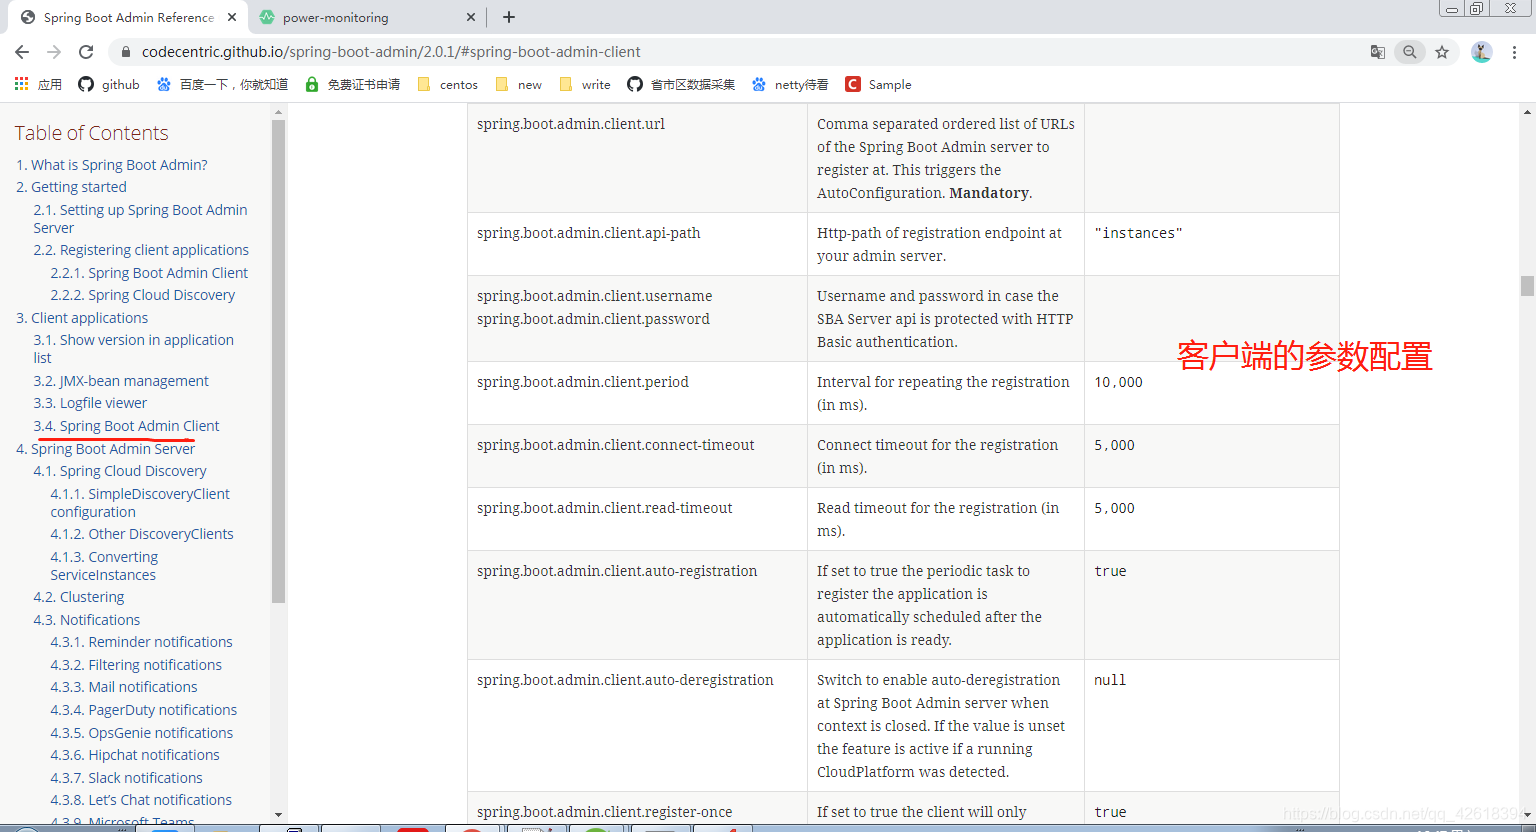
参数的指南
对于SpringBoot Admin服务端和客户端的配置还有很多,可以参照官方提供的参数进行配置(例如:读取超时时间、连接超时时间、更新实例服务信息时间)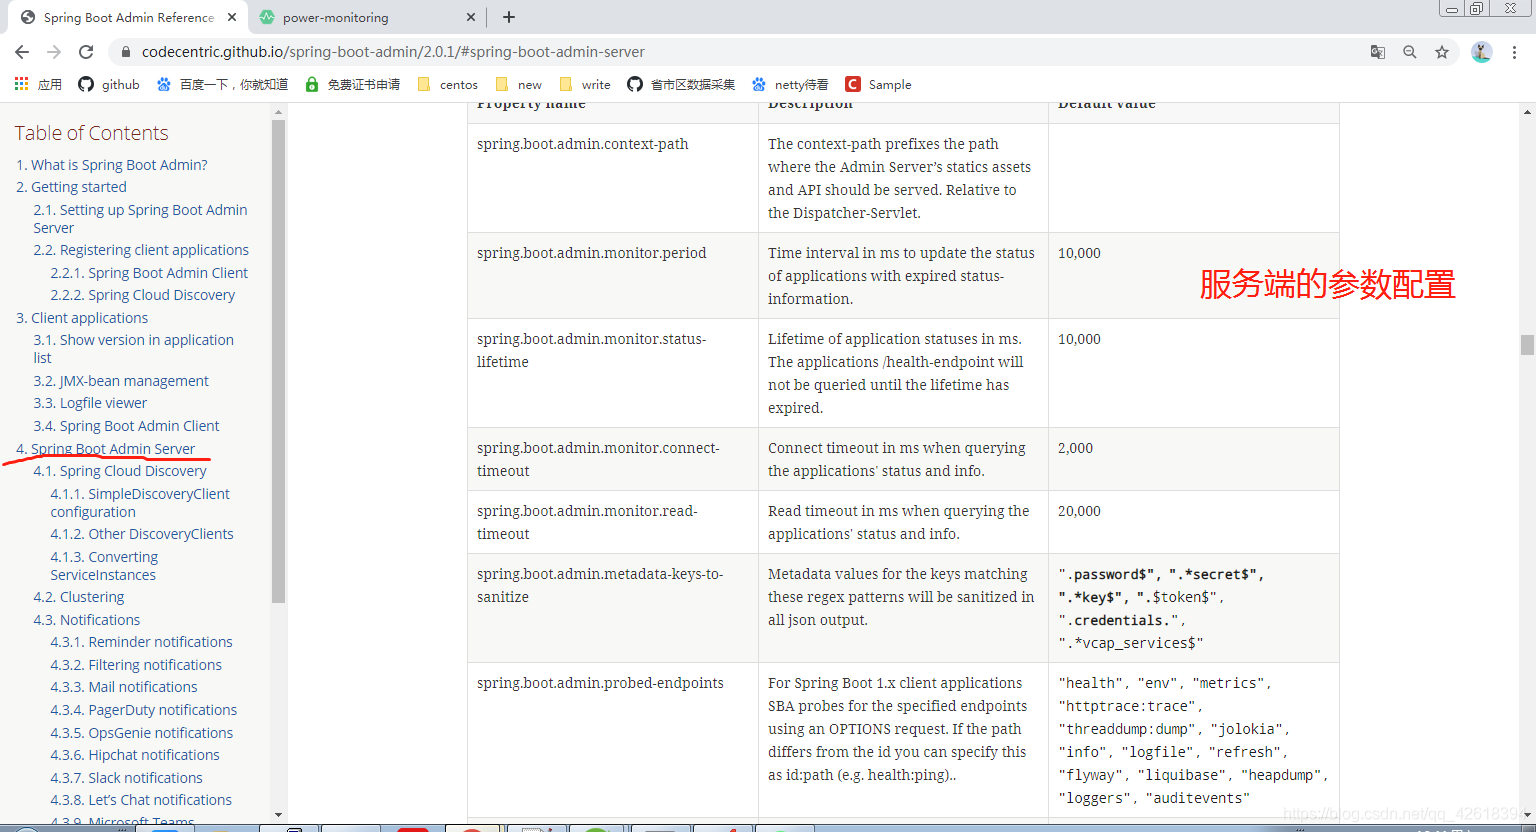
尾声
到了这里,也就意味着文章的完结了,如果文章中有疑惑或认为不对的地方都可以通过评论提出来,我会吸取您的宝贵意见,最后记得点赞哦,谢谢
原文章:https://blog.csdn.net/qq_42618394/article/details/112030573
实战SpringBoot Admin的更多相关文章
- 使用SpringBoot Admin监控SpringCloud微服务
spring-boot admin的github地址:https://github.com/codecentric/spring-boot-admin 本文基于SpringCloud的环境和配置上增加 ...
- SpringBoot Actuator & SpringBoot Admin
SpringBoot Actuator提供了很多监控和管理你的spring boot应用的HTTP或者JMX端点,并且你可以有选择地开启和关闭部分功能. 当你的spring boot应用中引入依赖之后 ...
- SpringBoot Admin 使用指南
什么是 SpringBoot Admin? Spring Boot Admin 是一个管理和监控你的 Spring Boot 应用程序的应用程序.这些应用程序通过 Spring Boot Admin ...
- 【Springboot】用Springboot Admin监控你的微服务应用
1 简介 目前,微服务大行其道,各大小公司争相学习模仿,把单体应用拆得七零八落.服务多了,运行的实例多了,给运维人员的压力就更大了.如果有十几个应用,单单做Health Check就已经够费时间的了. ...
- SpringBoot Admin应用监控搭建
简介 Spring Boot Admin 用于监控基于 Spring Boot 的应用,它是在 Spring Boot Actuator 的基础上提供简洁的可视化 WEB UI. 参考手册地址:htt ...
- Springboot admin 发送邮件失败:com.sun.mail.smtp.SMTPSenderFailedException: 553 Mail from must equal authorized user
发邮件已经是老生常谈了,今天又遇到了,而且又出了各种问题.我晕哦. 我的配置是: spring.mail.host=smtp..com spring.mail.username=klxxxx spri ...
- springboot admin
转 Spring Boot Admin的使用 作者 杜琪 关注 2015.12.25 17:30* 字数 1803 阅读 16569评论 21喜欢 55 上一篇文章中了解了Spring Boot提供的 ...
- springboot admin server常用配置
Property name Description Default value spring.boot.admin.context-path The context-path prefixes the ...
- 使用springboot Admin 2.0.6版本 集成监控springcloud微服务应用
一 新建 添加依赖 <dependencies> <dependency> <groupId>de.codecentric</groupId> < ...
随机推荐
- Linux中数据库的安装和配置(MySQL与Maria DB)
目录 MySQL和Maria DB的介绍 MySQL和Maria DB的安装 yum源安装MySQL(Centos6.5+Mysql5.1) 源码包安装MySQL yum源安装Maria DB 源码包 ...
- Windows 驱动加载程序代码
#include <windows.h> #include <winsvc.h> #include <conio.h> #include <stdio.h&g ...
- SpringMVC中<mvc:default-servlet-handler/>的作用
问题所在:DispatcherServlet请求映射配置为"/",则Spring MVC将捕获Web容器所有的请求,包括静态资源的请求,Spring MVC会将它们当成一个普通请求 ...
- 简单使用高德地图开放平台API
需求说明 输入经纬度,得到城市名 挑选API 使用高德逆地理编码API,点击查看文档 demo <?php /** * 根据输入的经纬度返回城市名称 * @param $longitude 终点 ...
- 多变量高斯(MVN)概率建模的两种方案
摘要:在我们的时序异常检测应用中,设计了对时序数据进行多变量高斯(MVN)建模的算法方案进行异常检测,本文对基于tensorflow的两种MVN建模方案进行了总结. 1.基于custom choles ...
- 谁动了我的 Linux?原来 history 可以这么强大!
当我们频繁使用 Linux 命令行时,有效地使用历史记录,可以大大提高工作效率. 在平时 Linux 操作过程中,很多命令是重复的,你一定不希望大量输入重复的命令.如果你是系统管理员,你可能需要对用户 ...
- 使用DevExpress的GridControl实现多层级或无穷级的嵌套列表展示
在我早期的随笔<在GridControl表格控件中实现多层级主从表数据的展示>中介绍过GridControl实现二级.三级的层级列表展示,主要的逻辑就是构建GridLevelNode并添加 ...
- WM_PAINT 与 WM_ERASEBKGND消息的深入分析
当WM_PAINT消息不是由函数InvalidateRect产生的时(即通过最大话,最小化,移动,下拉菜单等),系统会先产生连续产生若干个WM_ERASEBKGND消息,紧接着在产生WM_PAINT消 ...
- 对ansible不支持service模块的status命令进行修正
原生的ansible不支持service.status,在Google之后,发现有人提交了一个patch,可以支持status选项.见https://github.com/ritzk/ansible- ...
- Linux 操作系统(四)用户组管理&进程管理&任务调度
以下实例均在Centos7下验证 Centos7 查看命令帮助 man xxx 用户组管理 useradd useradd user1 password user1 cat /etc/passwd # ...