吴裕雄--天生自然 pythonTensorFlow图形数据处理:数据集基本使用方法
import tempfile
import tensorflow as tf # 1. 从数组创建数据集。
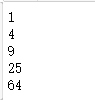
input_data = [1, 2, 3, 5, 8]
dataset = tf.data.Dataset.from_tensor_slices(input_data) # 定义迭代器。
iterator = dataset.make_one_shot_iterator() # get_next() 返回代表一个输入数据的张量。
x = iterator.get_next()
y = x * x with tf.Session() as sess:
for i in range(len(input_data)):
print(sess.run(y))
# 2. 读取文本文件里的数据。
# 创建文本文件作为本例的输入。
with open("E:\\test1.txt", "w") as file:
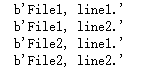
file.write("File1, line1.\n")
file.write("File1, line2.\n") with open("E:\\test2.txt", "w") as file:
file.write("File2, line1.\n")
file.write("File2, line2.\n") # 从文本文件创建数据集。这里可以提供多个文件。
input_files = ["E:\\test1.txt", "E:\\test2.txt"]
dataset = tf.data.TextLineDataset(input_files) # 定义迭代器。
iterator = dataset.make_one_shot_iterator() # 这里get_next()返回一个字符串类型的张量,代表文件中的一行。
x = iterator.get_next()
with tf.Session() as sess:
for i in range(4):
print(sess.run(x))
# 解析TFRecord文件里的数据。
# 解析一个TFRecord的方法。
def parser(record):
features = tf.parse_single_example(record,features={'image_raw':tf.FixedLenFeature([],tf.string),'pixels':tf.FixedLenFeature([],tf.int64),'label':tf.FixedLenFeature([],tf.int64)})
decoded_images = tf.decode_raw(features['image_raw'],tf.uint8)
retyped_images = tf.cast(decoded_images, tf.float32)
images = tf.reshape(retyped_images, [784])
labels = tf.cast(features['label'],tf.int32)
#pixels = tf.cast(features['pixels'],tf.int32)
return images, labels # 从TFRecord文件创建数据集。这里可以提供多个文件。
input_files = ["F:\\output.tfrecords"]
dataset = tf.data.TFRecordDataset(input_files) # map()函数表示对数据集中的每一条数据进行调用解析方法。
dataset = dataset.map(parser) # 定义遍历数据集的迭代器。
iterator = dataset.make_one_shot_iterator() # 读取数据,可用于进一步计算
image, label = iterator.get_next() with tf.Session() as sess:
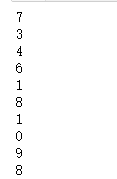
for i in range(10):
x, y = sess.run([image, label])
print(y)
# 使用initializable_iterator来动态初始化数据集。

# 从TFRecord文件创建数据集,具体文件路径是一个placeholder,稍后再提供具体路径。

input_files = tf.placeholder(tf.string)

dataset = tf.data.TFRecordDataset(input_files)

dataset = dataset.map(parser)

# 定义遍历dataset的initializable_iterator。

iterator = dataset.make_initializable_iterator()

image, label = iterator.get_next()

with tf.Session() as sess:

    # 首先初始化iterator,并给出input_files的值。

    sess.run(iterator.initializer,feed_dict={input_files: ["F:\\output.tfrecords"]})

    # 遍历所有数据一个epoch。当遍历结束时,程序会抛出OutOfRangeError。

    while True:

        try:

            x, y = sess.run([image, label])

        except tf.errors.OutOfRangeError:

            break
吴裕雄--天生自然 pythonTensorFlow图形数据处理:数据集基本使用方法的更多相关文章
- 吴裕雄--天生自然 pythonTensorFlow图形数据处理:数据集高层操作
import tempfile import tensorflow as tf # 1. 列举输入文件. # 输入数据生成的训练和测试数据. train_files = tf.train.match_ ...
- 吴裕雄--天生自然 pythonTensorFlow图形数据处理:循环神经网络预测正弦函数
import numpy as np import tensorflow as tf import matplotlib.pyplot as plt # 定义RNN的参数. HIDDEN_SIZE = ...
- 吴裕雄--天生自然 pythonTensorFlow图形数据处理:输入数据处理框架
import tensorflow as tf # 1. 创建文件列表,通过文件列表创建输入文件队列 files = tf.train.match_filenames_once("F:\\o ...
- 吴裕雄--天生自然 pythonTensorFlow图形数据处理:输入文件队列
import tensorflow as tf # 1. 生成文件存储样例数据. def _int64_feature(value): return tf.train.Feature(int64_li ...
- 吴裕雄--天生自然 pythonTensorFlow图形数据处理:多线程队列操作
import tensorflow as tf #1. 定义队列及其操作. queue = tf.FIFOQueue(100,"float") enqueue_op = queue ...
- 吴裕雄--天生自然 pythonTensorFlow图形数据处理:队列操作
import tensorflow as tf #1. 创建队列,并操作里面的元素. q = tf.FIFOQueue(2, "int32") init = q.enqueue_m ...
- 吴裕雄--天生自然 pythonTensorFlow图形数据处理:图像预处理完整样例
import numpy as np import tensorflow as tf import matplotlib.pyplot as plt #随机调整图片的色彩,定义两种顺序. def di ...
- 吴裕雄--天生自然 pythonTensorFlow图形数据处理:TensorFlow图像处理函数
import numpy as np import tensorflow as tf import matplotlib.pyplot as plt #读取图片 image_raw_data = tf ...
- 吴裕雄--天生自然 pythonTensorFlow图形数据处理:读取MNIST手写图片数据写入的TFRecord文件
import numpy as np import tensorflow as tf from tensorflow.examples.tutorials.mnist import input_dat ...
随机推荐
- 大数据高可用集群环境安装与配置(08)——安装Ganglia监控集群
1. 安装依赖包和软件 在所有服务器上输入命令进行安装操作 yum install epel-release -y yum install ganglia-web ganglia-gmetad gan ...
- Essay写作关键:严谨的逻辑关系
一篇好的文章并不是句子的机械堆砌,而是一个有机整体,句子和句子之间是存在严谨的逻辑关系的,要注意句子和句子之间,段落和段落之间的衔接和连贯(Coherence and Cohesion). 要写出逻辑 ...
- [极客大挑战 2019]BabySQL
0x00 知识点 双写绕过 简单测试一下,发现or在登陆过程被过滤,想到使用oorr试试,结果成了?! 最后多测试一下,发现from union select 这些关键函数都被替换为空 本题直接进行常 ...
- Sequence Models Week 2 Emojify
Emojify! Welcome to the second assignment of Week 2. You are going to use word vector representation ...
- 翻译SSD论文(Single Shot MultiBox Detector)
转自http://lib.csdn.net/article/deeplearning/53059 作者:Ai_Smith 本文翻译而来,如有侵权,请联系博主删除.未经博主允许,请勿转载.每晚泡脚,闲来 ...
- Java算法练习——两数相加
题目链接 题目描述 给出两个 非空 的链表用来表示两个非负的整数.其中,它们各自的位数是按照 逆序 的方式存储的,并且它们的每个节点只能存储 一位 数字. 如果,我们将这两个数相加起来,则会返回一个新 ...
- dic
参考慕课网 内置函数 map(f,list) f接收一个参数 def format_name(s): return s[0].upper() + s[1:].lower() reduce(f,li ...
- Vue-router(1)之component标签
1. 使用 <component>标签实现组件切换 <component> 是Vue提供的标签语法:有一个is属性,is的作用就是显示指定的组件 <template> ...
- 【每日Scrum】第六天冲刺
一.计划会议内容 数据库仍然有问题,决定先绕过数据库,进行软件内容设计与界面ui美化. 二.任务看板 三.scrum讨论照片 四.产品的状态 无 五.任务燃尽图
- [极客大挑战 2019]Knife
根据题目Knife 猜想尝试用蚁剑连接 http://40b92ebd-5234-40b7-b2e0-3c42fb5ad000.node3.buuoj.cn/?Knife.php 密码:Syc 找到f ...