
unity 读取灰度图生成按高程分层设色地形模型
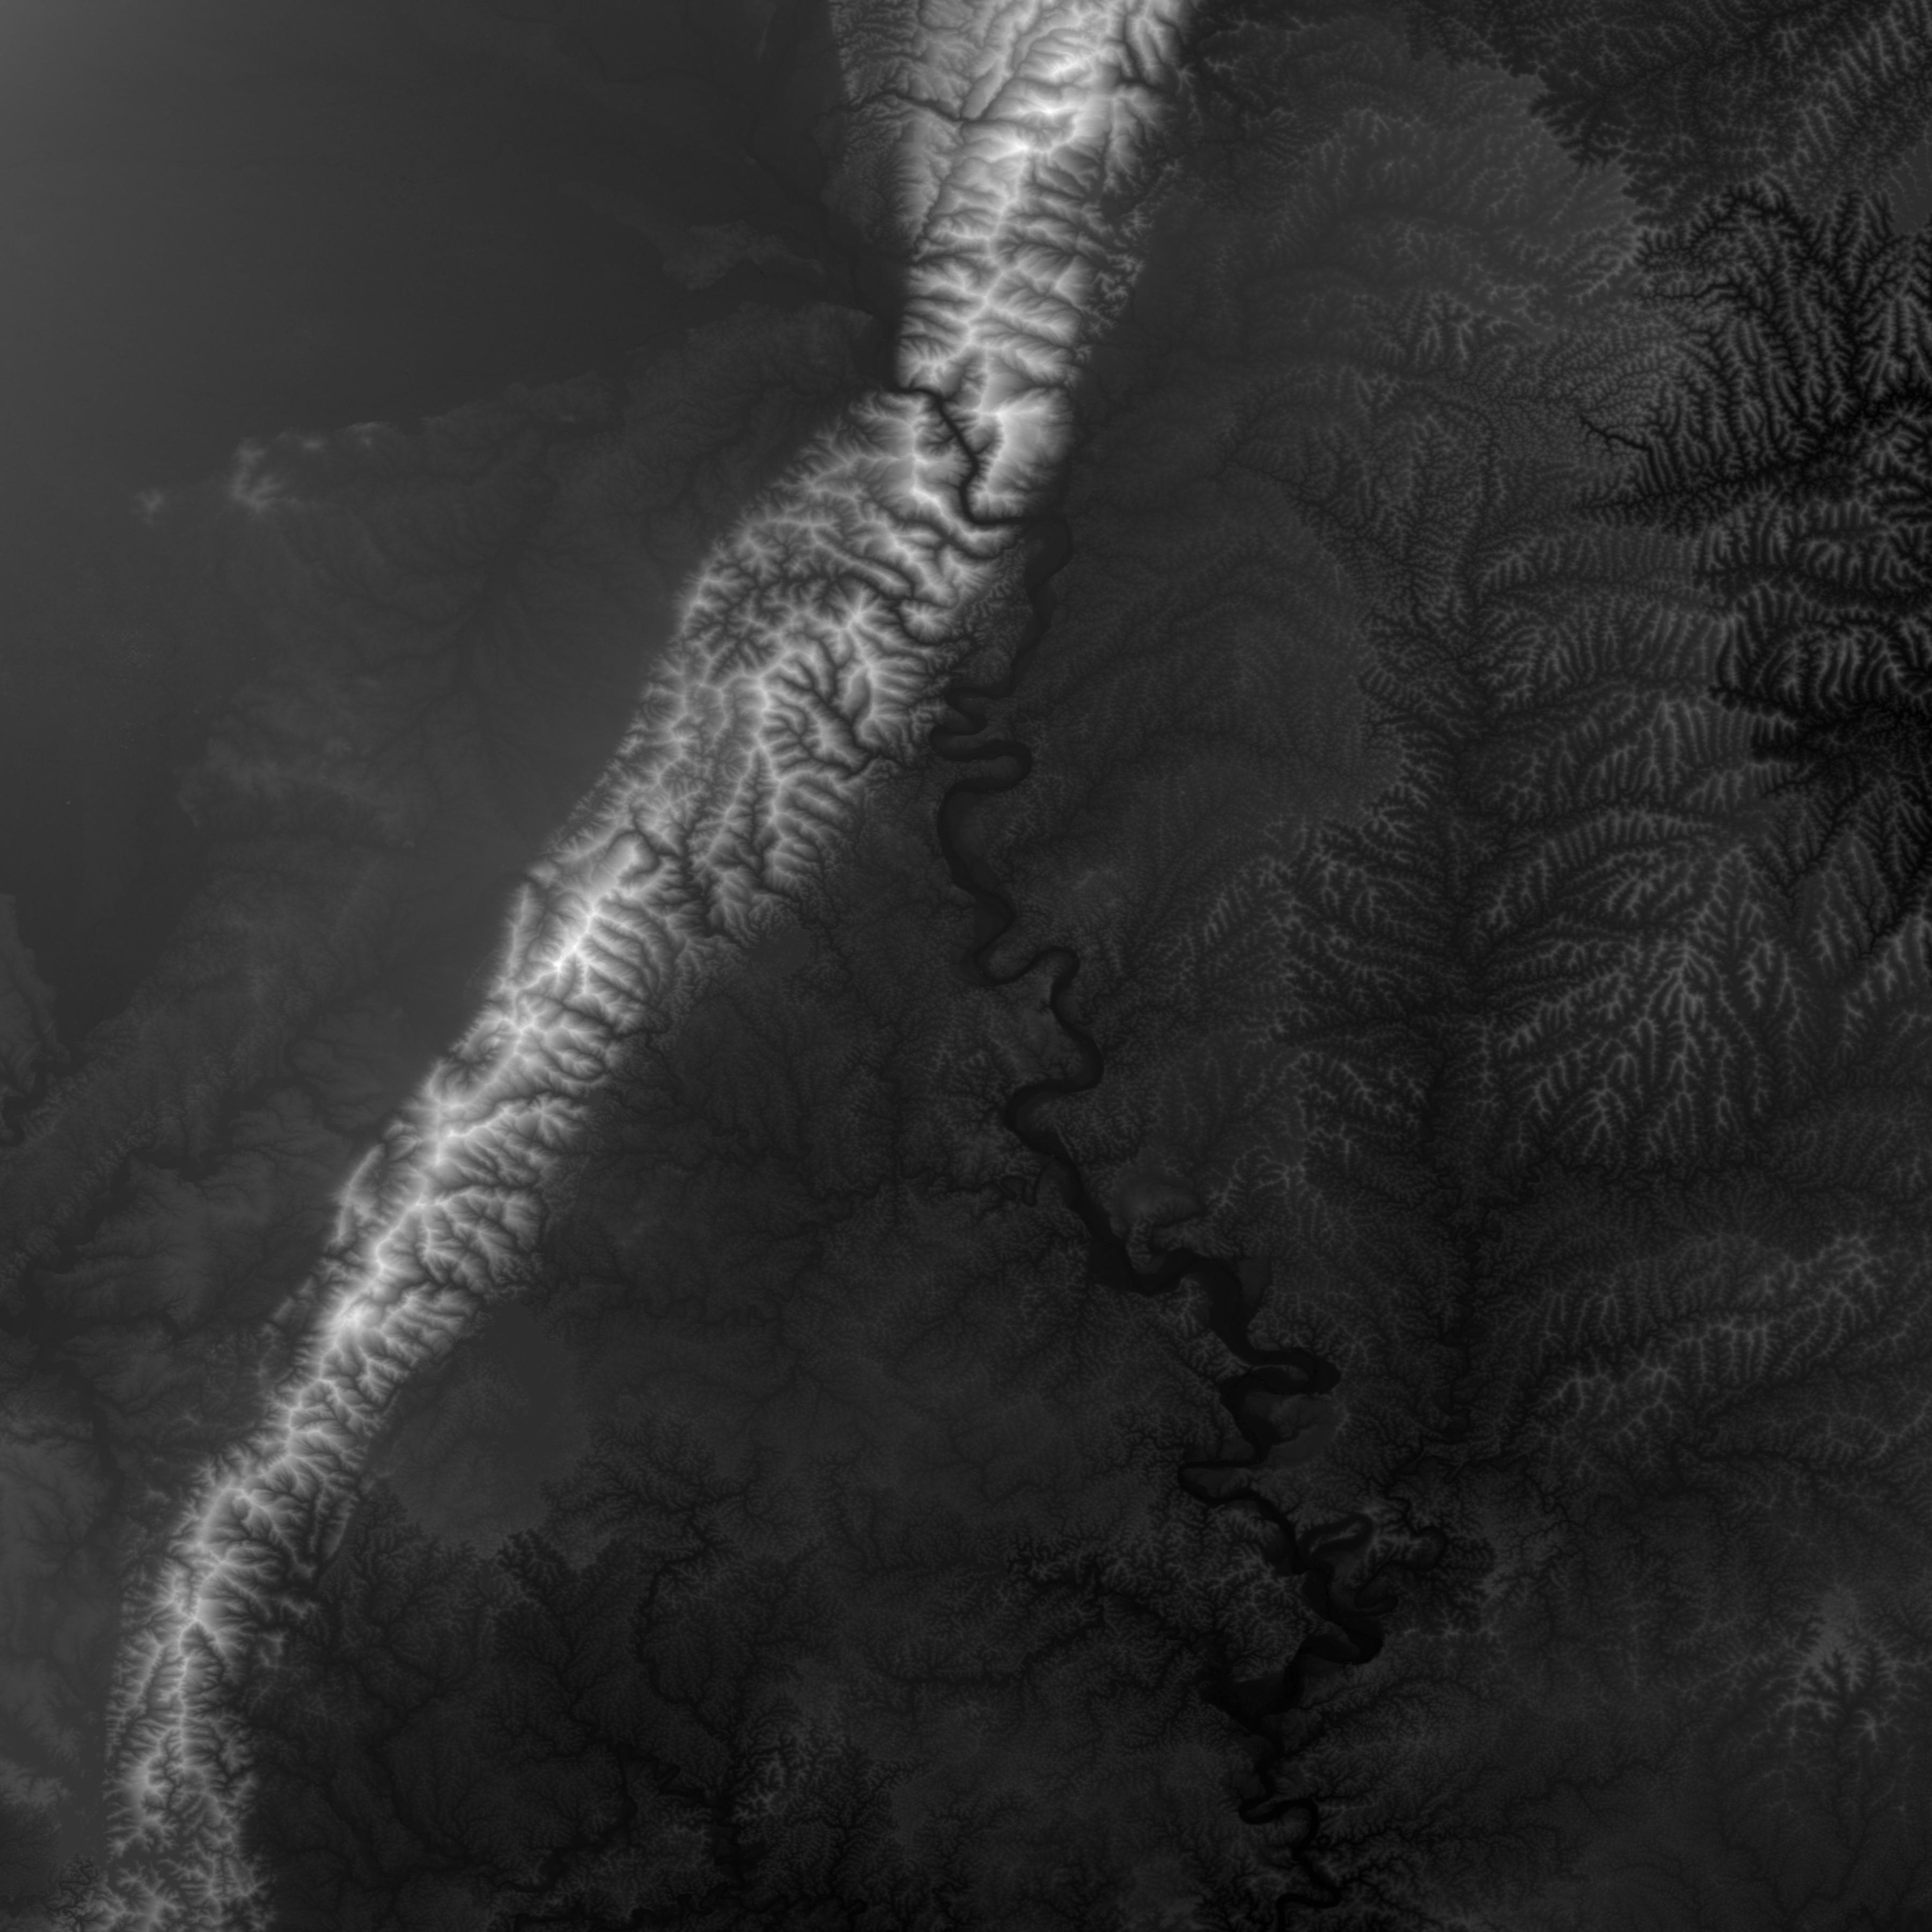
准备灰度图
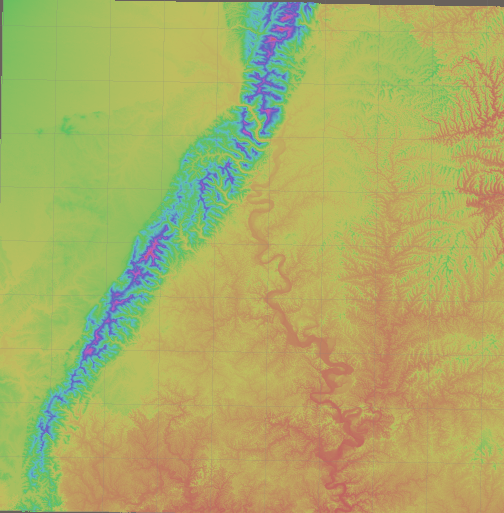
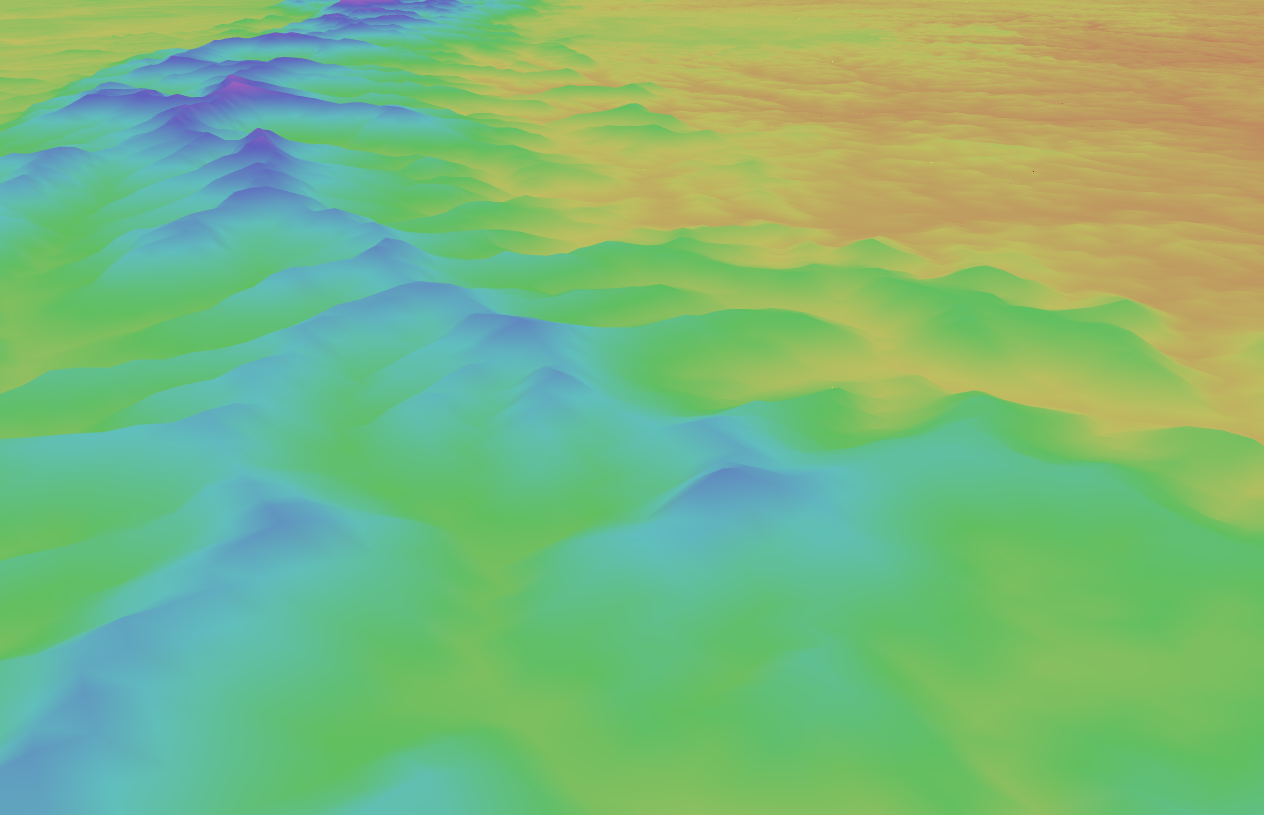
1、高程按比例对应hue色相(hsv)生成mesh效果
o.color = float4(hsv2rgb(float3(v.vertex.y/100.0, 0.5, 0.75)), 1.0);
unity shader
Shader "Unlit/vertexColor 1"

{

	Properties

	{

		_MainTex ("Texture", 2D) = "white" {}

	}

	SubShader

	{

		Tags { "RenderType"="Opaque" }

		LOD 100

		Pass

		{

			CGPROGRAM

			#pragma vertex vert

			#pragma fragment frag

			// make fog work

			#pragma multi_compile_fog

			#include "UnityCG.cginc"

			struct appdata

			{

				float4 vertex : POSITION;

				float2 uv : TEXCOORD0;

			};

			struct v2f

			{

				float2 uv : TEXCOORD0;

				UNITY_FOG_COORDS(1)

				float4 vertex : SV_POSITION;

				float4 color:COLOR;

			};

			sampler2D _MainTex;

			float4 _MainTex_ST;

			float3 hsv2rgb(float3 c)

			{

				float4 K = float4(1.0, 2.0 / 3.0, 1.0 / 3.0, 3.0);

				float3 p = abs(frac(c.xxx + K.xyz) * 6.0 - K.www);

				return c.z * lerp(K.xxx, saturate(p - K.xxx), c.y);

			}

			v2f vert (appdata v)

			{

				v2f o;

				o.vertex = UnityObjectToClipPos(v.vertex);

				o.uv = TRANSFORM_TEX(v.uv, _MainTex);

				o.color = float4(hsv2rgb(float3(v.vertex.y/100.0, 0.5, 0.75)), 1.0);

				UNITY_TRANSFER_FOG(o,o.vertex);

				return o;

			}

			fixed4 frag (v2f i) : SV_Target

			{

				// sample the texture

				//fixed4 col = tex2D(_MainTex, i.uv);

				fixed4 col = i.color;

				// apply fog

				UNITY_APPLY_FOG(i.fogCoord, col);

				return col;

			}

			ENDCG

		}

	}

}
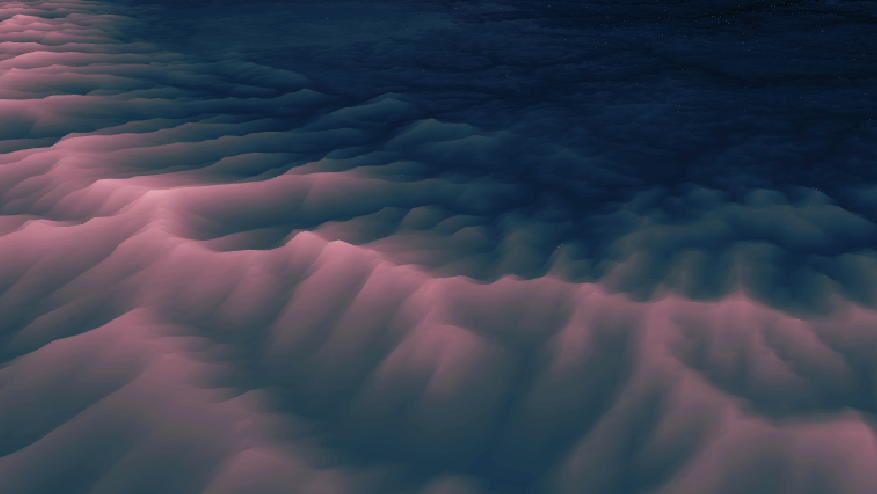
2、高程按比例对应色带生成mesh效果
准备色带图


unity shder
Shader "Unlit/colorRamp"

{

	Properties

	{

		_MainTex ("Texture", 2D) = "white" {}

	    _ColorRamp("Color Ramp", 2D) = "white" {}

	}

	SubShader

	{

		Tags { "RenderType"="Opaque" }

		LOD 100

		Pass

		{

			CGPROGRAM

			#pragma vertex vert

			#pragma fragment frag

			// make fog work

			#pragma multi_compile_fog

			#include "UnityCG.cginc"

			struct appdata

			{

				float4 vertex : POSITION;

				float2 uv : TEXCOORD0;

			};

			struct v2f

			{

				float2 uv : TEXCOORD0;

				UNITY_FOG_COORDS(1)

				float4 vertex : SV_POSITION;

				float2 colorUV : TEXCOORD1;

			};

			sampler2D _MainTex;

			sampler2D _ColorRamp;

			float4 _MainTex_ST;

			v2f vert (appdata v)

			{

				v2f o;

				o.vertex = UnityObjectToClipPos(v.vertex);

				o.uv = TRANSFORM_TEX(v.uv, _MainTex);

				UNITY_TRANSFER_FOG(o,o.vertex);

				o.colorUV =  float2(v.vertex.y / 100.0,0);

				return o;

			}

			fixed4 frag (v2f i) : SV_Target

			{

				fixed4 col = tex2D(_ColorRamp,i.colorUV);

				// apply fog

				UNITY_APPLY_FOG(i.fogCoord, col);

				return col;

			}

			ENDCG

		}

	}

}
mesh创建脚本
using System.Collections;

using System.Collections.Generic;

using UnityEngine;

public class meshCreate2 : MonoBehaviour {

    private Texture textureGray;//灰度图

    private Texture textureGrass;//草地贴图

    private int tGrayWidth = 0, tGrayHeight = 0;//灰度图的宽和高

    private bool bCreate = false;//是否完成创建

    private List<GameObject> meshList;//mesh集合

    private Texture2D texture2dGray;

    public float zScale = 100;//高度参数

    [Tooltip("传入mesh使用的材质")]

    public Material meshMaterial;

    void Start()

    {

        StartCoroutine(loadImage("IGray.png", (t) => textureGray = t));

        StartCoroutine(loadImage("IGrass.jpg", (t) => textureGrass = t));

        meshList = new List<GameObject>();

    }

    void Update()

    {

        if (textureGray != null && textureGrass != null)

        {

            if (bCreate == false)

            {

                tGrayWidth = textureGray.width;

                tGrayHeight = textureGray.height;

                meshMaterial.mainTexture = textureGrass;//设置材质贴图

                //mesh顶点数目最大65000,则取mes为250*250=62500

                int xNum = 1 + tGrayWidth / 250;//x方向mesh个数

                int zNum = 1 + tGrayHeight / 250; //z方向mesh个数

                texture2dGray = (Texture2D)textureGray;

                //根据灰度图创建mesh

                for (int i = 0; i < xNum; i++)

                {

                    for (int j = 0; j < zNum; j++)

                    {

                        if (i < xNum - 1 && j < zNum - 1)

                        {

                            meshList.Add(

                                createMesh("meshX" + i.ToString() + "Z" + j.ToString(), 251, 251,

                                i * new Vector3(2500, 0, 0) + j * new Vector3(0, 0,2500),

                                (i + 1) * new Vector3(2500, 0, 0) + (j + 1) * new Vector3(0, 0,2500) + new Vector3(10,  0,10),

                                i * new Vector2(250, 0) + j * new Vector2(0, 250),

                                (i + 1) * new Vector2(250, 0) + (j + 1) * new Vector2(0, 250) + new Vector2(1, 1)));

                        }

                        else if (i == xNum - 1 && j < zNum - 1)

                        {

                            meshList.Add(createMesh("meshX" + i.ToString() + "Z" + j.ToString(), tGrayWidth % 250, 251,

                            i * new Vector3(2500, 0, 0) + j * new Vector3(0, 0,2500),

                            i * new Vector3(2500, 0, 0) + new Vector3(10 * (tGrayWidth % 250),  0,10) + (j + 1) * new Vector3(0, 0,2500),

                            i * new Vector2(250, 0) + j * new Vector2(0, 250),

                            i * new Vector2(250, 0) + new Vector2(tGrayWidth % 250, 1) + (j + 1) * new Vector2(0, 250)));

                        }

                        else if (i < xNum - 1 && j == zNum - 1)

                        {

                            meshList.Add(createMesh("meshX" + i.ToString() + "Z" + j.ToString(), 251, tGrayHeight % 250,

                              i * new Vector3(2500, 0, 0) + j * new Vector3(0, 0,2500),

                             (i + 1) * new Vector3(2500, 0, 0) + j * new Vector3(0, 0,2500) + new Vector3(10, 0, 10 * (tGrayHeight % 250)),

                              i * new Vector2(250, 0) + j * new Vector2(0, 250),

                             (i + 1) * new Vector2(250, 0) + j * new Vector2(0, 150) + new Vector2(1, tGrayHeight % 250)));

                        }

                        else if (i == xNum - 1 && j == zNum - 1)

                        {

                            meshList.Add(createMesh("meshX" + i.ToString() + "Z" + j.ToString(), tGrayWidth % 250, tGrayHeight % 250,

                             i * new Vector3(2500, 0, 0) + j * new Vector3(0, 0, 2500),

                             i * new Vector3(2500, 0, 0) + j * new Vector3(0, 0, 2500) + new Vector3(10 * (tGrayWidth % 250),  0, 10 * (tGrayHeight % 250)),

                             i * new Vector2(250, 0) + j * new Vector2(0, 250),

                             i * new Vector2(250, 0) + j * new Vector2(0, 250) + new Vector2(tGrayWidth % 250, tGrayHeight % 250)));

                        }

                    }

                }

                bCreate = true;

            }

        }

    }

    //加载图片

    IEnumerator loadImage(string imagePath, System.Action<Texture> action)

    {

        WWW www = new WWW("file://" + Application.streamingAssetsPath + "/" + imagePath);

        yield return www;

        if (www.error == null)

        {

            action(www.texture);

        }

    }

    /// <summary>

    ///创建mesh

    /// </summary>

    /// <param name="meshName">mesh名称</param>

    /// <param name="row">行数</param>

    /// <param name="col">列数</param>

    /// <param name="minPoint">最小点位置</param>

    /// <param name="maxPoint">最大点位置</param>

    /// <param name="minImgPosition">最小点灰度图位置</param>

    /// <param name="maxImgPosition">最大点灰度图位置</param>

    /// <returns></returns>

    ///

    private GameObject createMesh(string meshName, int row, int col, Vector3 minPoint, Vector3 maxPoint, Vector2 minImgPosition, Vector2 maxImgPosition)

    {

        GameObject meshObject = new GameObject(meshName);

        int verticeNum = row * col;

        Vector3[] vertices = new Vector3[verticeNum];//顶点数组大小

        int[] triangles = new int[verticeNum * 3 * 2];//三角集合数组,保存顶点索引

                                                      // Vector3[] normals = new Vector3[verticeNum];//顶点法线数组大小

        Vector2[] uvs = new Vector2[verticeNum];

        float rowF = (float)row;

        float colF = (float)col;

        Vector3 xStep = new Vector3((maxPoint.x - minPoint.x) / rowF, 0, 0);

        Vector3 zSetp = new Vector3(0,  0, (maxPoint.z - minPoint.z) / colF);

        int k = 0;

        for (int i = 0; i < row; i++)

        {

            for (int j = 0; j < col; j++)

            {

                float tempZ = texture2dGray.GetPixel((int)minImgPosition.x + i, (int)minImgPosition.y + j).grayscale;

                vertices[i + j * row] = minPoint + xStep * i + zSetp * j + new Vector3(0, tempZ * zScale,0);

                uvs[i + j * row] = new Vector2((float)i / rowF, (float)j / colF);

                if (j < col - 1 && i < row - 1)

                {

                    triangles[k++] = j * row + i;

                    triangles[k++] = j * row + i + row;

                    triangles[k++] = j * row + i + 1;

                    triangles[k++] = j * row + i + row;

                    triangles[k++] = j * row + i + row + 1;

                    triangles[k++] = j * row + i + 1;

                }

            }

        }

        Mesh mesh = new Mesh();

        mesh.vertices = vertices;

        mesh.triangles = triangles;

        // mesh.normals = normals;

        mesh.uv = uvs;

        mesh.RecalculateBounds();

        mesh.RecalculateNormals();

        meshObject.AddComponent<MeshFilter>();

        meshObject.AddComponent<MeshRenderer>();

        meshObject.GetComponent<MeshFilter>().mesh = mesh;

        meshObject.GetComponent<MeshRenderer>().material = meshMaterial;

        return meshObject;

    }

}
相机漫游控制脚本
using System.Collections;

using System.Collections.Generic;

using UnityEngine;

public class MyCameraControl : MonoBehaviour

{

    public Camera mainCam;

    //旋转变量;

    private float m_deltX = 0f;

    private float m_deltY = 0f;

    //缩放变量;

    private float m_distance = 10f;

    private float m_mSpeed = 5f;

    //移动变量;

    private Vector3 m_mouseMovePos = Vector3.zero;

    //平移速度

    float Speed = 200f;

    void Start()

    {

        //  transform.localPosition = new Vector3(0, m_distance, 0);

    }

    void Update()

    {

        if (Input.GetKey(KeyCode.W))

        {

            transform.Translate(Vector3.forward * Time.deltaTime * Speed);

        }

        if (Input.GetKey(KeyCode.A))

        {

            transform.Translate(Vector3.left * Time.deltaTime * Speed);

        }

        if (Input.GetKey(KeyCode.S))

        {

            transform.Translate(Vector3.forward * Time.deltaTime * -Speed);

        }

        if (Input.GetKey(KeyCode.D))

        {

            transform.Translate(Vector3.left * Time.deltaTime * -Speed);

        }

        //鼠标左键控制旋转

        if (Input.GetMouseButton(0))

        {

            m_deltX += Input.GetAxis("Mouse X") * m_mSpeed;

            m_deltY -= Input.GetAxis("Mouse Y") * m_mSpeed;

            m_deltX = ClampAngle(m_deltX, -360, 360);//旋转幅度 左右

            m_deltY = ClampAngle(m_deltY, -70, 70);//旋转幅度 上下

            transform.rotation = Quaternion.Euler(m_deltY, m_deltX, 0);

        }

        //鼠标滑轮缩放

        if (Input.GetAxis("Mouse ScrollWheel") != 0)

        {

            //自由缩放方式;

            m_distance = Input.GetAxis("Mouse ScrollWheel") * 10f;

            transform.localPosition = transform.position + transform.forward * m_distance;

        }

        //相机位置跳到点击处;

        if (Input.GetMouseButtonDown(1)) //0-左键 1-右键 2-滑轮

        {

            Ray ray = mainCam.ScreenPointToRay(Input.mousePosition);//从摄像机发出到点击坐标的射线

            RaycastHit hitInfo;

            if (Physics.Raycast(ray, out hitInfo))

            {

                m_mouseMovePos = hitInfo.point;

                transform.localPosition = m_mouseMovePos;

            }

        }

    }

    float ClampAngle(float angle, float minAngle, float maxAgnle)

    {

        if (angle <= -360)

            angle += 360;

        if (angle >= 360)

            angle -= 360;

        return Mathf.Clamp(angle, minAngle, maxAgnle);

    }

}
本文链接
https://www.cnblogs.com/gucheng/p/10945429.html
unity 读取灰度图生成按高程分层设色地形模型的更多相关文章
- unity读取灰度图生成三维地形mesh
准备灰度图 IGray.png及草地贴图 IGrass.jpg ,放入Assets下StreamingAssets文件夹中. 创建空材质,用作参数传入脚本. 脚本如下,挂载并传入材质球即可 ...
- unity 读取灰度图生成三维地形并贴图卫星影像
从 https://earthexplorer.usgs.gov/ 下载高程数据 从谷歌地球上保存对应地区卫星图像 从灰度图创建地形模型,并将卫星影像作为贴图 using System.Collect ...
- unity读取灰度图生成等值线图
准备灰度图 grayTest.png,放置于Assets下StreamingAssets文件夹中. 在场景中添加RawImage用于显示最后的等值线图. 生成等值线的过程,使用Marching ...
- opengl读取灰度图生成三维地形并添加光照
转自:https://www.cnblogs.com/gucheng/p/10152889.html 准备第三方库 glew.freeglut.glm.opencv 准备一张灰度图 最终效果 代码如下 ...
- ue4读取灰度图生成三维地形mesh
转自:https://www.cnblogs.com/gucheng/p/10116857.html 新建ue c++工程. 在Build.cs中添加"ProceduralMeshCompo ...
- opengl读取灰度图生成三维地形
准备第三方库 glew.freeglut.glm.opencv 准备灰度图片和草地贴图 最终效果 代码包括主程序源文件mainApp.cpp.顶点着色器shader.vs.片元着色器shader.fs ...
- blender导入灰度图生成地形模型
安装软件 在此处下载blender并安装. 添加平面 1.打开blender,右键删除初始的立方体. 2.shift+a选择平面添加进场景: 3.按下s键鼠标拖动调节平面大小确定后按下鼠标左键: 4. ...
- unity 读取excel表 生成asset资源文件
做unity 项目也有一段时间了,从unity项目开发和学习中也遇到了很多坑,并且也从中学习到了很多曾经未接触的领域.项目中的很多功能模块,从今天开始把自己的思路和代码奉上给学渣们作为一份学习的资料. ...
- c语言实现灰度图转换为二值图
将上篇得到的灰度图转换为二值图,读取像素数据,低于某一值置0,否则设置为255,为得到更好的效果不同图片应采用不同的值 /* 2015年6月2日11:16:22 灰度图转换为二值图 blog:http ...
随机推荐
- linux 优化
如何优化Linux系统? 1)不用root超级用户登录,添加普通用户,通过sudo授权管理:/etc/sudoers 2)更改默认的远程连接ssh服务端口号,禁止root用户远程登录到服务器:/etc ...
- P4118 [Ynoi2016]炸脖龙I
思路:扩展欧拉定理 提交:\(\geq5\)次 错因:快速幂时刚开始没有判断\(a\)是否大于\(p\) 题解: 用树状数组维护差分,查询时暴力从左端点的第一个数向右端点递归,若递归时发现指数变为\( ...
- 001_linuxC++之_类的引入
(一) C++类的引入,图片的程序比较好看,文中程序不贴出来 (二) 知识点 1. 成员函数的存取权限:公有的(public),保护的(protectd),私有的(private) 2. 第27行th ...
- MySQL Group Replication-MGR集群简介
简介 MySQL Group Replication(简称MGR)字面意思是mysql组复制的意思,但其实他是一个高可用的集群架构,暂时只支持mysql5.7和mysql8.0版本. 是MySQL官方 ...
- ueditor百度编辑器destoon的word图片转存功能
图片的复制无非有两种方法,一种是图片直接上传到服务器,另外一种转换成二进制流的base64码目前限chrome浏览器使用首先以um-editor的二进制流保存为例:打开umeditor.js,找到UM ...
- python define function
>>> def square(x): ... 'calculates the square of the number x.' ... return x*x ... >> ...
- 国庆集训Day1
T1 divide 题意: 有\(n\)个数 \(a_1, a_2,..., a_n\) 有m个数\(b_1, b_2,..., b_n\) 令\(a = a_1\times a_2\,\times ...
- nodejs基础(回调函数、模块、事件、文件读写、目录的创建与删除)
node官网:http://nodejs.cn/ 今天想看看node的视频,对node进一步了解, 1.我们可以从官网下载node到自己的电脑上,今天了解到node的真正概念,node时javascr ...
- C语言学习笔记7-字符串
本系列文章由jadeshu编写,转载请注明出处.http://blog.csdn.net/jadeshu/article/details/50752405 作者:jadeshu 邮箱: jades ...
- 1-7HSB色彩模式
http://www.missyuan.com/thread-350721-1-1.html HSB色彩模式色相hue.饱和度saturation.明度brightness 在HSB模式中,S和B的取 ...