WPF一步步实现完全无边框自定义Window(附源码)
在我们设计一个软件的时候,有很多时候我们需要按照美工的设计来重新设计整个版面,这当然包括主窗体,因为WPF为我们提供了强大的模板的特性,这就为我们自定义各种空间提供了可能性,这篇博客主要用来介绍如何自定义自己的Window,在介绍整个写作思路之前,我们来看看最终的效果。 
图一 自定义窗体主界面
这里面的核心就是重写Window的Template,针对整个开发过程中出现的问题我们再来一步步去剖析,首先要看看我们定义好的样式
<ResourceDictionary xmlns="http://schemas.microsoft.com/winfx/2006/xaml/presentation"

                    xmlns:x="http://schemas.microsoft.com/winfx/2006/xaml"

                    xmlns:ui="clr-namespace:CustomWPFWindow.Controls"

                    xmlns:local="clr-namespace:CustomWPFWindow.Themes">

    <Style TargetType="{x:Type Window}" x:Key="ShellWindow">

        <Setter Property="Background" Value="#2B5A97"></Setter>

        <Setter Property="WindowStyle" Value="None"></Setter>

        <Setter Property="AllowsTransparency" Value="False"></Setter>

        <Setter Property="Template" >

            <Setter.Value>

                <ControlTemplate TargetType="Window">

                    <Border BorderBrush="#333" BorderThickness="1" Background="#eee">

                        <Grid>

                            <Grid.RowDefinitions>

                                <RowDefinition Height="Auto"></RowDefinition>

                                <RowDefinition Height="*"></RowDefinition>

                            </Grid.RowDefinitions>

                            <ui:WindowTopArea Background="#2B579A">

                                <Grid HorizontalAlignment="Stretch" VerticalAlignment="Stretch">

                                    <StackPanel Orientation="Horizontal" Margin="5" HorizontalAlignment="Left" VerticalAlignment="Center">

                                        <Image Source="/CustomWPFWindow;component/Resources/Images/application.png"></Image>

                                        <TextBlock Text="标题" Foreground="White" Margin="5 2" HorizontalAlignment="Center" VerticalAlignment="Center"></TextBlock>

                                    </StackPanel>

                                    <StackPanel Orientation="Horizontal" HorizontalAlignment="Right">

                                        <ui:WindowButtonMin ToolTip="最小化">

                                            <Image Source="/CustomWPFWindow;component/Resources/Images/min.png" Width="16" Height="16"

                                              HorizontalAlignment="Center" VerticalAlignment="Center" RenderOptions.BitmapScalingMode="NearestNeighbor"></Image>

                                        </ui:WindowButtonMin>

                                        <ui:WindowButtonMax x:Name="max" ToolTip="最大化">

                                            <Image Source="/CustomWPFWindow;component/Resources/Images/max.png" Width="16" Height="16"

                                           HorizontalAlignment="Center" VerticalAlignment="Center" RenderOptions.BitmapScalingMode="NearestNeighbor"></Image>

                                        </ui:WindowButtonMax>

                                        <ui:WindowButtonNormal x:Name="normal" ToolTip="向下还原">

                                            <Image Source="/CustomWPFWindow;component/Resources/Images/normal.png" Width="16" Height="16"

                                           HorizontalAlignment="Center" VerticalAlignment="Center" RenderOptions.BitmapScalingMode="NearestNeighbor"></Image>

                                        </ui:WindowButtonNormal>

                                        <ui:WindowButtonClose x:Name="windowclose" ToolTip="关闭">

                                            <Image  Source="/CustomWPFWindow;component/Resources/Images/close.png" Width="16" Height="16"

                                           HorizontalAlignment="Center" VerticalAlignment="Center" RenderOptions.BitmapScalingMode="NearestNeighbor">

                                            </Image>

                                        </ui:WindowButtonClose>

                                    </StackPanel>

                                </Grid>

                            </ui:WindowTopArea>

                            <AdornerDecorator Grid.Row="1">

                                <ContentPresenter></ContentPresenter>

                            </AdornerDecorator>

                        </Grid>

                    </Border>

                    <ControlTemplate.Triggers>

                        <Trigger Property="WindowState" Value="Maximized">

                            <Setter Property="Visibility" Value="visible" TargetName="normal"></Setter>

                            <Setter Property="Visibility" Value="collapsed" TargetName="max"></Setter>

                        </Trigger>

                        <Trigger Property="WindowState" Value="Normal">

                            <Setter Property="Visibility" Value="collapsed" TargetName="normal"></Setter>

                            <Setter Property="Visibility" Value="visible" TargetName="max"></Setter>

                        </Trigger>

                    </ControlTemplate.Triggers>

                </ControlTemplate>

            </Setter.Value>

        </Setter>

    </Style>

</ResourceDictionary>
这里面要设置几个最核心的属性,第一个就是WindowStyle要设置成None,否则就无法进行自定义的设置按键功能区,另外一个就是是否设置AllowsTransparency属性的问题,我们分别看一下设置和不设置的效果。
1 设置属性为false时:
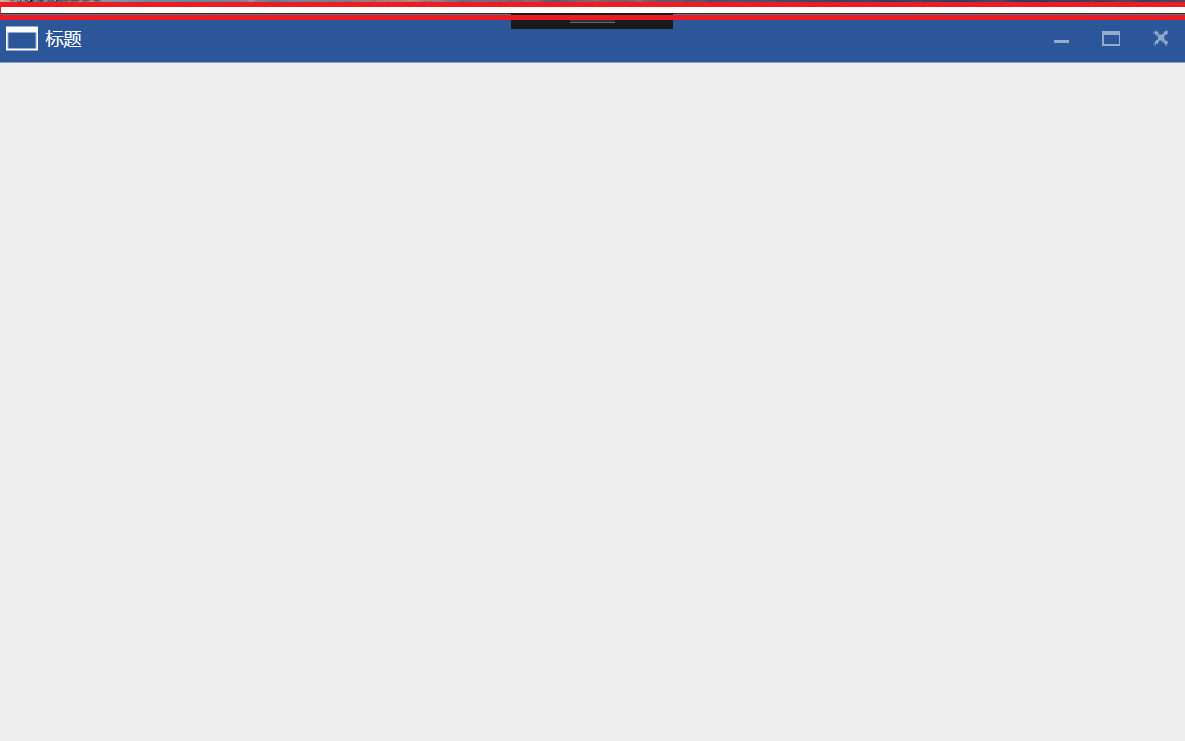
图二 设置AllowsTransparency=“False”时主窗体样式
我们会发现此时在窗体的正上方出现一块白色的矩形区域,这块区域无论你怎么重写Window的样式,它都是一直存在的,但是此时整个窗体都是允许你进行拉伸的操作,但是此时我们会发现这样不是真正地无边框的Window的样式,整个窗体上面的白色区域都是存在的,查阅相关的资料的时候,我们会发现这一块是整个窗体上面部分的拉伸的区域,是无法通过重写模板去去掉它的,那么该怎样真正地去实现无边框的样式呢?
2 设置属性为true时:
当我们更改窗体的样式,设置窗体可以允许为透明窗体的时候,我们是否可以实现上面的效果呢?当我们设置这个属性为true的时候,我们发现能实现图一所示的效果,但是整个窗体都不能够进行拉伸了,那么这个怎么办呢?其实这个也可以理解,当我们设置Window窗体允许透明的时候,所有和窗体相关的事件都会消失了,这个是必然的,那么我们就不得不去重写所有的这些事件,下面我们将贴出整个窗体重写后的核心代码,并就里面的核心部分来进行深入的分析。
#region 窗体大小变化
public void SetWindowResizer()
{
Window win = Window.GetWindow(this);
ResizePosition ResPosition = ResizePosition.None;
int Resizer = 5;
win.MouseMove += new MouseEventHandler(
delegate (object target, MouseEventArgs args)
{
try
{
//do resize
if (win.WindowState == WindowState.Normal)
{
Point MS = args.GetPosition(win);
if (args.LeftButton == MouseButtonState.Pressed)
{
Win32.POINT pos = new Win32.POINT();
Win32.GetCursorPos(out pos);
#region 改变窗体大小
switch (ResPosition)
{
case ResizePosition.Left:
//左边
Mouse.SetCursor(Cursors.SizeWE);
Point transPointLeft = win.PointToScreen(new Point(0, 0));
win.Left += pos.X - transPointLeft.X;
win.Width += transPointLeft.X - pos.X;
break;
case ResizePosition.Right:
//右边
Mouse.SetCursor(Cursors.SizeWE);
Point transPointRight = win.PointToScreen(new Point(win.Width, 0));
win.Width += pos.X - transPointRight.X;
break;
case ResizePosition.Top:
//顶部
Mouse.SetCursor(Cursors.SizeNS);
Point transPointTop = win.PointToScreen(new Point(0, 0));
win.Top += pos.Y - transPointTop.Y;
win.Height += transPointTop.Y - pos.Y;
break;
case ResizePosition.Bottom:
//底部
Mouse.SetCursor(Cursors.SizeNS);
Point transPointBottom = win.PointToScreen(new Point(0, win.Height));
win.Height += (pos.Y - transPointBottom.Y);
break;
case ResizePosition.TopLeft:
//左上
Mouse.SetCursor(Cursors.SizeNWSE);
Point transPointTopLeft = win.PointToScreen(new Point(0, 0));
win.Left += pos.X - transPointTopLeft.X;
win.Top += pos.Y - transPointTopLeft.Y;
win.Width += transPointTopLeft.X - pos.X;
win.Height += transPointTopLeft.Y - pos.Y;
break;
case ResizePosition.BottomLeft:
//左下
Mouse.SetCursor(Cursors.SizeNESW);
Point transPointBottomLeft = win.PointToScreen(new Point(0, win.Height));
win.Left += pos.X - transPointBottomLeft.X;
win.Width += transPointBottomLeft.X - pos.X;
win.Height += pos.Y - transPointBottomLeft.Y;
break;
case ResizePosition.TopRight:
//右上
Mouse.SetCursor(Cursors.SizeNESW);
Point transPointTopRight = win.PointToScreen(new Point(win.Width, 0));
win.Top += pos.Y - transPointTopRight.Y;
win.Width = transPointTopRight.Y - pos.X;
win.Height = transPointTopRight.Y - pos.Y;
break;
case ResizePosition.BottomRight:
//右下
Mouse.SetCursor(Cursors.SizeNWSE);
Point transPointBottomRight = win.PointToScreen(new Point(win.Width, win.Height));
win.Width += pos.X - transPointBottomRight.X;
win.Height += pos.Y - transPointBottomRight.Y;
break;
case ResizePosition.None:
default:
Mouse.SetCursor(Cursors.Arrow);
break;
}
#endregion
}
else if (MS.X <= Resizer + 5 && MS.Y <= Resizer + 5)
{
//左上 (不执行)
Mouse.SetCursor(Cursors.SizeNWSE);
ResPosition = ResizePosition.TopLeft;
}
else if (MS.X <= Resizer && MS.Y >= win.ActualHeight - Resizer)
{
//左下
Mouse.SetCursor(Cursors.SizeNESW);
ResPosition = ResizePosition.BottomLeft;
}
else if (MS.X >= win.ActualWidth - Resizer - 5 && MS.Y <= Resizer + 5)
{
//右上(不执行)
Mouse.SetCursor(Cursors.SizeNESW);
ResPosition = ResizePosition.TopRight;
}
else if (MS.X >= win.ActualWidth - Resizer && MS.Y >= win.ActualHeight - Resizer)
{
//右下
Mouse.SetCursor(Cursors.SizeNWSE);
ResPosition = ResizePosition.BottomRight;
}
else if (MS.X <= Resizer)
{
//左边
Mouse.SetCursor(Cursors.SizeWE);
ResPosition = ResizePosition.Left;
}
else if (MS.Y <= Resizer + 5)
{
//顶部(不执行)
Mouse.SetCursor(Cursors.SizeNS);
ResPosition = ResizePosition.Top;
}
else if (MS.X >= win.ActualWidth - Resizer)
{
//右边
Mouse.SetCursor(Cursors.SizeWE);
ResPosition = ResizePosition.Right;
}
else if (MS.Y >= win.ActualHeight - Resizer)
{
//底部
Mouse.SetCursor(Cursors.SizeNS);
ResPosition = ResizePosition.Bottom;
}
else
{
//无
Mouse.SetCursor(Cursors.Arrow);
ResPosition = ResizePosition.None;
}
}
}
catch
{
ResPosition = ResizePosition.None;
win.ReleaseMouseCapture();
}
args.Handled = CaptureMouse;
}
);
win.MouseLeftButtonDown += new MouseButtonEventHandler(
delegate (object target, MouseButtonEventArgs args)
{
if (win.WindowState == WindowState.Normal)
{
//获取当前鼠标点击点相对于Dvap.Shell窗体的位置
Point pos = args.GetPosition(win);
if (ResPosition != ResizePosition.None)
{
CaptureMouse = win.CaptureMouse();
}
args.Handled = CaptureMouse;
}
}
);
win.MouseLeftButtonUp += new MouseButtonEventHandler(
delegate (object target, MouseButtonEventArgs args)
{
if (win.WindowState == WindowState.Normal)
{
ResPosition = ResizePosition.None;
if (CaptureMouse)
{
win.ReleaseMouseCapture();
CaptureMouse = false;
}
args.Handled = CaptureMouse;
}
}
);
}
#endregion
这段代码还是很容易理解的,就是为整个窗体添加MouseLeftButtonDown、MouseMove、MouseLeftButtonUp这个事件,这里需要特别注意的就是,我们获取屏幕的坐标的方式是调用Win32的API GetCursorPos来获取当前的屏幕坐标的位置,但是我们在操作的时候获取到的是主窗体的坐标位置,这两个位置该如何进行转化呢?这个是核心,上面的代码是经过反复进行验证后的代码,就具体的拉伸过程我们再来做进一步的分析。
2.1 首先我们要设置一个进行拉伸的区域,这里我们设置Resizer为5个像素,这个距离内作为窗体拉伸的识别区域。
2.2 首先在MouseLeftButtonDown事件中我们需要窗体能够捕获到鼠标的位置,这里我们使用win.CaptureMouse()方法来捕获鼠标的输入。
2.3 最重要的部分都是在MouseMove事件中完成的,首先我们需要通过Point MS = args.GetPosition(win)来获取到当前鼠标相对于主窗体win的位置,记住这个获取到的位置是相对于主窗体的而不是相对于屏幕的坐标位置的。然后我们判断当前鼠标左键是否按下来将整个过程分为两个部分,按下的话进行窗体的拉伸操作,没有按下的话进行窗体的初始化状态操作,通过获取到的MS的坐标位置来初始化操作对象,并且设置当前鼠标的光标的样式,这个是非常重要的一个过程的,只有完成了这个过程才能进行下面的操作。
2.4 当鼠标左键按下时,我们将会看到通过3步骤进行初始化的状态我们来改变窗体的大小以及位置信息,在这一步骤中需要特别注意的是,注意坐标系的转换,比如向右拉伸的时候,我们首先获取到的是通过GetCursorPos来获取到的相对于屏幕的位置信息,那么当我们将窗体向右拉伸时,窗体移动的距离应该是窗体的Width对应的点转化为屏幕坐标点后再与通过GetCursorPos来获取到的相对于屏幕的位置信息做差运算的结果,切不可直接将屏幕坐标位置减去窗体当前的位置,因为窗体获取到的Width以及其它位置信息和屏幕的坐标系是不统一的,无法直接做差运算,这里读者也可以改动代码进行尝试,所以这里就有了PointToScreen和PointFromScreen这两个坐标转换函数的用武之地了,比如我们拉伸窗体的右侧距离时,我们通过 Point transPointRight = win.PointToScreen(new Point(win.Width, 0))这句代码将当前主窗体最右侧的位置首先转成相对于屏幕坐标系的位置,然后用两个相同坐标系的两个坐标位置进行做差运算,从而改变窗体的Left、Top、Width、Height属性,这个是需要我们去一点点分析的,后面的每一个过程都与此类似,这个过程是整个窗体拉伸变换的关键。
2.5 最后一个需要注意的地方就是窗体拉伸的时候,需要考虑窗体是否设置了MinWidt、MinHeight这些属性,当超过这些属性的时候窗体是无法进行拉伸操作的。
3 通过Win32的API函数设置窗体的无边框透明属性。
在进一步分析代码时我们发现可以通过设置SetWindowLong来设置窗体的属性,这个函数可以在设置AllowsTransparency=“False”的状态下仍然改变窗体的无边框样式,下面贴出具体代码,具体每个参数的含义需要参考具体的文档。
private void SetWindowNoBorder()

        {

            Window win = Window.GetWindow(this);

            // 获取窗体句柄

            IntPtr hwnd = new System.Windows.Interop.WindowInteropHelper(win).Handle;

            // 获得窗体的 样式

            long oldstyle = Win32.GetWindowLong(hwnd, Win32.GWL_STYLE);

            // 更改窗体的样式为无边框窗体

            Win32.SetWindowLong(hwnd, Win32.GWL_STYLE, (int)(oldstyle & ~Win32.WS_CAPTION));

        }
4 最后需要提及的是一个鼠标移入关闭按钮时的一个动画状态,通过这段代码我们可以学习一下该如何在Trigger中设置动画属性。
<Style TargetType="{x:Type controls:WindowButtonClose}">

        <Setter Property="Margin" Value="0 0 1 0"></Setter>

        <Setter Property="Template">

            <Setter.Value>

                <ControlTemplate TargetType="{x:Type controls:WindowButtonClose}">

                    <Border  x:Name="bg" Background="Transparent" Width="32" Height="32">

                        <ContentPresenter x:Name="content" HorizontalAlignment="Center" VerticalAlignment="Center"  Opacity="0.5" RenderTransformOrigin="0.5 0.5">

                            <ContentPresenter.RenderTransform>

                                <RotateTransform x:Name="angleRotateTransform" ></RotateTransform>

                            </ContentPresenter.RenderTransform>

                        </ContentPresenter>

                    </Border>

                    <ControlTemplate.Triggers>

                        <Trigger Property="IsMouseOver" Value="true">

                            <Setter Property="Background" Value="Red" TargetName="bg"></Setter>

                            <Setter Property="Opacity" Value="1" TargetName="content"></Setter>

                            <Trigger.EnterActions>

                                <BeginStoryboard>

                                    <Storyboard>

                                        <DoubleAnimation Storyboard.TargetName="angleRotateTransform" Storyboard.TargetProperty="Angle"

                                                         From="0" To="90" Duration="0:0:0.5">

                                            <DoubleAnimation.EasingFunction>

                                                <BackEase EasingMode="EaseInOut"></BackEase>

                                            </DoubleAnimation.EasingFunction>

                                        </DoubleAnimation>

                                    </Storyboard>

                                </BeginStoryboard>

                            </Trigger.EnterActions>

                            <Trigger.ExitActions>

                                <BeginStoryboard>

                                    <Storyboard>

                                        <DoubleAnimation Storyboard.TargetName="angleRotateTransform" Storyboard.TargetProperty="Angle"

                                                         From="90" To="0" Duration="0:0:0.5">

                                            <DoubleAnimation.EasingFunction>

                                                <BackEase EasingMode="EaseInOut"></BackEase>

                                            </DoubleAnimation.EasingFunction>

                                        </DoubleAnimation>

                                    </Storyboard>

                                </BeginStoryboard>

                            </Trigger.ExitActions>

                        </Trigger>

                    </ControlTemplate.Triggers>

                </ControlTemplate>

            </Setter.Value>

        </Setter>

    </Style>
最后,贴出整个工程的源码,请点击此处进行下载,文中有表述不当的地方请批评指正,谢谢!
WPF一步步实现完全无边框自定义Window(附源码)的更多相关文章
- C#/ASP.NET MVC微信公众号接口开发之从零开发(四) 微信自定义菜单(附源码)
C#/ASP.NET MVC微信接口开发文章目录: 1.C#/ASP.NET MVC微信公众号接口开发之从零开发(一) 接入微信公众平台 2.C#/ASP.NET MVC微信公众号接口开发之从零开发( ...
- python实现抖音多线程下载无水印视频【附源码】
昨天发了一个无水印解析,评论说想要多线程下载,还是比较简单的. py文件同目录下创建url.txt,把链接一行一行复制进去,就能批量下载. 代码中的延时不能去掉,由于是多线程,速度较快,延时很重要. ...
- wpf 模拟3D效果(和手机浏览图片效果相似)(附源码)
原文 wpf 模拟3D效果(和手机浏览图片效果相似)(附源码) pf的3D是一个很有意思的东西,类似于ps的效果,类似于电影动画的效果,因为动画的效果,(对于3D基础的摄像机,光源,之类不介绍,对于依 ...
- jquery自定义插件结合baiduTemplate.js实现异步刷新(附源码)
上一篇记录了BaiduTemplate模板引擎使用示例附源码,在此基础上对使用方法进行了封装 自定义插件jajaxrefresh.js 代码如下: //闭包限定命名空间 (function ($) { ...
- 《pigcms v6.2最新完美至尊版无任何限制,小猪微信源码多用户微信营销服务平台系统》
<pigcms v6.2最新完美至尊版无任何限制,小猪微信源码多用户微信营销服务平台系统> 前两天分享了套小猪CMS(PigCms)多用户微信营销服务平台系统V6.1完美破解至尊版带微用户 ...
- 一步步实现windows版ijkplayer系列文章之七——终结篇(附源码)
一步步实现windows版ijkplayer系列文章之一--Windows10平台编译ffmpeg 4.0.2,生成ffplay 一步步实现windows版ijkplayer系列文章之二--Ijkpl ...
- 在Winform窗体中使用WPF控件(附源码)
原文:在Winform窗体中使用WPF控件(附源码) 今天是礼拜6,下雨,没有外出,闲暇就写一篇博文讲下如何在Winform中使用WPF控件.原有是我在百度上搜索相关信息无果,遂干脆动手自己实现. W ...
- wpf 模拟抖音很火的罗盘时钟,附源码,下载就能跑
wpf 模拟抖音很火的罗盘时钟,附源码 前端时间突然发现,抖音火了个壁纸,就是黑底蕾丝~~~ 错错错,黑底白字的罗盘时钟! 作为程序员的我,也觉得很新颖,所以想空了研究下,这不,空下来了就用wpf, ...
- PyQt:无边框自定义标题栏及最大化最小化窗体大小调整
环境 Python3.5.2 PyQt5 陈述 隐藏掉系统的控制栏,实现了自定义的标题控制栏,以及关闭/最大化/最小化的功能,自由调整窗体大小的功能(跟随一个大佬学的),代码内有详细注释 只要把Mai ...
随机推荐
- 转://linux下hugepages理解
就Linux应用程序而言,使用的都是虚拟地址,当应用程序读写一个指定的虚拟地址时,内存管理单元会自动进行虚拟地址到物理地址的转换.一个虚拟地址可以映射到多个物理地址,但当前映射到哪一个物理地址取决于当 ...
- <网络编程>IO复用
IO复用是一种机制,一个进程可以监听多个描述符,一旦某个描述符就绪(读就绪和写就绪),能够同志程序进行相应的读写操作. 目前支持I/O复用的系统调用有select,poll,pselect,epoll ...
- Feature Extractor[ResNet]
0. 背景 众所周知,深度学习,要的就是深度,VGG主要的工作贡献就是基于小卷积核的基础上,去探寻网络深度对结果的影响.而何恺明大神等人发现,不是随着网络深度增加,效果就好的,他们发现了一个违背直觉的 ...
- Generative Adversarial Nets[Theory&MSE]
本文来自<deep multi-scale video prediction beyond mean square error>,时间线为2015年11月,LeCun等人的作品. 从一个视 ...
- 记一次项目上线后Log4j2不输出日志的坑
公司项目采用了Log4j2来输出日志,在开发环境和测试环境下均可以输出日志,但在生成环境就没有日志输出.开始毫无头绪,后来通过不断的排查,终于解决了这个问题.在此记录下该问题的解决过程,便于后 ...
- Sql Server利用游标批量清空数据表
先吐槽一下,由于公司要为新客户部署一个全新的系统,然而公司并没有空库,所以只能把正在线上运行的数据库给备份,然后清空相关数据 下面分享一下我在做清空数据库时写的一个批量清空数据表的方法 思路:查询出该 ...
- 强大的开源企业级数据监控利器Lepus安装与配置管理
开篇介绍 官方网站:http://www.lepus.cc 开源企业级数据库监控系统 简洁.直观.强大的开源数据库监控系统,MySQL/Oracle/MongoDB/Redis一站式性能监控,让数据库 ...
- 安卓权限申请处理框架Android-UsesPermission
安卓权限申请封装处理框架.测试支持4.0+.项目源于正式处理Android权限问题时,没找到简单.能满足被拒绝权限自动会到系统设置处理的框架,按自己的编程习惯造一个熟悉的轮子还是蛮好的.第一次使用An ...
- 持续集成之单元测试篇——WWH(讲讲我们做单元测试的故事)
持续集成之单元测试篇--WWH(讲讲我们做单元测试的故事) 前言 临近上线的几天内非重大bug不敢进行发版修复,担心引起其它问题(摁下葫芦浮起瓢) 尽管我们如此小心,仍不能避免修改一些bug而引起更多 ...
- 使用 OpenSSL 创建私有 CA:3 用户证书
OpenSSL 创建私有 CA 三部曲:使用 OpenSSL 创建私有 CA:1 根证书使用 OpenSSL 创建私有 CA:2 中间证书使用 OpenSSL 创建私有 CA:3 用户证书 在前文&l ...