
scrapy框架爬取蜂鸟网的人像图片
今天有点无聊,本来打算去蜂鸟网爬点图片存起来显得自己有点内涵,但是当我点开人像的时候就被里面的小姐姐所吸引了,下面就是整个爬图片的思路和过程了
第一步:先创建一个爬虫项目
scrapy startproject Feng
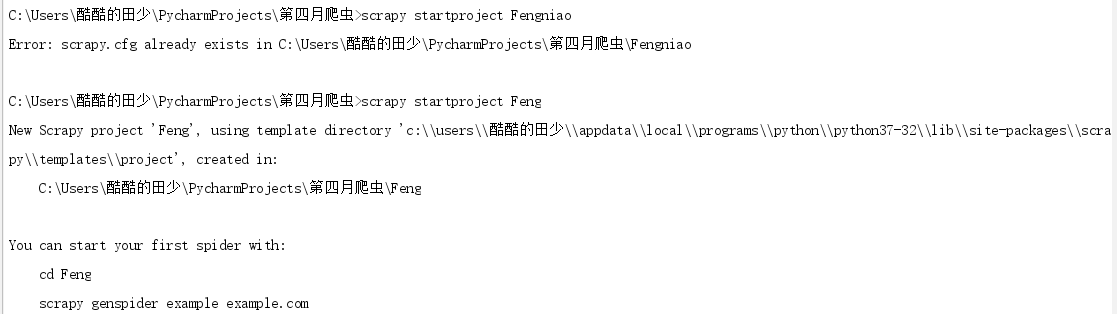
然后进入目录里面 创建爬虫

好了 爬虫项目创建完成了,接下来该去网页分析数据了
首先进入蜂鸟网 找到人像摄影页面的网址添加到爬虫的start_urls里面
然后利用开发者工具分析网页页面的图片数据
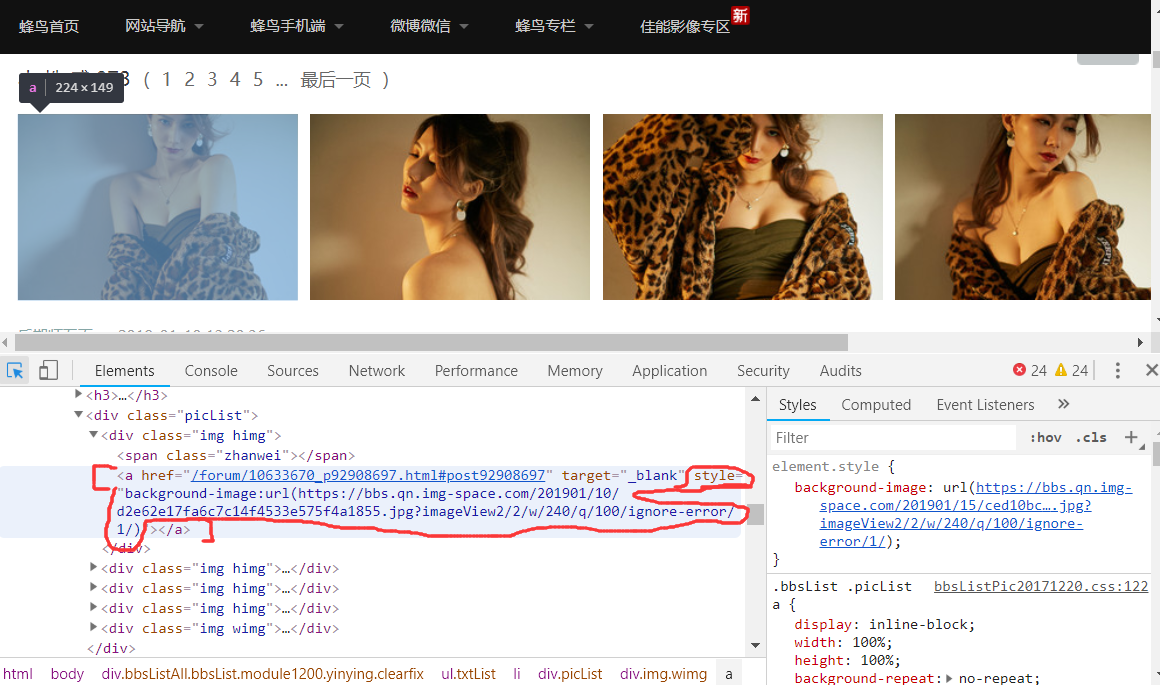
发现图片的地址是在a标签里面的style属性里面的background-image:url,然后根据xpath找到该页面的所有人像图片的a标签里的style属性,获得的属性值有多余的background-image:url(),利用字符串的切片将这些去除掉,就可以获得完整的图片url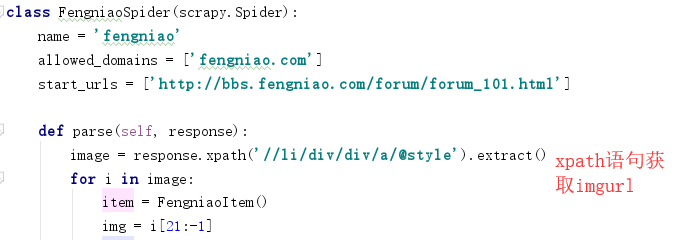
这样我就获取到了该页面所有的人像图片的url
然后在settings.py文件里面配置反爬机制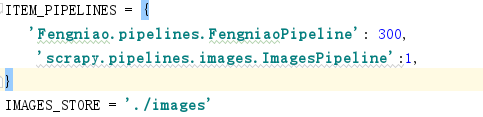
然后再引用scrapy.pipelines.images.ImagesPipeline
并给图片一个存储地址 IMAGE_STORE='./images' 即在当前目录下的images文件夹里面
然后再items.py文件里面设置对象
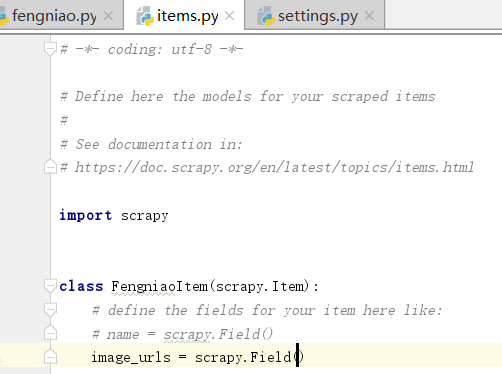
在parse里面导入items,然后创建item对象,然后将取到的图片地址赋给item对象在yield item
这样就可以下载当前页面的图片了
下面的翻页就是获取下一页的链接的xpath,用scrapy中的Request方法访问下一页,callback到parse就能循环翻页并下载
# -*- coding: utf-8 -*-

import scrapy

from ..items import FengniaoItem

class FengniaoSpider(scrapy.Spider):

    name = 'fengniao'

    allowed_domains = ['fengniao.com']

    start_urls = ['http://bbs.fengniao.com/forum/forum_101.html']

    def parse(self, response):

        image = response.xpath('//li/div/div/a/@style').extract()

        for i in image:

            item = FengniaoItem()

            img = i[21:-1]

            item['image_urls'] = [img]

            yield item

        nextpage = response.xpath('//a[text()="下一页"]/@href') .extract_first()

        yield scrapy.Request(url=nextpage,callback=self.parse,method='GET',dont_filter=True)
# -*- coding: utf-8 -*-

# Define here the models for your scraped items

#

# See documentation in:

# https://doc.scrapy.org/en/latest/topics/items.html

import scrapy

class FengniaoItem(scrapy.Item):

    # define the fields for your item here like:

    # name = scrapy.Field()

    image_urls = scrapy.Field()
# -*- coding: utf-8 -*-

# Scrapy settings for Fengniao project

#

# For simplicity, this file contains only settings considered important or

# commonly used. You can find more settings consulting the documentation:

#

#     https://doc.scrapy.org/en/latest/topics/settings.html

#     https://doc.scrapy.org/en/latest/topics/downloader-middleware.html

#     https://doc.scrapy.org/en/latest/topics/spider-middleware.html

BOT_NAME = 'Fengniao'

SPIDER_MODULES = ['Fengniao.spiders']

NEWSPIDER_MODULE = 'Fengniao.spiders'

# Crawl responsibly by identifying yourself (and your website) on the user-agent

USER_AGENT = 'Fengniao (+http://www.yourdomain.com)'

# Obey robots.txt rules

ROBOTSTXT_OBEY = False

# Configure maximum concurrent requests performed by Scrapy (default: 16)

CONCURRENT_REQUESTS = 32

# Configure a delay for requests for the same website (default: 0)

# See https://doc.scrapy.org/en/latest/topics/settings.html#download-delay

# See also autothrottle settings and docs

DOWNLOAD_DELAY = 3

# The download delay setting will honor only one of:

#CONCURRENT_REQUESTS_PER_DOMAIN = 16

#CONCURRENT_REQUESTS_PER_IP = 16

# Disable cookies (enabled by default)

COOKIES_ENABLED = True

# Disable Telnet Console (enabled by default)

#TELNETCONSOLE_ENABLED = False

# Override the default request headers:

DEFAULT_REQUEST_HEADERS = {

  'Accept': 'text/html,application/xhtml+xml,application/xml;q=0.9,*/*;q=0.8',

  'Accept-Language': 'en',

}

# Enable or disable spider middlewares

# See https://doc.scrapy.org/en/latest/topics/spider-middleware.html

#SPIDER_MIDDLEWARES = {

#    'Fengniao.middlewares.FengniaoSpiderMiddleware': 543,

#}

# Enable or disable downloader middlewares

# See https://doc.scrapy.org/en/latest/topics/downloader-middleware.html

#DOWNLOADER_MIDDLEWARES = {

#    'Fengniao.middlewares.FengniaoDownloaderMiddleware': 543,

#}

# Enable or disable extensions

# See https://doc.scrapy.org/en/latest/topics/extensions.html

#EXTENSIONS = {

#    'scrapy.extensions.telnet.TelnetConsole': None,

#}

# Configure item pipelines

# See https://doc.scrapy.org/en/latest/topics/item-pipeline.html

ITEM_PIPELINES = {

   'Fengniao.pipelines.FengniaoPipeline': 300,

    'scrapy.pipelines.images.ImagesPipeline':1,

}

IMAGES_STORE = './images'

# Enable and configure the AutoThrottle extension (disabled by default)

# See https://doc.scrapy.org/en/latest/topics/autothrottle.html

#AUTOTHROTTLE_ENABLED = True

# The initial download delay

#AUTOTHROTTLE_START_DELAY = 5

# The maximum download delay to be set in case of high latencies

#AUTOTHROTTLE_MAX_DELAY = 60

# The average number of requests Scrapy should be sending in parallel to

# each remote server

#AUTOTHROTTLE_TARGET_CONCURRENCY = 1.0

# Enable showing throttling stats for every response received:

#AUTOTHROTTLE_DEBUG = False

# Enable and configure HTTP caching (disabled by default)

# See https://doc.scrapy.org/en/latest/topics/downloader-middleware.html#httpcache-middleware-settings

#HTTPCACHE_ENABLED = True

#HTTPCACHE_EXPIRATION_SECS = 0

#HTTPCACHE_DIR = 'httpcache'

#HTTPCACHE_IGNORE_HTTP_CODES = []

#HTTPCACHE_STORAGE = 'scrapy.extensions.httpcache.FilesystemCacheStorage'

LOG_FILE = 'test.log'

FEED_EXPORT_ENCODING='utf-8'
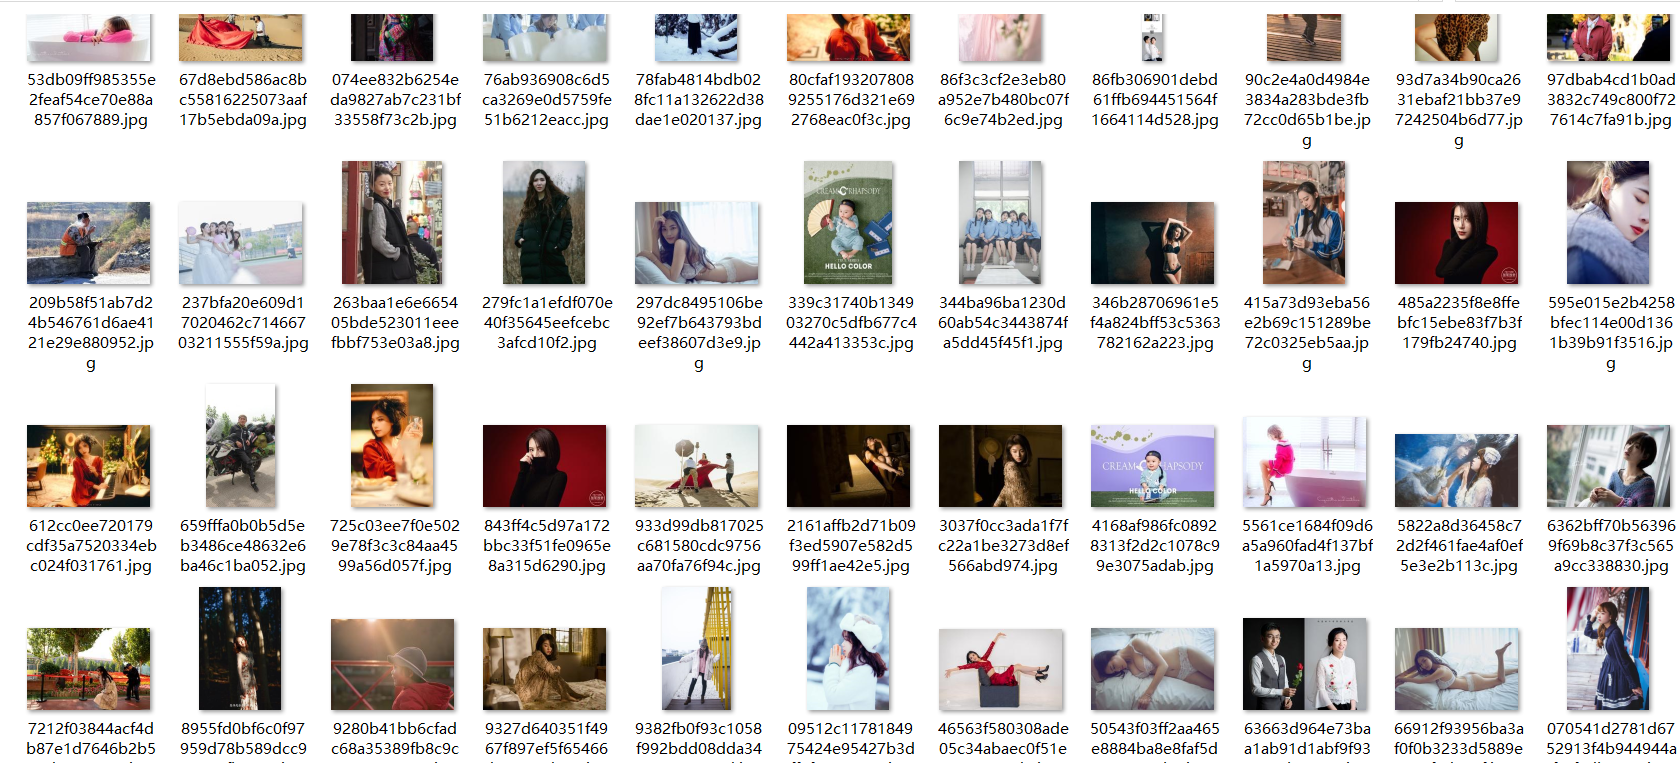
然后下面就是抓下来的部分图片
scrapy框架爬取蜂鸟网的人像图片的更多相关文章
- 使用scrapy框架爬取自己的博文(2)
之前写了一篇用scrapy框架爬取自己博文的博客,后来发现对于中文的处理一直有问题- - 显示的时候 [u'python\u4e0b\u722c\u67d0\u4e2a\u7f51\u9875\u76 ...
- scrapy框架爬取笔趣阁完整版
继续上一篇,这一次的爬取了小说内容 pipelines.py import csv class ScrapytestPipeline(object): # 爬虫文件中提取数据的方法每yield一次it ...
- scrapy框架爬取笔趣阁
笔趣阁是很好爬的网站了,这里简单爬取了全部小说链接和每本的全部章节链接,还想爬取章节内容在biquge.py里在加一个爬取循环,在pipelines.py添加保存函数即可 1 创建一个scrapy项目 ...
- scrapy框架爬取妹子图片
首先,建立一个项目#可在github账户下载完整代码:https://github.com/connordb/scrapy-jiandan2 scrapy startproject jiandan2 ...
- 爬虫 Scrapy框架 爬取图虫图片并下载
items.py,根据需求确定自己的数据要求 # -*- coding: utf-8 -*- # Define here the models for your scraped items # # S ...
- 基于python的scrapy框架爬取豆瓣电影及其可视化
1.Scrapy框架介绍 主要介绍,spiders,engine,scheduler,downloader,Item pipeline scrapy常见命令如下: 对应在scrapy文件中有,自己增加 ...
- scrapy框架爬取豆瓣读书(1)
1.scrapy框架 Scrapy,Python开发的一个快速.高层次的屏幕抓取和web抓取框架,用于抓取web站点并从页面中提取结构化的数据.Scrapy用途广泛,可以用于数据挖掘.监测和自动化测试 ...
- scrapy框架爬取糗妹妹网站妹子图分类的所有图片
爬取所有图片,一个页面的图片建一个文件夹.难点,图片中有不少.gif图片,需要重写下载规则, 创建scrapy项目 scrapy startproject qiumeimei 创建爬虫应用 cd qi ...
- Python使用Scrapy框架爬取数据存入CSV文件(Python爬虫实战4)
1. Scrapy框架 Scrapy是python下实现爬虫功能的框架,能够将数据解析.数据处理.数据存储合为一体功能的爬虫框架. 2. Scrapy安装 1. 安装依赖包 yum install g ...
随机推荐
- c/c++写的比较好的读写配置文件的函数或者类
共用版 .h文件 //---------------------------------------------------------------------------- // 程序名称: ...
- Java Main Differences between HashMap HashTable and ConcurrentHashMap
转自这篇帖子:http://www.importnew.com/7010.html HashMap和Hashtable的比较是Java面试中的常见问题,用来考验程序员是否能够正确使用集合类以及是否可以 ...
- django models class 不识别问题解决方案
目录 1. 事情起因 2. 排查经过 3. 总结 1. 事情起因 今天在写代码的时候,在django 的models目录中新增了一个pkg.py文件,里面定义了一个class, 在执行 makemig ...
- 原 requirements.txt 介绍 & 快捷生成
requirements.txt介绍 requirements.txt 文件 里面记录了当前程序的所有依赖包及其精确版本号. 这个文件有点类似与Rails的Gemfile.其作用是用来在另一台 ...
- 洛谷【P1177】【模板】归并排序
题目传送门:https://www.luogu.org/problemnew/show/P1177 归并排序: 1.先将\(a\)数组的区间\([l,mid],[mid+1,r]\)排成有序的. 2. ...
- xml schema 中如何定义类似Map的结构
利用xs:unique关键字.在xs:element里添加unique节点,任意命名,然后用xs:selector来选择需要唯一的域, xs:field 里指定特定的字段. 例如:定义所有Item里的 ...
- js之递归拼树(树结构的数据结构)
- C# 自定义颜色
一.需要引用 using System.Windows.Media; 二. 自定义颜色 通过自定义 RGB 的值来达到自定义颜色的目的 Color _Mycolor = Color.FromRgb(5 ...
- Tiny4412学习杂记
1.Android 挂载NFS 使用 busybox mount 来替代mount命令 2.修改Uboot中fastboot最大buff 使用U-boot烧写Android5.0的时候出现 remo ...
- 每天一道算法题(4)——O(1)时间内删除链表节点
1.思路 假设链表......---A--B--C--D....,要删除B.一般的做法是遍历链表并记录前驱节点,修改指针,时间为O(n).删除节点的实质为更改后驱指针指向.这里,复制C的内容至B(此时 ...