Python开发环境-Pyenv安装使用
安装使用-Pyenv
简单的python版本管理:pyenv
管理python解释器
管理python版本
管理python的虚拟环境
官网:https://github.com/pyenv/pyenv
pyenv安装
挂载光盘,配置本地yum源
[root@centos7 ~]# uname -a

Linux centos7 3.10.0-514.el7.x86_64 #1 SMP Tue Nov 22 16:42:41 UTC 2016 x86_64 x86_64 x86_64 GNU/Linux

[root@centos7 ~]# cat /etc/yum.repos.d/aaa.repo

[aaa]

name=aaa

baseurl=file:///var/dvd

enabled=1

gpgcheck=0
pyenv安装使用get
# yum -y install get
安装其它依赖包
# yum -y install gcc make patch gdbm-devel openssl-devel sqlite-devel readlinedevel zlib-devel bzip2-devel
创建用户Python
# useradd python
使用Python用户登入,开始下面的安装
# su -l python
[python@centos7 ~]$ curl -L https://raw.githubusercontent.com/pyenv/pyenv-installer/master/bin/pyenv-installer | bash
本身是一个bash脚本,通过curl命令的工具下载这个脚本,通道管道交给bash,来运行。
在Python用户的~/.bash_profile 中追加
[python@centos7 ~]$ vim .bash_profile

export PYENV_ROOT=/home/python/.pyenv

export PATH="/home/python/.pyenv/bin:$PATH"

eval "$(pyenv init -)"

eval "$(pyenv virtualenv-init -)"
在当前bash环境下读取并执行FileName中的命令
[python@centos7 ~]$ source ~/.bash_profile
python版本及path路径
[python@centos7 ~]$ python -V

Python 2.7.5

[python@centos7 ~]$ echo $PATH

/home/python/.pyenv/plugins/pyenv-virtualenv/shims:/home/python/.pyenv/shims:/home/python/.pyenv/bin:/home/python/.pyenv/plugins/pyenv-virtualenv/shims:/home/python/.pyenv/shims:/home/python/.pyenv/bin:/usr/local/bin:/bin:/usr/bin:/usr/local/sbin:/usr/sbin:/home/python/.local/bin:/home/python/bin:/home/python/.local/bin:/home/python/bin:/home/python/.local/bin:/home/python/bin
这时安装成功!查看pyenv基本信息
[python@centos7 ~]$ pyenv

pyenv 1.2.1

Usage: pyenv <command> [<args>]

Some useful pyenv commands are:

   commands    List all available pyenv commands

   local       Set or show the local application-specific Python version

   global      Set or show the global Python version

   shell       Set or show the shell-specific Python version

   install     Install a Python version using python-build

   uninstall   Uninstall a specific Python version

   rehash      Rehash pyenv shims (run this after installing executables)

   version     Show the current Python version and its origin

   versions    List all Python versions available to pyenv

   which       Display the full path to an executable

   whence      List all Python versions that contain the given executable

See `pyenv help <command>' for information on a specific command.

For full documentation, see: https://github.com/pyenv/pyenv#readme

[python@centos7 ~]$ pyenv help install #单项查看

Usage: pyenv install [-f] [-kvp] <version>

       pyenv install [-f] [-kvp] <definition-file>

       pyenv install -l|--list

       pyenv install --version

  -l/--list          List all available versions

  -f/--force         Install even if the version appears to be installed already

  -s/--skip-existing Skip if the version appears to be installed already

  python-build options:

  -k/--keep          Keep source tree in $PYENV_BUILD_ROOT after installation

                     (defaults to $PYENV_ROOT/sources)

  -p/--patch         Apply a patch from stdin before building

  -v/--verbose       Verbose mode: print compilation status to stdout

  --version          Show version of python-build

  -g/--debug         Build a debug version

For detailed information on installing Python versions with

python-build, including a list of environment variables for adjusting

compilation, see: https://github.com/pyenv/pyenv#readme
列出所有python版本及扩展工具
[python@centos7 ~]$ pyenv install -l
安装python3.5.3
[python@centos7 ~]$ pyenv install 3.5.3 -v #-v打印详细信息
这里它会在/tmp下创建临时目录,后会在服务器上把相应的版本文件给你拽回来,然后在本地给你解压,开始编译这个加载过程是比较慢的。
改进:可以使用本地缓存方式安装
[python@centos7 ~]$ ls -a

.  ..  .bash_history  .bash_logout  .bash_profile  .bashrc  .pki  .pyenv  .viminfo
在~/.pyenv目录下,新建cache目录,放入下载好的版本文件。
[python@centos7 ~]$ mkdir .pyenv/cache

[python@centos7 ~]$ cd .pyenv/cache/

#上传下载好的python文件

[python@centos7 cache]$ ls

Python-3.5.3.tar.gz  Python-3.5.3.tar.xz  Python-3.5.3.tgz
注:这里不确定 pyenv install 会选择那个python文件进行安装,所以把三个格式安装包都放进去。如果它要的包不在就会连网去下载。
再次安装
[python@centos7 cache]$ pyenv install 3.5.3 -v
查看当前系统版本
[python@centos7 cache]$ pyenv version

system (set by /home/python/.pyenv/version) #系统版本2.7
列出所有可用于pyenv的Python版本
[python@centos7 cache]$ pyenv versions

* system (set by /home/python/.pyenv/version)

  3.5.3

[python@centos7 cache]$
设置python版本
[python@centos7 cache]$ pyenv help

...

   local       Set or show the local application-specific Python version

   global      Set or show the global Python version

   shell       Set or show the shell-specific Python version

...
Global全局
[python@centos7 cache]$ pyenv global 3.5.3
global:将使用python账号登入的所有用户的python版本都变了,如果有软件依赖于python2.7版本的话,就出大问题了,所以global是禁用的。
Shell
[python@centos7 ~]$ pyenv shell 3.5.3
shell是会话级的,如果shell断掉了,在登入时session_id也变了,所有的环境配置将需要从新配置,所以只对当前shell环境生效。
Local本地
local是把某个文件夹与当前环境捆绑在一起,设置从当前工作目录开始向下递归都继承这个设置。
[python@centos7 ~]$ mkdir cheshi/projects -p

[python@centos7 ~]$ cd cheshi/projects/

[python@centos7 projects]$ pwd

/home/python/cheshi/projects

[python@centos7 projects]$ pyenv local 3.5.3 #将当前文件夹与3.5.3捆绑

[python@centos7 projects]$ pyenv version

3.5.3 (set by PYENV_VERSION environment variable)

[python@centos7 projects]$ pyenv versions

  system

* 3.5.3 (set by PYENV_VERSION environment variable)

[python@centos7 projects]$ python -V

Python 3.5.3

[python@centos7 projects]$ cd

[python@centos7 ~]$ pwd

/home/python

[python@centos7 ~]$ pyenv version

system (set by /home/python/.pyenv/version)

[python@centos7 ~]$ pyenv versions

* system (set by /home/python/.pyenv/version)

  3.5.3

[python@centos7 ~]$ python -V

Python 2.7.5

[python@centos7 ~]$

#创建子目录同样继承,当前目录和子目录,兄弟目录不管。

[python@centos7 ~]$ cd cheshi/projects/

[python@centos7 projects]$ mkdir cmdb

[python@centos7 projects]$ cd cmdb/

[python@centos7 cmdb]$ pyenv version

3.5.3 (set by /home/python/cheshi/projects/.python-version)

[python@centos7 cmdb]$ pyenv versions

  system

* 3.5.3 (set by /home/python/cheshi/projects/.python-version)

[python@centos7 cmdb]$
Virtualenv插件
Virtualenv创建一个独立虚拟环境,不同项目之间的依赖包互不干扰。
我们在开发中大规模的使用虚拟环境,不要对大环境产生影响,各开发各的,各项目维护自己虚拟环境。
实验环境区分安装一个python3.6.1
pyenv install 3.6.1 -v
后续下载安装包的版本在一下目录
[python@centos7 ~]$ ls .pyenv/cache/

Python-3.5.3.tar.gz  Python-3.5.3.tar.xz  Python-3.5.3.tgz  Python-3.6.1.tar.xz

[python@centos7 ~]$
创建虚拟环境
[python@centos7 projects]$ pyenv version

3.5.3 (set by /home/python/cheshi/projects/.python-version)

[python@centos7 projects]$ pyenv versions

  system

* 3.5.3 (set by /home/python/cheshi/projects/.python-version)

  3.6.1

[python@centos7 projects]$ pyenv local system   #一个项目一个虚拟环境

[python@centos7 projects]$ pyenv version

system (set by /home/python/cheshi/projects/.python-version)

[python@centos7 projects]$

[python@centos7 projects]$ cd cmdb/

[python@centos7 cmdb]$ pyenv version

system (set by /home/python/cheshi/projects/.python-version)

[python@centos7 cmdb]$ pyenv virtualenv 3.5.3 virtual353   #创建虚拟环境

Requirement already satisfied: setuptools in /home/python/.pyenv/versions/3.5.3/envs/virtual353/lib/python3.5/site-packages

Requirement already satisfied: pip in /home/python/.pyenv/versions/3.5.3/envs/virtual353/lib/python3.5/site-packages

[python@centos7 cmdb]$ pyenv version

system (set by /home/python/cheshi/projects/.python-version)

[python@centos7 cmdb]$ pyenv versions

* system (set by /home/python/cheshi/projects/.python-version)

  3.5.3

  3.5.3/envs/virtual353

  3.6.1

  virtual353

[python@centos7 cmdb]$ pyenv local virtual353     #当前目录与虚拟环境捆绑

(virtual353) [python@centos7 cmdb]$

(virtual353) [python@centos7 cmdb]$ pyenv version    #查看当前环境

virtual353 (set by /home/python/cheshi/projects/cmdb/.python-version)

(virtual353) [python@centos7 cmdb]$

(virtual353) [python@centos7 cmdb]$ cd ..

[python@centos7 projects]$

[python@centos7 projects]$ cd cmdb/

(virtual353) [python@centos7 cmdb]$
创建某个版本的虚拟环境会在一下目录中生成文件
[python@centos7 ~]$ cd .pyenv/versions/

[python@centos7 versions]$ ls   #例如virtual353

3.5.3  3.6.1  virtual353

[python@centos7 versions]$ cd 3.5.3/

[python@centos7 3.5.3]$ ls

bin  envs  include  lib  share

[python@centos7 3.5.3]$ cd ..

[python@centos7 versions]$ ll

total 0

drwxr-xr-x 7 python python 68 Mar  1 03:41 3.5.3

drwxr-xr-x 6 python python 56 Feb 28 09:00 3.6.1

lrwxrwxrwx 1 python python 50 Mar  1 03:41 virtual353 -> /home/python/.pyenv/versions/3.5.3/envs/virtual353

[python@centos7 versions]$
如果删除虚拟环境,直接将其相关的目录删除就可以了,删除操作要谨慎。
[python@centos7 ~]$ pyenv versions

* system (set by /home/python/.pyenv/version)

  3.5.3

  3.5.3/envs/virtual353

  3.6.1

  3.6.1/envs/web361

  virtual353

  web361

[python@centos7 ~]$ rm -rf .pyenv/versions/web361   #删除虚拟环境

[python@centos7 ~]$ pyenv versions

* system (set by /home/python/.pyenv/version)

  3.5.3

  3.5.3/envs/virtual353

  3.6.1

  3.6.1/envs/web361

  virtual353

[python@centos7 ~]$ rm -rf .pyenv/versions/3.6.1/envs/web361   #删除虚拟环境配置文件

[python@centos7 ~]$

[python@centos7 projects]$ rm -rf web   #删除目录

[python@centos7 projects]$ ls

cmdb

[python@centos7 ~]$ pyenv versions

* system (set by /home/python/.pyenv/version)

  3.5.3

  3.5.3/envs/virtual353

  3.6.1

  virtual353

[python@centos7 ~]$
pip通用配置
在不同的虚拟环境中使用pip,会对应使用相应python版本。
envs:管理虚拟环境目录,site-packages:管理以后安装的模块都在这。
(virtual353) [python@centos7 cmdb]$ pip -V

pip 9.0.1 from /home/python/.pyenv/versions/3.5.3/envs/virtual353/lib/python3.5/site-packages (python 3.5)

(virtual353) [python@centos7 cmdb]$
在虚拟环境中使用pip安装ipython
(virtual353) [python@centos7 cmdb]$ pip install ipython #默认去官方网拉相应的安装包,有些慢,可以修改国内pip源。
首先
[python@centos7 ~]$ mkdir .pip

[python@centos7 ~]$ touch .pip/pip.conf

[python@centos7 ~]$ vim .pip/pip.conf

[global]

index-url=https://mirrors.aliyun.com/pypi/simple/

trusted-host=mirrors.aliyun.com

:x
再次安装
(virtual353) [python@centos7 cmdb]$ pip install ipython

。。。

(virtual353) [python@centos7 cmdb]$ ipython    #成了

Python 3.5.3 (default, Feb 24 2018, 04:14:07)

Type 'copyright', 'credits' or 'license' for more information

IPython 6.2.1 -- An enhanced Interactive Python. Type '?' for help.

In [1]: print("Hello World")

Hello World

In [2]: exit

(virtual353) [python@centos7 cmdb]$
安装Jupyter,它依赖ipython如果安装了ipython它就不会在装了。
Jupyter Notebook(此前被称为 IPython notebook)是一个独立的交互式笔记本,本质是一个Web用应程序,后台使用Ipython,支持多种编程语言。
(virtual353) [python@centos7 cmdb]$ pip install jupyter

Collecting jupyter

...

(virtual353) [python@centos7 cmdb]$ jupyter notebook --help

The Jupyter HTML Notebook.

...

    jupyter notebook                       # start the notebook

    jupyter notebook --certfile=mycert.pem # use SSL/TLS certificate

    jupyter notebook password              # enter a password to protect the server

(virtual353) [python@centos7 cmdb]$ jupyter notebook password   #修改密码

Enter password:

Verify password:

[NotebookPasswordApp] Wrote hashed password to /home/python/.jupyter/jupyter_notebook_config.json

(virtual353) [python@centos7 cmdb]$ jupyter notebook --ip=0.0.0.0 --no-browser    #启动服务进程

[I 04:19:58.375 NotebookApp] Writing notebook server cookie secret to /home/python/.local/share/jupyter/runtime/notebook_cookie_secret

[I 04:19:58.716 NotebookApp] Serving notebooks from local directory: /home/python/cheshi/projects/cmdb

[I 04:19:58.716 NotebookApp] 0 active kernels

[I 04:19:58.716 NotebookApp] The Jupyter Notebook is running at:

[I 04:19:58.716 NotebookApp] http://0.0.0.0:8888/

[I 04:19:58.716 NotebookApp] Use Control-C to stop this server and shut down all kernels (twice to skip confirmation).
关防火墙在浏览器上访问
[root@centos7 ~]# iptables -F

本机地址加端口访问:http://0.0.0.0:8888/

当前环境工作目录
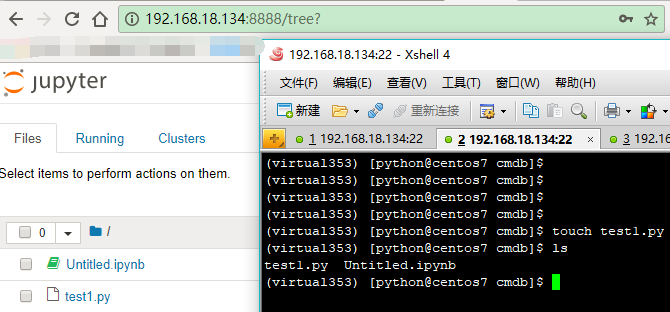
Jupyter快捷键:shift + Enter、Ctrl + Enter、dd、m
将当前虚拟环境所有安装包导入其它虚拟环境。
(virtual353) [python@centos7 cmdb]$ pip freeze > /tmp/packs.txt   #将当前环境中所有安装包名称导入至packs.txt文件

(virtual353) [python@centos7 cmdb]$ cat /tmp/packs.txt

bleach==2.1.3

...

(virtual353) [python@centos7 cmdb]$ cd ../web

(env361) [python@centos7 web]$ pip -V

pip 9.0.1 from /home/python/.pyenv/versions/3.6.1/envs/env361/lib/python3.6/site-packages (python 3.6)

(env361) [python@centos7 web]$ pip list   #查看Web项目已安装的包

DEPRECATION: The default format will switch to columns in the future. You can use --format=(legacy|columns) (or define a format=(legacy|columns) in your pip.conf under the [list] section) to disable this warning.

pip (9.0.1)

setuptools (28.8.0)

(env361) [python@centos7 web]$ pip install -r /tmp/packs.txt   #将导出的所有安装包导入至Web项目

...

(env361) [python@centos7 web]$ pip list   #导入后

DEPRECATION: The default format will switch to columns in the future. You can use --format=(legacy|columns) (or define a format=(legacy|columns) in your pip.conf under the [list] section) to disable this warning.

bleach (2.1.3)

...

(env361) [python@centos7 web]$
如果pyenv自身版本升级了,出现python4.0了,就更新一下就好了。
更新:$ pyenv update
Python开发环境-Pyenv安装使用的更多相关文章
- Python开发环境Spyder安装方法
Spyder(Scientific PYthon Development EnviRonment)是一个强大的交互式 Python 语言开发环境,提供高级的代码编辑.交互测试.调试等特性,支持包括 W ...
- Python开发环境的安装配置
要学习Python,我们首先要安装配置好Python的运行环境. 那么安装Python 2 还是 Python 3 呢? 当然是要选择Python 3 .这里来教大家安装稳定版Python3 的版本是 ...
- linux下python开发环境的安装
1.准备编译环境 yum groupinstall 'Development Tools' yum install zlib-devel bzip2-devel openssl-devel ncurs ...
- python开发环境软件包安装相关 failed with error code 1 in /tmp/pip-build-vn_f_e1n/psutil/
指定源安装 pip install git+https://github.com/xxxxxx.git pip install -r requirements.txt -i https://mirro ...
- Lubuntu下配置Python开发环境
安装完系统必须要做的几件事: 一.更新软件 (如果是通过最新版镜像安装,可无视此步骤) 1.选择速度比较快的源,默认的源速度不一定快.二.配置终端 1.设置终端背景,前景色,透明度 ...
- 极速在mac中安装python开发环境
mac开发环境的安装: brew: 包管理工具{ 安装:ruby -e "$(curl -fsSL https://raw.githubusercontent.com/Homebrew/in ...
- 【tensorflow】1.安装Tensorflow开发环境,安装Python 的IDE--PyCharm
================================================== 安装Tensorflow开发环境,安装Python 的IDE--PyCharm 1.PyCharm ...
- 【python安装】Windows上安装和创建python开发环境
1. 在 windows10 上安装python开发环境 Linux和Mac OS都自带python环境,但是Windows没有,所以需要自行安装. 第1步:访问 python官网,下载Windows ...
- Windows下Eclipse+PyDev安装Python开发环境
.简介 Eclipse是一款基于Java的可扩展开发平台.其官方下载中包括J2EE方向版本.Java方向版本.C/C++方向版本.移动应用方向版本等诸多版本.除此之外,Eclipse还可以通过安装插件 ...
随机推荐
- 小程序tab切换 点击左右滑动
wxml <scroll-view scroll-x="true" class="navbar-box"> <block wx:for=&qu ...
- Spring boot 2.1.x 造成的问题
1. mysql-conector-java 版本默认使用了 8.0.1.5 导致:项目启动时的警告:Loading class `com.mysql.jdbc.Driver'. This is de ...
- UML入门学习
在UML类图中,常见的有以下几种关系: 泛化(Generalization), 实现(Realization),关联(Association),聚合(Aggregation),组合(Composit ...
- mybatis逆向工程generatorConfiguration详细配置
<?xml version="1.0" encoding="UTF-8" ?> <!DOCTYPE generatorConfiguratio ...
- myEclipse和eclipse从debug视图自动跳回default视图。
本来是吐槽文,找到了解决的插件,就改改标题了. debug的时候,可以从default视图自动跳转到debug视图,退出debug的时候,却不能自动切换回default视图. https://bugs ...
- [luogu P2521] [HAOI2011]防线修建
[luogu P2521] [HAOI2011]防线修建 题目描述 近来A国和B国的矛盾激化,为了预防不测,A国准备修建一条长长的防线,当然修建防线的话,肯定要把需要保护的城市修在防线内部了.可是A国 ...
- windows cmd 查找/关闭端口
1.首先查找端口,会显示出所有的端口,比如说要找到端口为“8888”的PID netstat -ano 2.还可以精确查找 netstat -aon|findstr " 3.关闭对应的端口 ...
- PDF 补丁丁 0.6.0.3413 版发布(修复提取图片问题,增加自动检查软件更新功能)
新的测试版修复了提取图片旋转方向错误.遇到格式错误的图片后无法继续提取的问题. 另外增加了自动检查软件版本更新的功能(该功能不上传关于用户的任何个人信息,仅向本博客请求静态的版本信息文件,可在“帮助- ...
- 构建web应用之——maven创建以及SpringMVC配置
构建web应用第一步需要创建以及配置maven项目管理,同时配置启动SpringMVC,这里推荐参考CSDN的一篇文章链接:https://blog.csdn.net/weixin_42222334/ ...
- learning coap protocol
reference: http://coap.technology/spec.html