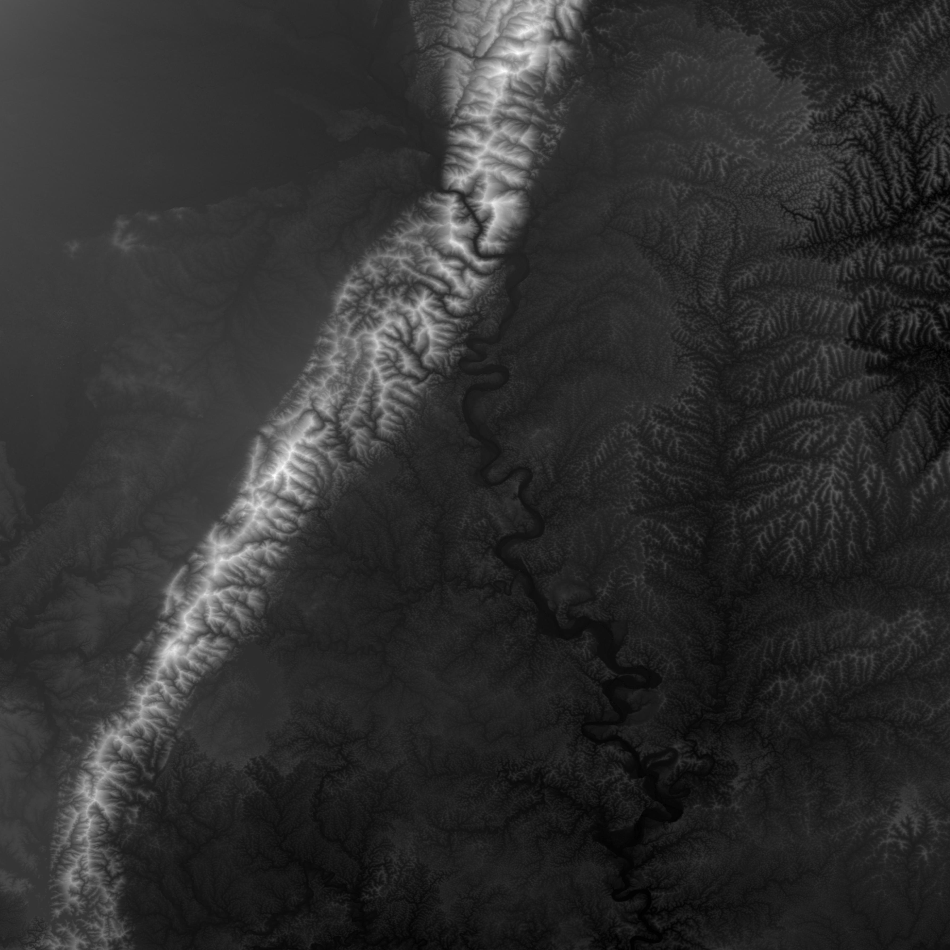
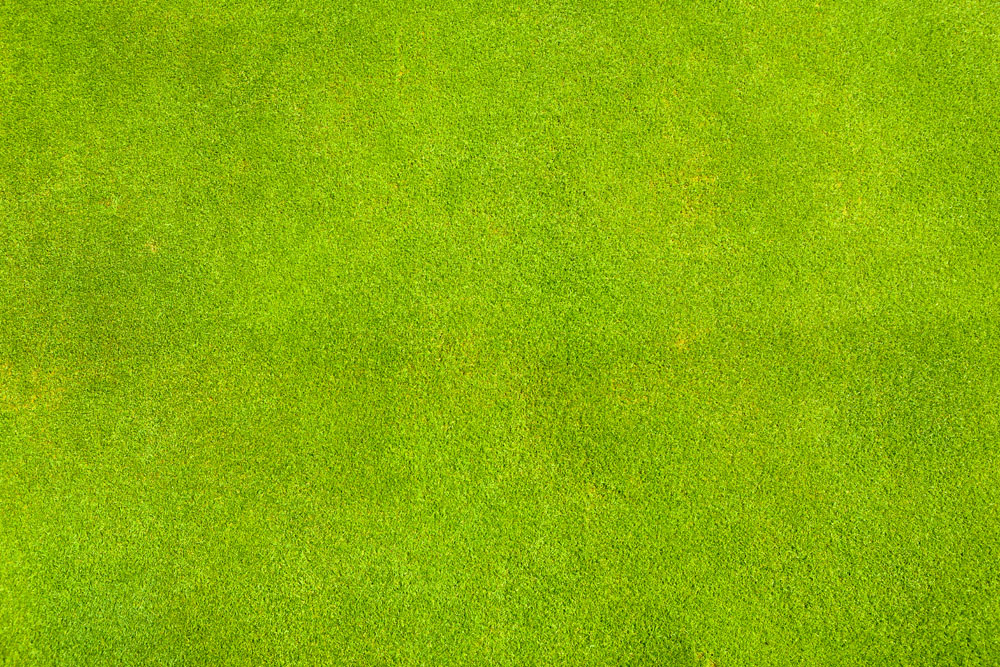
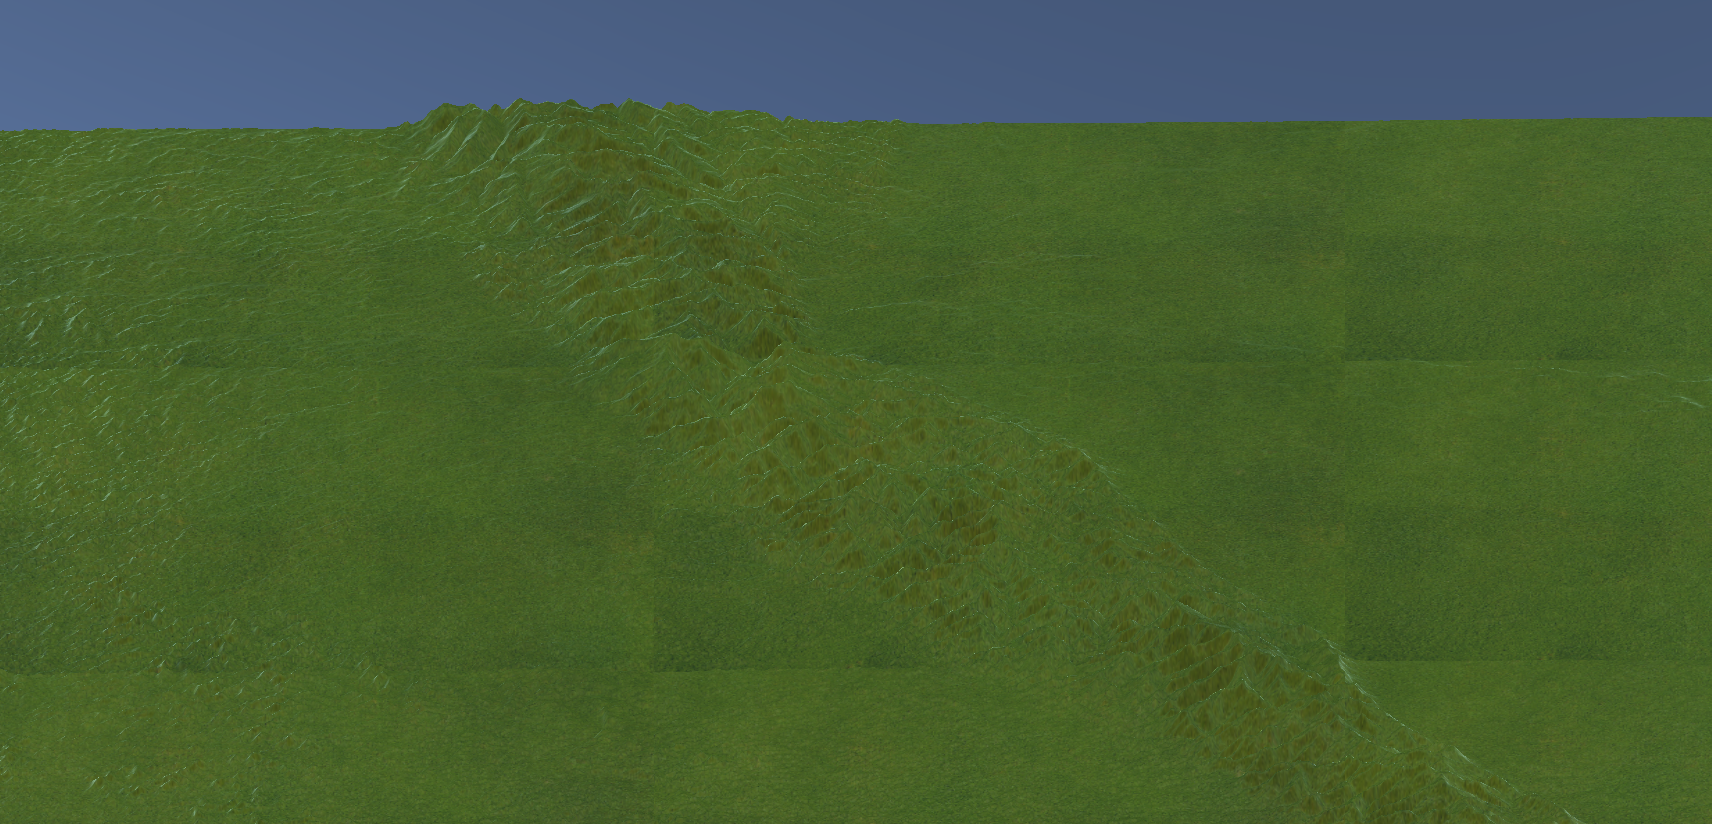
unity读取灰度图生成三维地形mesh
using System.Collections;
using System.Collections.Generic;
using UnityEngine; //根据灰度图创建mesh地形
public class MeshTerrainCreate : MonoBehaviour
{
private Texture textureGray;//灰度图
private Texture textureGrass;//草地贴图
private int tGrayWidth = 0, tGrayHeight = 0;//灰度图的宽和高
private bool bCreate = false;//是否完成创建
private List<GameObject> meshList;//mesh对象集合
private Texture2D texture2dGray;
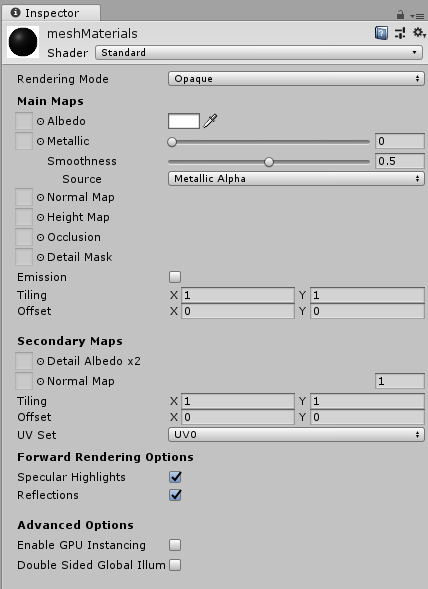
public float zScale=100;//高度参数 [Tooltip("传入mesh使用的材质")]
public Material meshMaterial; void Start()
{
StartCoroutine(loadImage("IGray.png", (t) => textureGray = t));
StartCoroutine(loadImage("IGrass.jpg", (t) => textureGrass = t));
meshList = new List<GameObject>();
} void Update()
{
if (textureGray != null && textureGrass != null)
{
if (bCreate == false)
{
tGrayWidth = textureGray.width;
tGrayHeight = textureGray.height;
meshMaterial.mainTexture = textureGrass;//设置材质贴图
//mesh顶点数目最大65000,则取mesh顶点为250*250=62500
int xNum = 1+tGrayWidth / 250;//x方向mesh个数
int yNum = 1+tGrayHeight / 250; //y方向mesh个数
texture2dGray = (Texture2D)textureGray;
//根据灰度图创建mesh
for (int i = 0; i <xNum; i++)
{
for (int j = 0; j <yNum; j++)
{
if (i < xNum-1 && j < yNum-1)
{
meshList.Add(
createMesh("meshX" + i.ToString() + "Y" + j.ToString(), 251, 251,
i * new Vector3(2500, 0, 0) + j * new Vector3(0, 2500, 0),
(i + 1) * new Vector3(2500, 0, 0) + (j + 1) * new Vector3(0, 2500, 0)+new Vector3(10,10,0),
i * new Vector2(250, 0) + j * new Vector2(0, 250),
(i + 1) * new Vector2(250, 0) + (j + 1) * new Vector2(0, 250)+new Vector2(1,1)));
}
else if (i == xNum-1 && j < yNum-1)
{
meshList.Add(createMesh("meshX" + i.ToString() + "Y" + j.ToString(), tGrayWidth%250, 251,
i * new Vector3(2500, 0, 0) + j * new Vector3(0, 2500, 0),
i* new Vector3(2500, 0, 0)+new Vector3(10*(tGrayWidth % 250),10,0) + (j + 1) * new Vector3(0, 2500, 0),
i * new Vector2(250, 0) + j * new Vector2(0, 250),
i * new Vector2(250, 0)+new Vector2(tGrayWidth % 250,1) + (j + 1) * new Vector2(0, 250)));
}
else if (i < xNum-1 && j == yNum-1)
{
meshList.Add(createMesh("meshX" + i.ToString() + "Y" + j.ToString(),251, tGrayHeight%250,
i * new Vector3(2500, 0, 0) + j * new Vector3(0, 2500, 0),
(i + 1) * new Vector3(2500, 0, 0) + j * new Vector3(0, 2500, 0)+new Vector3(10,10* (tGrayHeight % 250),0),
i * new Vector2(250, 0) + j * new Vector2(0, 250),
(i + 1) * new Vector2(250, 0) + j * new Vector2(0, 150)+new Vector2(1, tGrayHeight % 250) ) );
}
else if (i == xNum-1 && j == yNum-1)
{
meshList.Add(createMesh("meshX" + i.ToString() + "Y" + j.ToString(),tGrayWidth%250,tGrayHeight%250,
i * new Vector3(2500, 0, 0) + j * new Vector3(0, 2500, 0),
i * new Vector3(2500, 0, 0) + j * new Vector3(0, 2500, 0)+new Vector3(10 * (tGrayWidth % 250), 10 * (tGrayHeight % 250),0),
i * new Vector2(250, 0) + j * new Vector2(0, 250),
i * new Vector2(250, 0) + j * new Vector2(0, 250) +new Vector2(tGrayWidth % 250, tGrayHeight % 250)) );
}
}
}
bCreate = true;
}
}
} //加载图片
IEnumerator loadImage(string imagePath, System.Action<Texture> action)
{
WWW www = new WWW("file://" + Application.streamingAssetsPath + "/" + imagePath);
yield return www;
if (www.error == null)
{
action(www.texture);
}
} /// <summary>
///创建mesh
/// </summary>
/// <param name="meshName">mesh名称</param>
/// <param name="row">行数</param>
/// <param name="col">列数</param>
/// <param name="minPoint">最小点位置</param>
/// <param name="maxPoint">最大点位置</param>
/// <param name="minImgPosition">最小点灰度图位置</param>
/// <param name="maxImgPosition">最大点灰度图位置</param>
/// <returns></returns>
/// private GameObject createMesh(string meshName, int row, int col, Vector3 minPoint, Vector3 maxPoint, Vector2 minImgPosition, Vector2 maxImgPosition)
{
GameObject meshObject = new GameObject(meshName); int verticeNum = row * col;
Vector3[] vertices = new Vector3[verticeNum];//顶点数组大小
int[] triangles = new int[verticeNum * 3 * 2];//三角集合数组,保存顶点索引
// Vector3[] normals = new Vector3[verticeNum];//顶点法线数组大小
Vector2[] uvs = new Vector2[verticeNum];
float rowF = (float)row;
float colF = (float)col;
Vector3 xStep = new Vector3((maxPoint.x - minPoint.x) / rowF, 0, 0);
Vector3 ySetp = new Vector3(0, (maxPoint.y - minPoint.y) / colF, 0);
int k = 0; for (int i = 0; i < row; i++)
{
for (int j = 0; j < col; j++)
{
float tempZ = texture2dGray.GetPixel((int)minImgPosition.x + i, (int)minImgPosition.y + j).grayscale;
vertices[i + j * row] = minPoint + xStep * i + ySetp * j+new Vector3(0,0,tempZ* zScale); uvs[i + j * row] = new Vector2((float)i / rowF, (float)j / colF); if (j < col - 1 && i < row - 1)
{
triangles[k++] = j * row + i;
triangles[k++] = j * row + i + 1;
triangles[k++] = j * row + i + row; triangles[k++] = j * row + i + row;
triangles[k++] = j * row + i + 1;
triangles[k++] = j * row + i + row + 1;
}
}
}
Mesh mesh = new Mesh();
mesh.vertices = vertices;
mesh.triangles = triangles;
// mesh.normals = normals;
mesh.uv = uvs;
mesh.RecalculateBounds();
mesh.RecalculateNormals();
meshObject.AddComponent<MeshFilter>();
meshObject.AddComponent<MeshRenderer>();
meshObject.GetComponent<MeshFilter>().mesh = mesh;
meshObject.GetComponent<MeshRenderer>().material = meshMaterial; return meshObject;
}
}
效果如下

unity读取灰度图生成三维地形mesh的更多相关文章
- ue4读取灰度图生成三维地形mesh
转自:https://www.cnblogs.com/gucheng/p/10116857.html 新建ue c++工程. 在Build.cs中添加"ProceduralMeshCompo ...
- unity 读取灰度图生成三维地形并贴图卫星影像
从 https://earthexplorer.usgs.gov/ 下载高程数据 从谷歌地球上保存对应地区卫星图像 从灰度图创建地形模型,并将卫星影像作为贴图 using System.Collect ...
- opengl读取灰度图生成三维地形并添加光照
转自:https://www.cnblogs.com/gucheng/p/10152889.html 准备第三方库 glew.freeglut.glm.opencv 准备一张灰度图 最终效果 代码如下 ...
- opengl读取灰度图生成三维地形
准备第三方库 glew.freeglut.glm.opencv 准备灰度图片和草地贴图 最终效果 代码包括主程序源文件mainApp.cpp.顶点着色器shader.vs.片元着色器shader.fs ...
- unity 读取灰度图生成按高程分层设色地形模型
准备灰度图 1.高程按比例对应hue色相(hsv)生成mesh效果 o.color = float4(hsv2rgb(float3(v.vertex.y/100.0, 0.5, 0.75)), 1.0 ...
- unity读取灰度图生成等值线图
准备灰度图 grayTest.png,放置于Assets下StreamingAssets文件夹中. 在场景中添加RawImage用于显示最后的等值线图. 生成等值线的过程,使用Marching ...
- blender导入灰度图生成地形模型
安装软件 在此处下载blender并安装. 添加平面 1.打开blender,右键删除初始的立方体. 2.shift+a选择平面添加进场景: 3.按下s键鼠标拖动调节平面大小确定后按下鼠标左键: 4. ...
- unity 读取excel表 生成asset资源文件
做unity 项目也有一段时间了,从unity项目开发和学习中也遇到了很多坑,并且也从中学习到了很多曾经未接触的领域.项目中的很多功能模块,从今天开始把自己的思路和代码奉上给学渣们作为一份学习的资料. ...
- (二)GameMaker:Studio ——使用等高图生成3D地形
上一篇,我们讲解了GM中导入模型的方法,这节我们来讲地形. 源文件地址:http://pan.baidu.com/share/link?shareid=685772423&uk=2466343 ...
随机推荐
- C语言定义数组时使用枚举作为数组的下标 ——c99功能
部分参考了https://blog.csdn.net/wq3028/article/details/76204690 同时在电脑上进行验证 //温度,电磁阀传感器序号,方便数组定位 typedef e ...
- Linux新手到大佬系列——1
站长资讯平台:Linux是一套免费使用和自由传播的类Unix操作系统,是一个基于POSIX和Unix的多用户.多任务.支持多线程和多CPU的操作系统.它能运行主要的Unix工具软件.应用程序和网络协议 ...
- BZOJ 4008 亚瑟王(概率DP 奥妙重重)
题意 中文题面,就不解释了 分析 显然这道题直接求期望太麻烦,想想转化问题(这转化太神了). 定义f(i,j)f(i,j)f(i,j)表示第iii张卡总共被经过jjj次的概率,有转移方程式 f(i,j ...
- 017_STM32程序移植之_AS608指纹模块
STM32程序移植之AS608指纹模块 BUG说明: 硬件接线图如图所示 STM32引脚 指纹模块引脚 功能 3.3V 3.3V PA3 Tx PA2 Rx GND GND PA1 WAK 3.3V ...
- uname/hostname
uname 显示操作系统相关信息的命令. hostname 显示或者设置当前系统的主机名 修改hostname
- Java进阶知识19 Struts2和Spring整合在一起
1.概述 1.Spring负责对象创建 2.Struts2负责用Action处理请求 3.整合的关键点:让Struts2框架Action对象的创建交给Spring完成. 2.整合实例 需要用到的 ...
- libpng warning:iCCP:known incorrect sRGB profile
原因是新版的libpng增强了检查,发出警告.此警告可以忽略.若要消除此警告则要使用v4的色彩配置.GIMP sRGB v4 色彩配置,修改当前图片的色彩配置,设为默认. sRGB profilesO ...
- form 表单提交数据和文件(fromdata的使用方法)
<!-- 数据和文件一次性提交 --> <form class="form_meren" id="mainForm" name="m ...
- input上传mp3格式文件,预览并且获取时间
<input type="file" id="file" name="file" class="upfile" o ...
- 使用linux中,最让人无语的是软件源
使用linux的最大的障碍是软件源的配置和系统的安装,这两个搞定了,坚持使用下去都不是问题,如果实在不行,还可以win10下的linux子系统可以作为基本的使用.下面记录两个软件源: Found 2 ...