ELKStack入门篇(三)之logstash收集日志写入redis
1、部署Redis
1.1、下载redis
[root@linux-node2 ~]# wget http://download.redis.io/releases/redis-4.0.6.tar.gz

[root@linux-node2 ~]# tar -zxvf redis-4.0..tar.gz

[root@linux-node2 ~]# mv redis-4.0. /usr/loca/src

[root@linux-node2 ~]# cd /usr/local/src/redis-4.0.

[root@linux-node2 redis-4.0.]# make

[root@linux-node2 redis-4.0.]# ln -sv /usr/local/src/redis-4.0. /usr/local/redis

[root@linux-node2 redis-4.0.]# cd /usr/local/redis
1.2、配置redis
[root@linux-node2 redis]# vim redis.conf

bind 192.168.56.12

daemonize yes

save ""

requirepass     #开启认证

[root@linux-node2 redis]# cp /usr/local/src/redis-4.0./src/redis-server /usr/bin/

[root@linux-node2 redis]# cp /usr/local/src/redis-4.0./src/redis-cli /usr/bin/

[root@linux-node2 redis]# redis-server /usr/local/redis/redis.conf

:C  Jan ::26.801 # oO0OoO0OoO0Oo Redis is starting oO0OoO0OoO0Oo

:C  Jan ::26.801 # Redis version=4.0., bits=, commit=, modified=

:C  Jan ::26.801 # Configuration loaded
1.3、测试redis
[root@linux-node2 ~]# netstat -tulnp |grep

tcp               192.168.56.12:      0.0.0.0:*               LISTEN      /redis-server

[root@linux-node2 redis]# redis-cli -h 192.168.56.12

192.168.56.12:> KEYS *

(error) NOAUTH Authentication required.

192.168.56.12:> auth

OK

192.168.56.12:> KEYS *

(empty list or set)

192.168.56.12:> quit
2、配置logstash将日志写入redis
2.1、配置logstash的system.conf
[root@linux-node1 conf.d]# vim system.conf

input {

  file {

        path => "/var/log/messages"

        type => "systemlog"

        start_position => "beginning"

        stat_interval => ""

  }

}

output {

  if [type] == "systemlog" {

        redis {

                data_type => "list"

                host => "192.168.56.12"

                db => ""

                port => ""

                password => ""

                key => "systemlog"

        }

  }

}
2.2、检测配置语法
[root@linux-node1 conf.d]# /usr/share/logstash/bin/logstash -f /etc/logstash/conf.d/sy

OpenJDK -Bit Server VM warning: If the number of processors is expected to increase CThreads=N

WARNING: Could not find logstash.yml which is typically located in $LS_HOME/config or

Could not find log4j2 configuration at path /usr/share/logstash/config/log4j2.properti

Configuration OK

[root@linux-node1 conf.d]# systemctl restart logstash
2.3、写入messages日志测试
[root@linux-node1 conf.d]# cat /etc/hosts >> /var/log/messages

[root@linux-node1 conf.d]# echo "helloword" >> /var/log/messages
2.4、登陆redis中查看
[root@linux-node2 ~]# redis-cli -h 192.168.56.12

192.168.56.12:> KEYS *

(error) NOAUTH Authentication required.

192.168.56.12:> AUTH

OK

192.168.56.12:>

192.168.56.12:> select

OK

192.168.56.12:[]> KEYS *

) "systemlog"

192.168.56.12:[]> LLEN systemlog      #查看key的长度

(integer)

192.168.56.12:[]> LLEN systemlog

(integer)

192.168.56.12:[]> LPOP systemlog    #展示一条记录会减少一条

"{\"@version\":\"1\",\"host\":\"linux-node1\",\"path\":\"/var/log/messages\",\"@timestamp\":\"2018-01-02T03:04:40.424Z\",\"type\":\"systemlog\",\"tags\":[\"_geoip_lookup_failure\"]}"

192.168.56.12:[]> LLEN systemlog

(integer)
3、配置logstash从reids中取出数据到elasticsearch
3.1、使用linux-node2上的logstash从redis取数据
[root@linux-node2 conf.d]# vim redis-es.conf

input {

    redis {

        data_type => "list"

        host => "192.168.56.12"

        db => ""

        port => ""

        key => "systemlog"

        password => ""

    }

}

output {

    elasticsearch {

        hosts => ["192.168.56.11:9200"]

        index => "redis-systemlog-%{+YYYY.MM.dd}"

    }

}

[root@linux-node2 conf.d]# /usr/share/logstash/bin/logstash -f /etc/logstash/conf.d/redis-es.conf -t

OpenJDK -Bit Server VM warning: If the number of processors is expected to increase from one, then you should configure the number of parallel GC threads appropriately using -XX:ParallelGCThreads=N

WARNING: Could not find logstash.yml which is typically located in $LS_HOME/config or /etc/logstash. You can specify the path using --path.settings. Continuing using the defaults

Could not find log4j2 configuration at path /usr/share/logstash/config/log4j2.properties. Using default config which logs errors to the console

Configuration OK

[root@linux-node2 conf.d]# systemctl restart logstash
3.2、从linux-node1上写入数据查看
[root@linux-node1 conf.d]# cat /etc/passwd >> /var/log/messages

[root@linux-node2 ~]# redis-cli -h 192.168.56.12

192.168.56.12:> KEYS *

(error) NOAUTH Authentication required.

192.168.56.12:> AUTH

OK

192.168.56.12:> select

OK

192.168.56.12:[]> KEYS *

) "systemlog"

192.168.56.12:[]> LLEN systemlog      #查看数据长度为38

(integer)

192.168.56.12:[]> LLEN systemlog      #配置成功logstash从redis中取完数据,redis长度变成0

(integer)
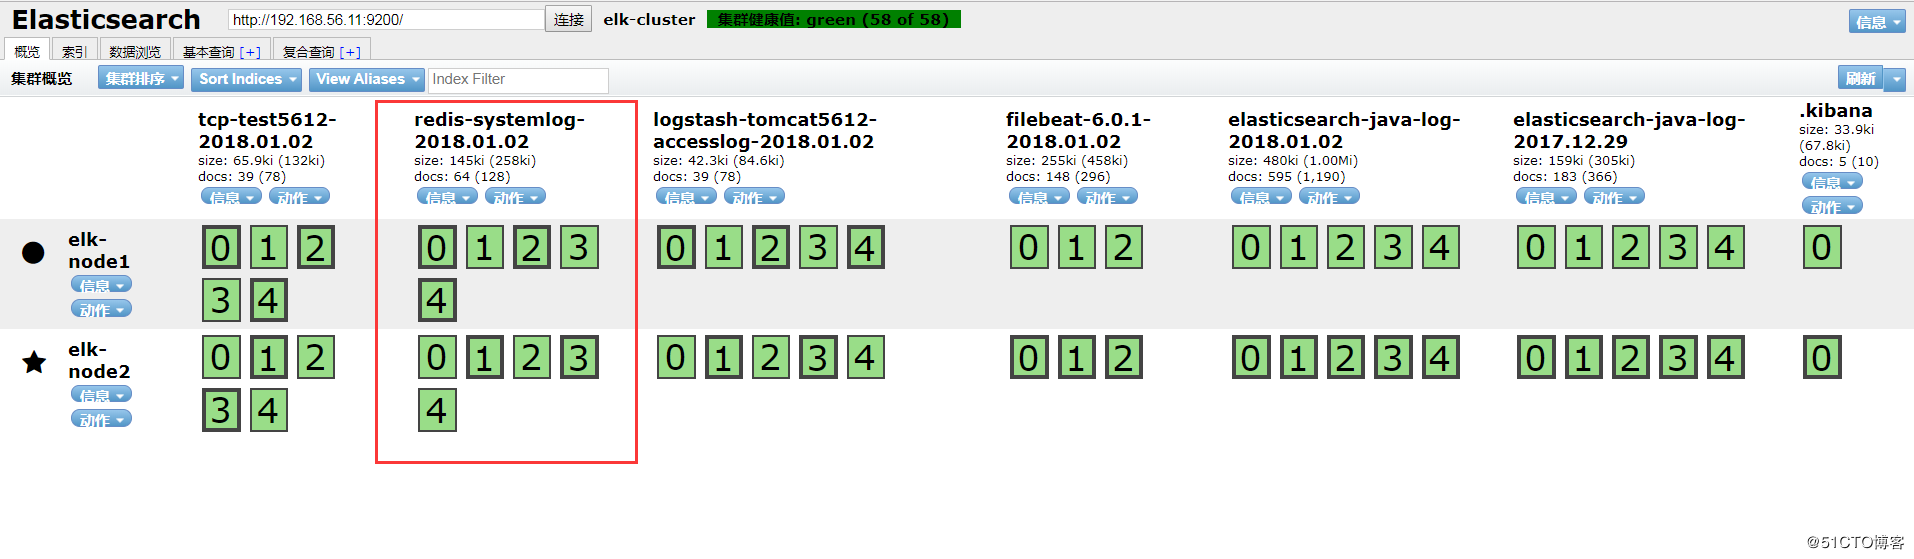
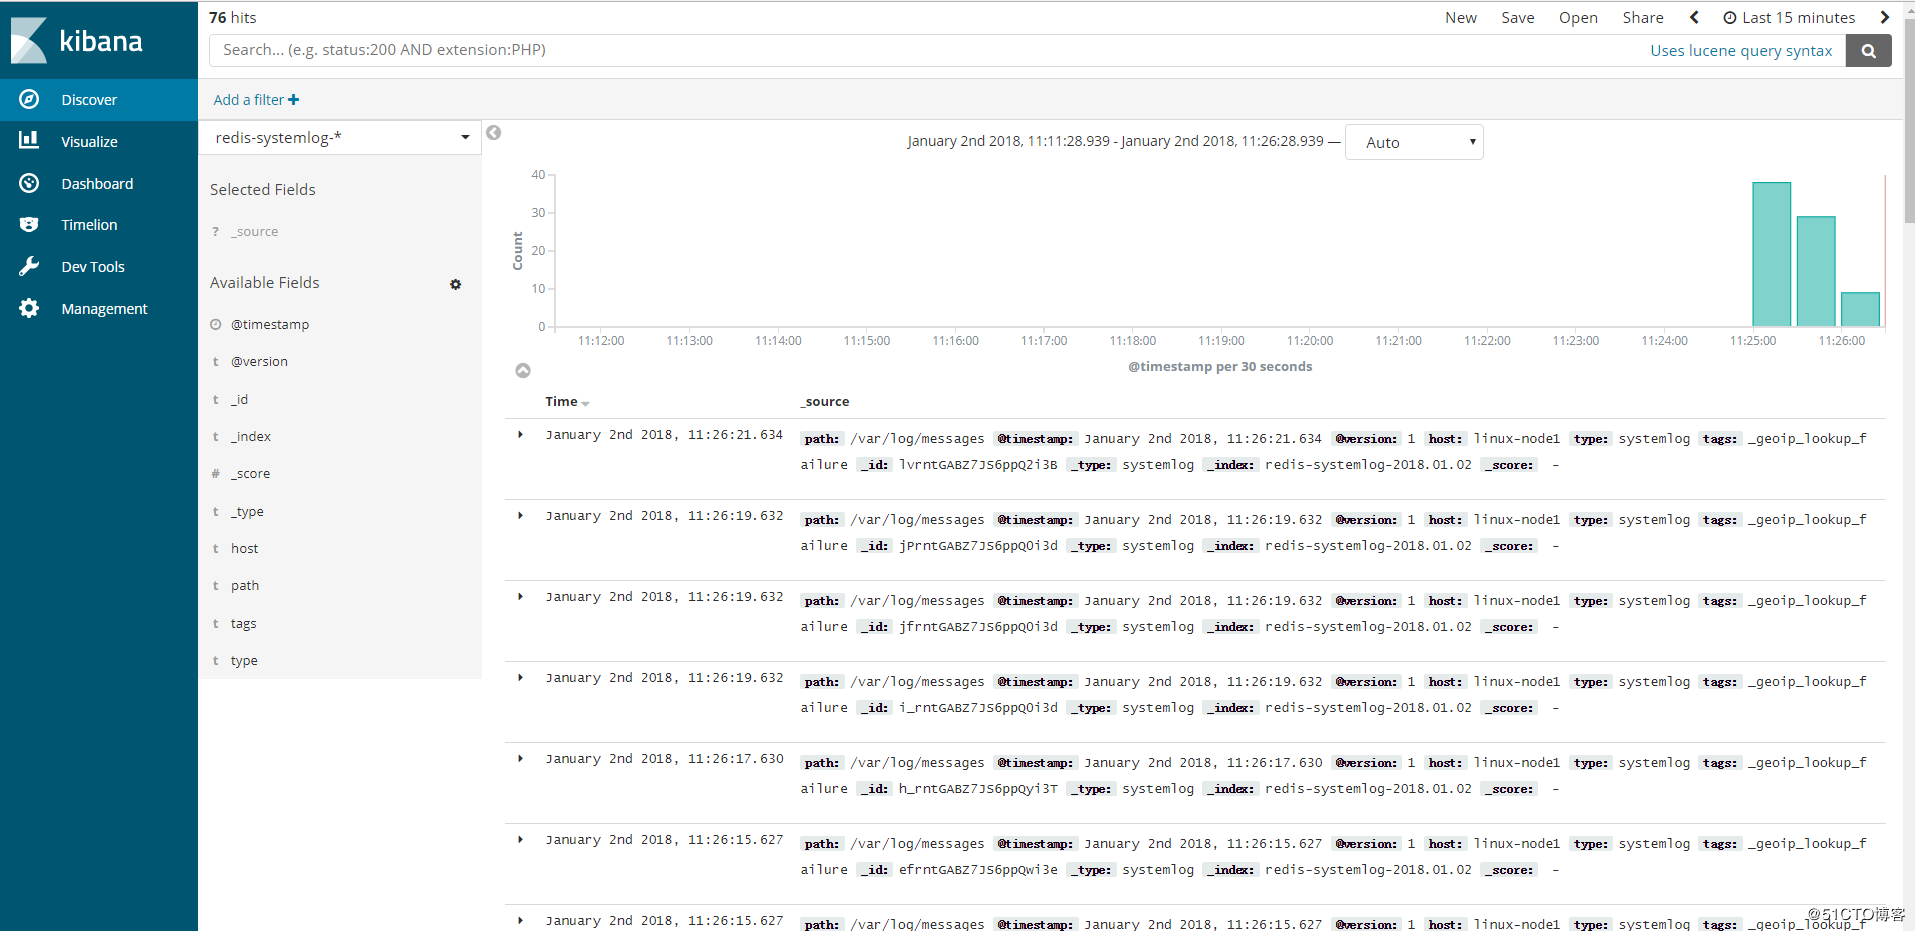
3.3、head插件和Kibana添加索引查看

ELKStack入门篇(三)之logstash收集日志写入redis的更多相关文章
- ELK快速入门(三)logstash收集日志写入redis
ELK快速入门三-logstash收集日志写入redis 用一台服务器部署redis服务,专门用于日志缓存使用,一般用于web服务器产生大量日志的场景. 这里是使用一台专门用于部署redis ,一台专 ...
- ELK之logstash收集日志写入redis及读取redis
logstash->redis->logstash->elasticsearch 1.安装部署redis cd /usr/local/src wget http://download ...
- ELK快速入门(四)filebeat替代logstash收集日志
ELK快速入门四-filebeat替代logstash收集日志 filebeat简介 Filebeat是轻量级单用途的日志收集工具,用于在没有安装java的服务器上专门收集日志,可以将日志转发到log ...
- ELK快速入门(二)通过logstash收集日志
ELK快速入门二-通过logstash收集日志 说明 这里的环境接着上面的ELK快速入门-基本部署文章继续下面的操作. 收集多个日志文件 1)logstash配置文件编写 [root@linux-el ...
- ELKStack入门篇(一)之ELK部署和使用
一.ELKStack简介 1.ELK介绍 中文指南:https://www.gitbook.com/book/chenryn/elk-stack-guide-cn/details ELK Stack包 ...
- 【SSRS】入门篇(三) -- 为报表定义数据集
原文:[SSRS]入门篇(三) -- 为报表定义数据集 通过前两篇文件 [SSRS]入门篇(一) -- 创建SSRS项目 和 [SSRS]入门篇(二) -- 建立数据源 后, 我们建立了一个SSRS项 ...
- ELK之filebeat替代logstash收集日志
filebeat->redis->logstash->elasticsearch 官网下载地址:https://www.elastic.co/downloads/beats/file ...
- ELKStack入门篇(二)之Nginx、Tomcat、Java日志收集以及TCP收集日志使用
1.收集Nginx的json格式日志 1.1.Nginx安装 [root@linux-node1 ~]# yum install nginx -y [root@linux-node1 ~]# vim ...
- ELKStack入门篇(四)之Filebeat
Filebeat是轻量级单用途的日志收集工具,用于在没有安装java的服务器上专门收集日志,可以将日志转发到logstash.elasticsearch或redis等场景中进行下一步处理. 官方文档: ...
随机推荐
- iOS动画暂停和继续-本质是速度控制和时间坐标转换
时间永不停止! 写一个CALayer的分类,控制动画的暂停与继续 extension CALayer { ///暂停动画 func pauseAnimation() { //取出当前时间,转成动画暂停 ...
- 【[CQOI2018]解锁屏幕】
状压这个东西好像没有什么能优化的高级东西,像什么斜率优化,单调队列在状压的优化上都很少见 而最常见的状压优化就是预处理优化了, 这道题就预处理一下所有点对之间连线上的点,之后压成状态就能做到\(O(2 ...
- 随手练——S(n)=O(1),判断一个链表是否为“回文”
方法一:T(n)=O(n),S(n)=O(n) 走完一遍链表,每个值入栈,之后再走一遍链表,和每次弹出的栈顶进行比较. 核心: LNode *p = l->next; while (p) { s ...
- WEB安全 php+mysql5注入防御(一)
注入利用函数: concat()函数将多个字符串连接成一个字符串 database() 当前数据库,用途:获取数据 version() 数据库版本,用途:利用版本特性,如5.0版本下的informat ...
- JAVA:字符串反转
import java.util.ArrayList;import java.util.Arrays;import java.util.Collections;import java.util.Lis ...
- 404 Note Found 队 Alpha 6
目录 组员情况 组员1(组长):胡绪佩 组员2:胡青元 组员3:庄卉 组员4:家灿 组员5:凯琳 组员6:翟丹丹 组员7:何家伟 组员8:政演 组员9:黄鸿杰 组员10:刘一好 组员11:何宇恒 展示 ...
- Angular动态表单生成(三)
ng-dynamic-forms实践篇(上) 定个小目标 先来定个小目标吧,我们要实现的效果: 动态生成一个表单,里面的字段如下: 字段名称 字段类型 验证 备注 姓名 text 必填,长度小于15 ...
- 关于JavaScript 常见的面试题
关于JavaScript常见的面试题总结 一.JavaScript基本数据类型 null:空.无.表示不存在,当为对象的属性赋值为null,表示删除该属性 undefined:未定义.当声明变量却没有 ...
- [iOS]CIDetector之CIDetectorTypeFace人脸识别
- (void)viewDidLoad { [super viewDidLoad]; // Do any additional setup after loading the view, typica ...
- CH4402 小Z的袜子(莫队)
描述 作为一个生活散漫的人,小Z每天早上都要耗费很久从一堆五颜六色的袜子中找出一双来穿.终于有一天,小Z再也无法忍受这恼人的找袜子过程,于是他决定听天由命-- 具体来说,小Z把这N只袜子从1到N编号, ...