kaggle 实战 (2): CNN 手写数字识别
文章目录
Tensorflow 官方示例
import tensorflow as tf

mnist = tf.keras.datasets.mnist

(x_train, y_train),(x_test, y_test) = mnist.load_data()

x_train, x_test = x_train / 255.0, x_test / 255.0

model = tf.keras.models.Sequential([

  tf.keras.layers.Flatten(input_shape=(28, 28)),

  tf.keras.layers.Dense(512, activation=tf.nn.relu),

  tf.keras.layers.Dropout(0.2),

  tf.keras.layers.Dense(10, activation=tf.nn.softmax)

])

model.compile(optimizer='adam',

              loss='sparse_categorical_crossentropy',

              metrics=['accuracy'])

model.fit(x_train, y_train, epochs=5)

model.evaluate(x_test, y_test)
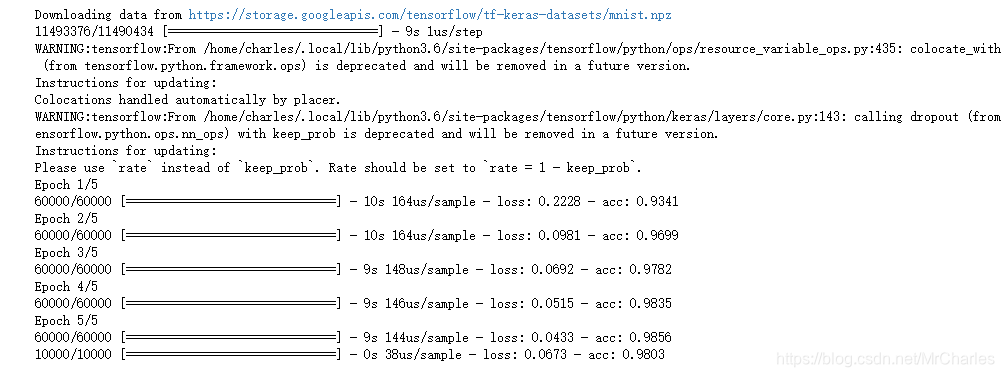
这个本身精度不高,我们可以改变结构提升精度
CNN
from __future__ import division, print_function, absolute_import

# Import MNIST data

from tensorflow.examples.tutorials.mnist import input_data

mnist = input_data.read_data_sets("/tmp/data/", one_hot=False)

import tensorflow as tf

import matplotlib.pyplot as plt

import numpy as np

# Training Parameters

learning_rate = 0.001

num_steps = 2000

batch_size = 128

# Network Parameters

num_input = 784 # MNIST data input (img shape: 28*28)

num_classes = 10 # MNIST total classes (0-9 digits)

dropout = 0.25 # Dropout, probability to drop a unit

# Create the neural network

def conv_net(x_dict, n_classes, dropout, reuse, is_training):

    # Define a scope for reusing the variables

    with tf.variable_scope('ConvNet', reuse=reuse):

        # TF Estimator input is a dict, in case of multiple inputs

        x = x_dict['images']

        # MNIST data input is a 1-D vector of 784 features (28*28 pixels)

        # Reshape to match picture format [Height x Width x Channel]

        # Tensor input become 4-D: [Batch Size, Height, Width, Channel]

        x = tf.reshape(x, shape=[-1, 28, 28, 1])

        # Convolution Layer with 32 filters and a kernel size of 5

        conv1 = tf.layers.conv2d(x, 32, 5, activation=tf.nn.relu)

        # Max Pooling (down-sampling) with strides of 2 and kernel size of 2

        conv1 = tf.layers.max_pooling2d(conv1, 2, 2)

        # Convolution Layer with 64 filters and a kernel size of 3

        conv2 = tf.layers.conv2d(conv1, 64, 3, activation=tf.nn.relu)

        # Max Pooling (down-sampling) with strides of 2 and kernel size of 2

        conv2 = tf.layers.max_pooling2d(conv2, 2, 2)

        # Flatten the data to a 1-D vector for the fully connected layer

        fc1 = tf.contrib.layers.flatten(conv2)

        # Fully connected layer (in tf contrib folder for now)

        fc1 = tf.layers.dense(fc1, 1024)

        # Apply Dropout (if is_training is False, dropout is not applied)

        fc1 = tf.layers.dropout(fc1, rate=dropout, training=is_training)

        # Output layer, class prediction

        out = tf.layers.dense(fc1, n_classes)

    return out

# Define the model function (following TF Estimator Template)

def model_fn(features, labels, mode):

    # Build the neural network

    # Because Dropout have different behavior at training and prediction time, we

    # need to create 2 distinct computation graphs that still share the same weights.

    logits_train = conv_net(features, num_classes, dropout, reuse=False, is_training=True)

    logits_test = conv_net(features, num_classes, dropout, reuse=True, is_training=False)

    # Predictions

    pred_classes = tf.argmax(logits_test, axis=1)

    pred_probas = tf.nn.softmax(logits_test)

    # If prediction mode, early return

    if mode == tf.estimator.ModeKeys.PREDICT:

        return tf.estimator.EstimatorSpec(mode, predictions=pred_classes)

    # Define loss and optimizer

    loss_op = tf.reduce_mean(tf.nn.sparse_softmax_cross_entropy_with_logits(

        logits=logits_train, labels=tf.cast(labels, dtype=tf.int32)))

    optimizer = tf.train.AdamOptimizer(learning_rate=learning_rate)

    train_op = optimizer.minimize(loss_op, global_step=tf.train.get_global_step())

    # Evaluate the accuracy of the model

    acc_op = tf.metrics.accuracy(labels=labels, predictions=pred_classes)

    # TF Estimators requires to return a EstimatorSpec, that specify

    # the different ops for training, evaluating, ...

    estim_specs = tf.estimator.EstimatorSpec(

      mode=mode,

      predictions=pred_classes,

      loss=loss_op,

      train_op=train_op,

      eval_metric_ops={'accuracy': acc_op})

    return estim_specs

# Build the Estimator

model = tf.estimator.Estimator(model_fn)

# Define the input function for training

input_fn = tf.estimator.inputs.numpy_input_fn(

    x={'images': mnist.train.images}, y=mnist.train.labels,

    batch_size=batch_size, num_epochs=None, shuffle=True)

# Train the Model

model.train(input_fn, steps=num_steps)

# Evaluate the Model

# Define the input function for evaluating

input_fn = tf.estimator.inputs.numpy_input_fn(

    x={'images': mnist.test.images}, y=mnist.test.labels,

    batch_size=batch_size, shuffle=False)

# Use the Estimator 'evaluate' method

model.evaluate(input_fn)

import pandas as pd # data processing, CSV file I/O (e.g. pd.read_csv)

#test=pd.read_csv('./input/test.csv')

import numpy

from numpy import genfromtxt

my_data = numpy.double(genfromtxt('./input/test.csv', delimiter=','))

# Prepare the input data

input_fn = tf.estimator.inputs.numpy_input_fn(

    x={'images': numpy.float32(my_data[1:,:])}, shuffle=False)

# Use the model to predict the images class

preds2 = list(model.predict(input_fn))

Submission = pd.DataFrame({

        "ImageId": range(1, len(preds2)+1),

        "Label": preds2

    })

Submission.to_csv("cnnMnistSubmission.csv", index=False)

Submission.head(5)
提交结果

kaggle 实战 (2): CNN 手写数字识别的更多相关文章
- Kaggle竞赛丨入门手写数字识别之KNN、CNN、降维
引言 这段时间来,看了西瓜书.蓝皮书,各种机器学习算法都有所了解,但在实践方面却缺乏相应的锻炼.于是我决定通过Kaggle这个平台来提升一下自己的应用能力,培养自己的数据分析能力. 我个人的计划是先从 ...
- CNN 手写数字识别
1. 知识点准备 在了解 CNN 网络神经之前有两个概念要理解,第一是二维图像上卷积的概念,第二是 pooling 的概念. a. 卷积 关于卷积的概念和细节可以参考这里,卷积运算有两个非常重要特性, ...
- 卷积神经网络CNN 手写数字识别
1. 知识点准备 在了解 CNN 网络神经之前有两个概念要理解,第一是二维图像上卷积的概念,第二是 pooling 的概念. a. 卷积 关于卷积的概念和细节可以参考这里,卷积运算有两个非常重要特性, ...
- Keras cnn 手写数字识别示例
#基于mnist数据集的手写数字识别 #构造了cnn网络拟合识别函数,前两层为卷积层,第三层为池化层,第四层为Flatten层,最后两层为全连接层 #基于Keras 2.1.1 Tensorflow ...
- pytorch CNN 手写数字识别
一个被放弃的入门级的例子终于被我实现了,虽然还不太完美,但还是想记录下 1.预处理 相比较从库里下载数据集(关键是经常失败,格式也看不懂),更喜欢直接拿图片,从网上找了半天,最后从CSDN上下载了一个 ...
- keras框架的CNN手写数字识别MNIST
参考:林大贵.TensorFlow+Keras深度学习人工智能实践应用[M].北京:清华大学出版社,2018. 首先在命令行中写入 activate tensorflow和jupyter notebo ...
- kaggle 实战 (1): PCA + KNN 手写数字识别
文章目录 加载package read data PCA 降维探索 选择50维度, 拆分数据为训练集,测试机 KNN PCA降维和K值筛选 分析k & 维度 vs 精度 预测 生成提交文件 本 ...
- 深度学习之PyTorch实战(3)——实战手写数字识别
上一节,我们已经学会了基于PyTorch深度学习框架高效,快捷的搭建一个神经网络,并对模型进行训练和对参数进行优化的方法,接下来让我们牛刀小试,基于PyTorch框架使用神经网络来解决一个关于手写数字 ...
- keras和tensorflow搭建DNN、CNN、RNN手写数字识别
MNIST手写数字集 MNIST是一个由美国由美国邮政系统开发的手写数字识别数据集.手写内容是0~9,一共有60000个图片样本,我们可以到MNIST官网免费下载,总共4个.gz后缀的压缩文件,该文件 ...
随机推荐
- HDU 6651 Final Exam (思维)
2019 杭电多校 7 1006 题目链接:HDU 6651 比赛链接:2019 Multi-University Training Contest 7 Problem Description Fin ...
- python中字符串输出格式
print输入格式总结 通过使用ljust(),center(),rjust()函数来实现输入字符串的左右对齐,居中,右对齐等操作; 方法一:(函数不带参数,则默认以空格填充,注意:文字与空格总字符数 ...
- 高级UI晋升之常用View(三)中篇
更多Android高级架构进阶视频学习请点击:https://space.bilibili.com/474380680本篇文章将从ViewPager来介绍常用View:文章目录 一.简介 二.基本使用 ...
- 注册页面-使用form模块搭建
基于Django的form模块,快速的搭建注册页面,每个限制条件,都放在form模块里面,不单独对每一项编写标签,使用模版的 for 循环来渲染. 首先设置form模块 在blogs模块下创建一个bl ...
- nginx-rtmp-module 指令详解
译序:截至 Jul 8th,2013 官方公布的最新 Nginx RTMP 模块 nginx-rtmp-module 指令详解. Core rtmp 语法:rtmp { ... } 上下文:根 描述: ...
- Xcode使用篇-重新安装Xcode
卸载Xcode sudo rm -rf /Applications/Xcode.app sudo rm -rf /Library/Preferences/com.apple.dt.Xcode.plis ...
- SQLite 小调研
一. 概况: SQLite 是 D. Richard Hipp 于 2000 年采用 C 语言编写的一个轻量级.跨平台的关系型数据库,支持大部分 SQL92 标准(比如视图.事务.触发器.blob 数 ...
- CentOS7.6安装Go-1.12.9
安装步骤 Go的官网:https://golang.google.cn 1. 下载压缩包 wget https://dl.google.com/go/go1.12.9.linux-amd64.tar. ...
- one-hot encoding与哑变量的区别
one-hot encoding与哑变量的区别 one-hot比哑变量的特征位多一位,即哑变量是精简版的one-hot,即在线性回归中用截距项来表示最后一维,但由于最初很难分辨特征的主次关系,且机器学 ...
- 移动端布局 + iscroll.js
<!DOCTYPE html> <html> <head> <meta charset="UTF-8"> <meta name ...