pygame 笔记-5 模块化&加入敌人
上一节,已经用OOP方法,把几个类抽象出来了,但是都集中在一个.py文件中,代码显得很冗长,这一节复用模块化的思想,把这个大文件拆分成几个小文件:
先把主角Player单独放到一个文件player.py里:
import pygame

# 主角

class Player(object):

    def __init__(self, x, y, width, height, img_base_path):

        self.x = x

        self.y = y

        self.width = width

        self.height = height

        self.speed = 5

        self.left = False

        self.right = True

        self.isJump = False

        self.walkCount = 0

        self.t = 10

        self.speed = 5

        self.char = pygame.image.load(img_base_path + 'standing.png')

        # 向右走的图片数组

        self.walkRight = [pygame.image.load(img_base_path + 'actor/R1.png'),

                          pygame.image.load(img_base_path + 'actor/R2.png'),

                          pygame.image.load(img_base_path + 'actor/R3.png'),

                          pygame.image.load(img_base_path + 'actor/R4.png'),

                          pygame.image.load(img_base_path + 'actor/R5.png'),

                          pygame.image.load(img_base_path + 'actor/R6.png'),

                          pygame.image.load(img_base_path + 'actor/R7.png'),

                          pygame.image.load(img_base_path + 'actor/R8.png'),

                          pygame.image.load(img_base_path + 'actor/R9.png')]

        # 向左走的图片数组

        self.walkLeft = [pygame.image.load(img_base_path + 'actor/L1.png'),

                         pygame.image.load(img_base_path + 'actor/L2.png'),

                         pygame.image.load(img_base_path + 'actor/L3.png'),

                         pygame.image.load(img_base_path + 'actor/L4.png'),

                         pygame.image.load(img_base_path + 'actor/L5.png'),

                         pygame.image.load(img_base_path + 'actor/L6.png'),

                         pygame.image.load(img_base_path + 'actor/L7.png'),

                         pygame.image.load(img_base_path + 'actor/L8.png'),

                         pygame.image.load(img_base_path + 'actor/L9.png')]

    def draw(self, win):

        if self.walkCount >= 9:

            self.walkCount = 0

        if self.left:

            win.blit(self.walkLeft[self.walkCount % 9], (self.x, self.y))

            self.walkCount += 1

        elif self.right:

            win.blit(self.walkRight[self.walkCount % 9], (self.x, self.y))

            self.walkCount += 1

        else:

            win.blit(self.char, (self.x, self.y))
其次是子弹类:
import pygame

# 子弹类

class Bullet(object):

    def __init__(self, x, y, direction, img_base_path):

        self.x = x

        self.y = y

        self.facing = direction

        self.vel = 8 * direction

        self.width = 24

        self.height = 6

        self.bullet_right = pygame.image.load(img_base_path + 'r_bullet.png')

        self.bullet_left = pygame.image.load(img_base_path + 'l_bullet.png')

    def draw(self, win):

        # 根据人物行进的方向,切换不同的子弹图片

        if self.direction == -1:

            win.blit(self.bullet_left, (self.x - 35, self.y))

        else:

            win.blit(self.bullet_right, (self.x + 10, self.y))
做为一个射击类的小游戏,这一节我们再加入目标敌人的类:
import pygame

class Enemy(object):

    def __init__(self, x, y, width, height, end, img_base_path):

        self.x = x

        self.y = y

        self.width = width

        self.height = height

        self.path = [x, end]

        self.walkCount = 0

        self.vel = 3

        self.walkRight = [pygame.image.load(img_base_path + 'enemy/R1E.png'),

                          pygame.image.load(img_base_path + 'enemy/R2E.png'),

                          pygame.image.load(img_base_path + 'enemy/R3E.png'),

                          pygame.image.load(img_base_path + 'enemy/R4E.png'),

                          pygame.image.load(img_base_path + 'enemy/R5E.png'),

                          pygame.image.load(img_base_path + 'enemy/R6E.png'),

                          pygame.image.load(img_base_path + 'enemy/R7E.png'),

                          pygame.image.load(img_base_path + 'enemy/R8E.png'),

                          pygame.image.load(img_base_path + 'enemy/R9E.png'),

                          pygame.image.load(img_base_path + 'enemy/R10E.png'),

                          pygame.image.load(img_base_path + 'enemy/R11E.png')]

        self.walkLeft = [pygame.image.load(img_base_path + 'enemy/L1E.png'),

                         pygame.image.load(img_base_path + 'enemy/L2E.png'),

                         pygame.image.load(img_base_path + 'enemy/L3E.png'),

                         pygame.image.load(img_base_path + 'enemy/L4E.png'),

                         pygame.image.load(img_base_path + 'enemy/L5E.png'),

                         pygame.image.load(img_base_path + 'enemy/L6E.png'),

                         pygame.image.load(img_base_path + 'enemy/L7E.png'),

                         pygame.image.load(img_base_path + 'enemy/L8E.png'),

                         pygame.image.load(img_base_path + 'enemy/L9E.png'),

                         pygame.image.load(img_base_path + 'enemy/L10E.png'),

                         pygame.image.load(img_base_path + 'enemy/L11E.png')]

    def draw(self, win):

        self.move()

        if self.walkCount >= 11:

            self.walkCount = 0

        if self.vel > 0:

            win.blit(self.walkRight[self.walkCount % 11], (self.x, self.y))

            self.walkCount += 1

        else:

            win.blit(self.walkLeft[self.walkCount % 11], (self.x, self.y))

            self.walkCount += 1

    def move(self):

        if self.vel > 0:

            if self.x < self.path[1] + self.vel:

                self.x += self.vel

            else:

                self.vel = self.vel * -1

                self.x += self.vel

                self.walkCount = 0

        else:

            if self.x > self.path[0] - self.vel:

                self.x += self.vel

            else:

                self.vel = self.vel * -1

                self.x += self.vel

                self.walkCount = 0
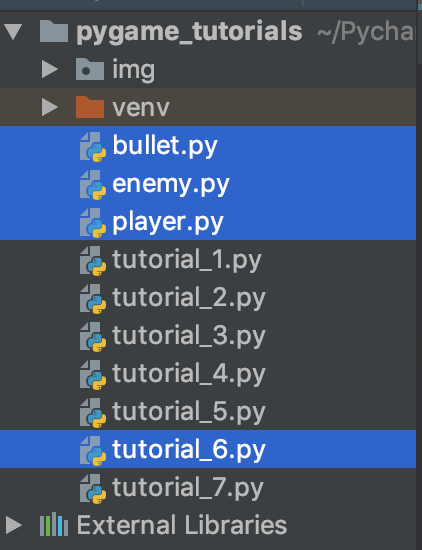
这3个.py文件放在与主文件tutorial_6.py同一个目录下,如下图:
然后在主文件tutorial_6.py里,把这3个模块导进来:
import os

# 导入3个模块

from bullet import *

from player import *

from enemy import *

pygame.init()

WIN_WIDTH, WIN_HEIGHT = 500, 500

win = pygame.display.set_mode((WIN_WIDTH, WIN_HEIGHT))

pygame.display.set_caption("first game")

img_base_path = os.getcwd() + '/img/'

bg = pygame.image.load(img_base_path + 'bg.jpg')

clock = pygame.time.Clock()

def redraw_game_window():

    win.blit(bg, (0, 0))

    man.draw(win)

    goblin.draw(win)

    for b in bullets:

        b.draw(win)

    pygame.display.update()

# main

man = Player(200, 410, 64, 64, img_base_path)

goblin = Enemy(100, 410, 64, 64, 400, img_base_path)

run = True

bullets = []

while run:

    clock.tick(24)

    for event in pygame.event.get():

        if event.type == pygame.QUIT:

            run = False

    for bullet in bullets:

        if WIN_WIDTH > bullet.x > 0:

            bullet.x += bullet.vel

        else:

            bullets.pop(bullets.index(bullet))

    keys = pygame.key.get_pressed()

    if keys[pygame.K_SPACE]:

        if man.left:

            facing = -1

        else:

            facing = 1

        if len(bullets) < 5:

            bullets.append(Bullet(round(man.x + man.width // 2), round(man.y + man.height // 2), facing, img_base_path))

    if keys[pygame.K_LEFT] and man.x > 0:

        man.x -= man.speed

        man.left = True

        man.right = False

    elif keys[pygame.K_RIGHT] and man.x < win.get_size()[0] - man.width:

        man.x += man.speed

        man.left = False

        man.right = True

    else:

        man.walkCount = 0

    if not man.isJump:

        if keys[pygame.K_UP]:

            man.isJump = True

            man.walkCount = 0

    else:

        if man.t >= -10:

            a = 1

            if man.t < 0:

                a = -1

            man.y -= 0.5 * a * (man.t ** 2)

            man.t -= 1

        else:

            man.isJump = False

            man.t = 10

    redraw_game_window()

pygame.quit()
效果:

该出场的人物与道具都齐全了,下一节将讨论"碰撞检测"。
pygame 笔记-5 模块化&加入敌人的更多相关文章
- thinkphp学习笔记5—模块化设计
原文:thinkphp学习笔记5-模块化设计 1.模块结构 完整的ThinkPHP用用围绕模块/控制器/操作设计,并支持多个入口文件盒多级控制.ThinkPHP默认PATHINFO模式,如下: htt ...
- pygame 笔记-10 摩擦力与屏幕环绕
多年前写过一篇 Flash/Flex学习笔记(25):摩擦力与屏幕环绕,可惜的当时上传的flash,服务器后来无人维护,现在flash链接都失效了.本篇用pygame重新实现了一个: 原理是类似,但要 ...
- pygame 笔记-7 生命值/血条处理
通常游戏中的角色都有所谓的生命值,而且头顶上会有一个血条显示.生命值无非就是一个属性而已,很容易在Player.py类中增加,头顶上的血条其实就是绘制二个矩形,叠加在一起. 以上节的Player.py ...
- javascript 学习笔记之模块化编程
题外: 进行web开发3年多了,javascript(后称js)用的也比较多,但是大部分都局限于函数的层次,有些公共的js函数可重用性不好,造成了程序的大量冗余,可读性差(虽然一直保留着注释的习惯,但 ...
- pygame 笔记-9 图片旋转及边界反弹
h5或flash中,可以直接对矢量对象,比如line, rectange旋转,但是pygame中,仅支持对image旋转,本以为这个是很简单的事情,但是发现还是有很多小猫腻的,记录一下: 先看一个错误 ...
- pygame 笔记-8 背景音乐&子弹音效
游戏哪能没有音效?这节我们研究下如何加背景音乐,其实也很简单: # 加载背景音乐 pygame.mixer.music.load(music_base_path + "music.mp3&q ...
- pygame 笔记-6 碰撞检测
这一节学习碰撞检测,先看原理图: 2个矩形如果发生碰撞(即:图形有重叠区域),按上图的判断条件就能检测出来,如果是圆形,则稍微变通一下,用半径检测.如果是其它不规则图形,大多数游戏中,并不要求精确检测 ...
- pygame 笔记-4 代码封装&发射子弹
继续之前的内容,随着游戏的内容越来越复杂,有必要把代码优化一下,可以参考OOP的做法,把人物类抽象出来,弄成一个单独的类,这们便于代码维护,同时我们给小人儿,加个发射子弹的功能,代码如下:(看上去略长 ...
- pygame 笔记-3 角色动画及背景的使用
上二节,已经知道如何控制基本的运动了,但是只有一个很单调的方块,不太美观,本节学习如何加载背景图,以及角色的动画. 素材准备:(原自github) 角色动画的原理:动画都是一帧帧渲染的,比如向左走的动 ...
随机推荐
- idea maven项目打war包 以及项目重新部署
第一步 打war包: 这样war报就在你项目的target目录下: 第二步 部署步骤 首先进入服务器tomcat bin 目录 关闭服务 命令: ./shutdown.sh 然后就要进入webap ...
- redis 配置文件配置
redis的配置和使用 redis的配置的分段的 配置段: 基本配置项 网络配置项 持久化相关配置 复制相关的配置 安全相关配置 Limit相关的配置 SlowLog相关的配置 INCLUDES Ad ...
- Codeforces 311D Interval Cubing 数学 + 线段树 (看题解)
Interval Cubing 这种数学题谁顶得住啊. 因为 (3 ^ 48) % (mod - 1)为 1 , 所以48个一个循环节, 用线段树直接维护. #include<bits/stdc ...
- js压缩图片上传插件localResizeIMG
示例 /** * 本地图片压缩后上传 */ $("#vfile").change(function(){ var _this = $(this); lrz(this.files[0 ...
- 2018牛客网暑假ACM多校训练赛(第五场)H subseq 树状数组
原文链接https://www.cnblogs.com/zhouzhendong/p/NowCoder-2018-Summer-Round5-H.html 题目传送门 - https://www.no ...
- AtCoder Regular Contest 082 (ARC082) E - ConvexScore 计算几何 计数
原文链接http://www.cnblogs.com/zhouzhendong/p/8934254.html 题目传送门 - ARC082 E 题意 给定二维平面上的$n$个点,定义全集为那$n$个点 ...
- gevent实现基于epoll和协程的服务器
1. 导gevent中的猴子补丁,来把原来python自带的socket变成基于epoll的socket(解除阻塞问题) 代码: # from gevent import monkey;monkey. ...
- 2018年中国研究生数学建模竞赛C题 二等奖 赛题论文
2018年中国研究生数学建模竞赛C题 对恐怖袭击事件记录数据的量化分析 恐怖袭击是指极端分子或组织人为制造的.针对但不仅限于平民及民用设施的.不符合国际道义的攻击行为,它不仅具有极大的杀伤性与破坏力, ...
- LYOI 2016 Summer 函数 【线段树】
<题目链接> 题目大意: fqk 退役后开始补习文化课啦,于是他打开了数学必修一开始复习函数,他回想起了一次函数都是 f(x)=kx+b的形式,现在他给了你n个一次函数 fi(x)=kix ...
- shell脚本中的set -e和set -o pipefail
工作中经常在shell脚本中看到set的这两个用法,但就像生活中的很多事情,习惯导致忽视,直到出现问题才引起关注. 1. set -eset命令的-e参数,linux自带的说明如下:"Exi ...