Android学习笔记进阶19 之给图片加边框
- //设置颜色
- public void setColour(int color){
- co = color;
- }
- //设置边框宽度
- public void setBorderWidth(int width){
- borderwidth = width;
- }
具体实现:
- package xiaosi.imageborder;
- import android.app.Activity;
- import android.graphics.Color;
- import android.os.Bundle;
- public class ImageBorderActivity extends Activity {
- /** Called when the activity is first created. */
- private myImageView image = null;
- private myImageView image1 = null;
- @Override
- public void onCreate(Bundle savedInstanceState) {
- super.onCreate(savedInstanceState);
- setContentView(R.layout.main);
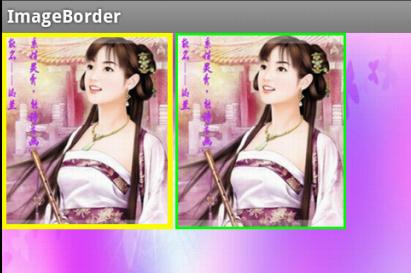
- image = (myImageView)findViewById(R.id.iamge);
- image.setColour(Color.YELLOW);
- image.setBorderWidth(10);
- image1 = (myImageView)findViewById(R.id.iamge1);
- image1.setColour(Color.GREEN);
- image1.setBorderWidth(5);
- }
- }
main.xml
- <LinearLayout
- xmlns:android="http://schemas.android.com/apk/res/android"
- android:background="@drawable/playerbackground"
- android:layout_width="fill_parent"
- android:layout_height="fill_parent">
- <xiaosi.imageborder.myImageView
- android:id="@+id/iamge"
- android:layout_width="200px"
- android:layout_height="230px"
- android:layout_alignParentRight="true"
- android:src="@drawable/v"
- android:layout_centerInParent="true"
- android:layout_marginRight="3px"
- />
- <xiaosi.imageborder.myImageView
- android:id="@+id/iamge1"
- android:layout_width="200px"
- android:layout_height="230px"
- android:layout_alignParentRight="true"
- android:src="@drawable/v"
- android:layout_centerInParent="true"
- android:layout_marginRight="3px"
- />
- </LinearLayout>
- package xiaosi.imageborder;
- import android.content.Context;
- import android.graphics.Canvas;
- import android.graphics.Paint;
- import android.graphics.Rect;
- import android.util.AttributeSet;
- import android.widget.ImageView;
- public class myImageView extends ImageView {
- private int co;
- private int borderwidth;
- public myImageView(Context context) {
- super(context);
- }
- public myImageView(Context context, AttributeSet attrs,
- int defStyle) {
- super(context, attrs, defStyle);
- }
- public myImageView(Context context, AttributeSet attrs) {
- super(context, attrs);
- }
- //设置颜色
- public void setColour(int color){
- co = color;
- }
- //设置边框宽度
- public void setBorderWidth(int width){
- borderwidth = width;
- }
- @Override
- protected void onDraw(Canvas canvas) {
- super.onDraw(canvas);
- // 画边框
- Rect rec = canvas.getClipBounds();
- rec.bottom--;
- rec.right--;
- Paint paint = new Paint();
- //设置边框颜色
- paint.setColor(co);
- paint.setStyle(Paint.Style.STROKE);
- //设置边框宽度
- paint.setStrokeWidth(borderwidth);
- canvas.drawRect(rec, paint);
- }
- }
源代码下载:点击打开链接
Android学习笔记进阶19 之给图片加边框的更多相关文章
- Android学习笔记进阶19之给图片加边框
//设置颜色 public void setColour(int color){ co = color; } //设置边框宽度 public void setBorderWidth(int width ...
- Android学习笔记进阶20 之得到图片的缩略图
<1>简介 之前往往是通过Bitmap.Drawable和Canvas配合完成,需要写一系列繁杂的逻辑去缩小原有图片,从而得到缩略图. 现在我给大家介绍一种比较简单的方法:(网上有) 在A ...
- Android学习笔记进阶20之得到图片的缩略图
<1>简介 之前往往是通过Bitmap.Drawable和Canvas配合完成,需要写一系列繁杂的逻辑去缩小原有图片,从而得到缩略图. 现在我给大家介绍一种比较简单的方法:(网上有) 在A ...
- Android学习笔记进阶之在图片上涂鸦(能清屏)
Android学习笔记进阶之在图片上涂鸦(能清屏) 2013-11-19 10:52 117人阅读 评论(0) 收藏 举报 HandWritingActivity.java package xiaos ...
- Android学习笔记进阶16之BitmapShader
<1>简介 具体的看一下博文:Android学习笔记进阶15之Shader渲染 public BitmapShader(Bitmap bitmap,Shader.TileMode ti ...
- Android学习笔记进阶17之LinearGradient
具体的看一下博文:Android学习笔记进阶15之Shader渲染 package xiaosi.BitmapShader; import android.app.Activity; import a ...
- Android学习笔记进阶18 之画图并保存图片到本地
1.首先创建一个Bitmap图片,并指定大小: 2.在该图片上创建一个新的画布Canvas,然后在画布上绘制,并保存即可: 3.需要保存的目录File,注意如果写的目录如“/sdcard/so ...
- Android学习笔记进阶18之画图并保存图片到本地
1.首先创建一个Bitmap图片,并指定大小: 2.在该图片上创建一个新的画布Canvas,然后在画布上绘制,并保存即可: 3.需要保存的目录File,注意如果写的目录如“/sdcard/so ...
- Android学习笔记(二)之异步加载图片
最近在android开发中碰到比较棘手的问题,就是加载图片内存溢出.我开发的是一个新闻应用,应用中用到大量的图片,一个界面中可能会有上百张图片.开发android应用的朋友可能或多或少碰到加载图片内存 ...
随机推荐
- vue -- 7 个 有用的 Vue 开发技巧
1 状态共享 随着组件的细化,就会遇到多组件状态共享的情况, Vuex当然可以解决这类问题,不过就像 Vuex官方文档所说的,如果应用不够大,为避免代码繁琐冗余,最好不要使用它,今天我们介绍的是 vu ...
- MySql-Error: ERROR 1045 (28000): Access denied for user 'root'@'localhost' (using password: YES)
MySql-Error: ERROR 1045 (28000): Access denied for user 'root'@'localhost' (using password: YES) 标签( ...
- POJ 3273 二分答案
思路:二分答案经典题吧....注意边界就OK了 //By SiriusRen #include <cstdio> #include <algorithm> using name ...
- IHttpHandler的学习(0-2)
这个IHttpHandler,要想到asp.net生命周期 ,想到哪个从你发起请求开始,这个请求通过HttpModule------>IHttpHandler的: 执行HttpModule的一系 ...
- 钓鱼WIFI的防范
实际上,Wi-Fi接入点(AP).路由器和热点常常是高度暴露的攻击面.用户一不小心就有可能踏进攻击者设置的Wi-Fi陷阱,为企业造成信息泄露或经济损失. 如今Wi-Fi 6时代悄然到来,为高密海量无线 ...
- 洛谷 P1454 圣诞夜的极光
P1454 圣诞夜的极光 题目背景 圣诞夜系列~~ 题目描述 圣诞老人回到了北极圣诞区,已经快到12点了.也就是说极光表演要开始了.这里的极光不是极地特有的自然极光景象.而是圣诞老人主持的人造极光. ...
- 思科E3200 路由器 DD-WRT 设置花生壳和3322.org动态域名(DDNS)
花生壳设置(已測试) ddns.oray.com:80 username aaaa password bbbb 主机名 abc.gicp.net URL /ph/update?ho ...
- 将IP表存入SQL里的程序
将IP表存入SQL里的程序 写得比較粗糙,另一点错误,只是能达到效果.请大家測试 create.asp ---------------------------------------------- ...
- 流水线技术原理和Verilog HDL实现
所谓流水线处理,如同生产装配线一样,将操作执行工作量分成若干个时间上均衡的操作段,从流水线的起点连续地输入,流水线的各操作段以重叠方式执行.这使得操作执行速度只与流水线输入的速度有关,而与处理所需的时 ...
- HDU2665 kth number 线段树做法
题意:求区间第k小 思路: 线段树 每个节点上保存 当前区间已经排序好的序列 (归并一下就好了嘛 复杂度 O(l)的) 这样建树的时空复杂度都是 O(nlogn)的 对于 每次询问 二分一个答案 在树 ...