Learning OSG programing---osgShape
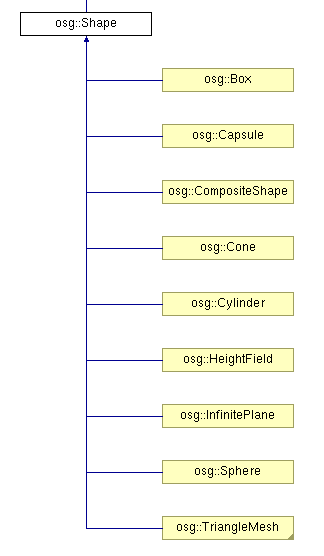
本例示范了osg中Shape ---- 基本几何元素的绘制过程。参照osg官方文档,Shape 类包含以下子类:
在示例程序中,函数createShapes函数用于生成需要绘制的几何形状。
 osg::Geode* createShapes(osg::ArgumentParser& arguments)

 {

     osg::Geode* geode = new osg::Geode();

     // ---------------------------------------

     // Set up a StateSet to texture the objects

     // ---------------------------------------

     osg::StateSet* stateset = new osg::StateSet();

   //设置材质图片

     osg::ref_ptr<osg::Image> image = osgDB::readRefImageFile( "Images/lz.rgb" );

     if (image)

     {

         osg::Texture2D* texture = new osg::Texture2D;

         texture->setImage(image);

         texture->setFilter(osg::Texture::MIN_FILTER, osg::Texture::LINEAR);

         stateset->setTextureAttributeAndModes(,texture, osg::StateAttribute::ON);

     }

     stateset->setMode(GL_LIGHTING, osg::StateAttribute::ON);

     geode->setStateSet( stateset );

     float radius = 0.8f;

     float height = 1.0f;

     osg::TessellationHints* hints = new osg::TessellationHints;

     hints->setDetailRatio(0.5f);

   //建立各种几何实体

     geode->addDrawable(new osg::ShapeDrawable(new osg::Sphere(osg::Vec3(0.0f,0.0f,0.0f),radius),hints));

     geode->addDrawable(new osg::ShapeDrawable(new osg::Box(osg::Vec3(2.0f,0.0f,0.0f),*radius),hints));

     geode->addDrawable(new osg::ShapeDrawable(new osg::Cone(osg::Vec3(4.0f,0.0f,0.0f),radius,height),hints));

     geode->addDrawable(new osg::ShapeDrawable(new osg::Cylinder(osg::Vec3(6.0f,0.0f,0.0f),radius,height),hints));

     geode->addDrawable(new osg::ShapeDrawable(new osg::Capsule(osg::Vec3(8.0f,0.0f,0.0f),radius,height),hints));

   //用于控制平面的高程起伏

     osg::HeightField* grid = new osg::HeightField;

     if (arguments.read("--large"))      //大范围

     {

         unsigned int numX = ;

         unsigned int numY = ;

         double sizeX = 10.0;

         double sizeY = 10.0;

         grid->allocate(numX,numY);

         grid->setXInterval(sizeX/float(numX));

         grid->setYInterval(sizeY/float(numY));

         for(unsigned int r=;r<numY;++r)

         {

             for(unsigned int c=;c<numX;++c)

             {

                 double rx = double(c)/double(numX-);

                 double ry = double(r)/double(numY-);

                 grid->setHeight(c, r, 2.0*sin(rx*ry*4.0*osg::PI));

             }

         }

     }

     else              //小范围

     {

         grid->allocate(,);

         grid->setXInterval(0.28f);

         grid->setYInterval(0.28f);

         for(unsigned int r=;r<;++r)

         {

             for(unsigned int c=;c<;++c)

             {

                 grid->setHeight(c,r,vertex[r+c*][]);

             }

         }

     }

     geode->addDrawable(new osg::ShapeDrawable(grid));

     return geode;

 }
在以上代码中,首先建立了几何节点Geode,加载纹理图像,并将其设置为节点的材质。
之后向节点中加入各种Shape模型,设置它们的集合参数。之后建立了高程域模型osg::HeightField* grid,根据运行程序时提供的命令行参数,设置其为不同的点密度。若运行命令中提供有--large选项,则建立高密度高程集,两层for循环中嵌套的语句,即为计算高程网格中各点的高程值方程。对于large情形,其在点(x,y)处的高程值为2*sin(x*y*4π)。而在普通情况下,点的高程值取决与vertex向量的第三个分量,因为在文件的开始,包含了地形坐标数据:
#include "../osghangglide/terrain_coords.h"
最后,将定义的地形平面添加到节点中去。
在主函数中,调用上面定义的createShapes函数,在进行一些其他准备工作即可:
int main(int argc, char **argv)

{

    osg::ArgumentParser arguments(&argc,argv);

    // construct the viewer.

    osgViewer::Viewer viewer(arguments);

    // add model to viewer.

    viewer.setSceneData( createShapes(arguments) );

    // add the state manipulator

    viewer.addEventHandler( new osgGA::StateSetManipulator(viewer.getCamera()->getOrCreateStateSet()) );

    return viewer.run();

}
按不同模式运行程序,得到不同的效果:
--large模式:

正常模式:

由此程序受到启发,可利用osg高程域,建立DEM(数字高程模型)浏览或仿真、编辑工具,达到学以致用的目的。
Enjoy!
Learning OSG programing---osgShape的更多相关文章
- Learning OSG programing---osgScribe
Learning OSG programing---osgScribe Scribe可以翻译为素描,抄写等.本例通过在模型表面添加一层素描,来显示模型的骨架. 关键代码: osg::ref_ptr&l ...
- Learning OSG programing---Multi Camera in Multi window 在多窗口中创建多相机
这个例子演示了在多个窗口中创建多个相机,函数的代码如下: void multiWindowMultipleCameras(osgViewer::Viewer& viewer,bool mult ...
- Learning OSG programing---Multi Camera in one window 在单窗口中创建多相机
在学习OSG提供的例子osgCamera中,由于例子很长,涉及很多细节,考虑将其分解为几个小例子.本文介绍实现在一个窗口中添加多个相机的功能. 此函数接受一个Viewer引用类型参数,设置图形上下文的 ...
- Learning OSG programing---osgAnimation(3)
接下来是用createModel函数创建模型: osg::ref_ptr<osg::Group> createModel(bool overlay, osgSim::OverlayNode ...
- Learning OSG programing---osgAnimation(2)
osg::Node* createBase(const osg::Vec3& center,float radius) { ; ; *radius; *radius; osg::Vec3 v0 ...
- Learning OSG programing---osgAnimation(1)
osg::AnimationPath* createAnimationPath(const osg::Vec3& center,float radius,double looptime) { ...
- Learning OSG programing---osgClip
OSG Clip例程剖析 首先是创建剪切节点的函数代码: osg::ref_ptr<osg::Node> decorate_with_clip_node(const osg::ref_pt ...
- Learning OSG programing---osgwindows
/* OpenSceneGraph example, osgwindows. * * Permission is hereby granted, free of charge, to any pers ...
- Coursera Deep Learning 2 Improving Deep Neural Networks: Hyperparameter tuning, Regularization and Optimization - week3, Hyperparameter tuning, Batch Normalization and Programming Frameworks
Tuning process 下图中的需要tune的parameter的先后顺序, 红色>黄色>紫色,其他基本不会tune. 先讲到怎么选hyperparameter, 需要随机选取(sa ...
随机推荐
- Java OO知识总结
接着上一集 https://www.cnblogs.com/pdev/p/11288014.html 5. OO中的一些基本概念 继承 父类的非private方法自动被子类继承 cl ...
- Elasticsearch7.X 入门学习第一课笔记----基本概念
原文:Elasticsearch7.X 入门学习第一课笔记----基本概念 版权声明:本文为博主原创文章,遵循CC 4.0 BY-SA版权协议,转载请附上原文出处链接和本声明. 本文链接:https: ...
- RocksDB存储引擎测试
一:安装搭建(两个节点都要安装) yum install http://www.percona.com/downloads/percona-release/redhat/0.1-4/percona-r ...
- .net 关于路径的总结
原文:https://www.cnblogs.com/hehehehehe/p/6196155.html https://www.cnblogs.com/yugongmengjiutian/artic ...
- 下载-MS SQL Server 2005(大全版)含开发人员版、企业版、标准版【转】
中文名称:微软SQL Server 2005 英文名称:MS SQL Server 2005资源类型:ISO版本:开发人员版.企业版.标准版发行时间:2006年制作发行:微软公司地区:大陆语言:普通话 ...
- 2018-8-27-C#-powshell-调用
title author date CreateTime categories C# powshell 调用 lindexi 2018-8-27 16:20:4 +0800 2018-06-18 20 ...
- VMware新加网卡NAT连接(内网)出现本机与虚拟机ping不通的问题
今新加网卡NAT连接,配置好之后始终出现eth1:link is not ready. 虚拟机与本机不能建立连接. 解决方案:windows里面打开服务开启VMware NAT Service,并关闭 ...
- 在虚拟机Linux中安装VMTools遇到的问题-小结
总结: 遇到的问题:No support for locale: zh_CN.utf8 可能的解决方法:1.sudo dpkg-reconfigure locale (重新配置?) 2.上一步失败,提 ...
- (转)Centos7下杀毒软件clamav的安装和使用
本文转载自:https://www.cnblogs.com/bingo1024/p/9018212.html#_label1_0 目录 一.yum安装 二.编译安装 2.1:下载软件包 2.2:创建c ...
- Sass @debug
@debug 在 Sass 中是用来调试的,当你的在 Sass 的源码中使用了 @debug 指令之后,Sass 代码在编译出错时,在命令终端会输出你设置的提示 Bug: @debug 10em + ...