
吴裕雄 python深度学习与实践(17)
import tensorflow as tf

from tensorflow.examples.tutorials.mnist import input_data

import time

# 声明输入图片数据,类别

x = tf.placeholder('float', [None, 784])

y_ = tf.placeholder('float', [None, 10])

# 输入图片数据转化

x_image = tf.reshape(x, [-1, 28, 28, 1])

#第一层卷积层,初始化卷积核参数、偏置值,该卷积层5*5大小,一个通道,共有6个不同卷积核

filter1 = tf.Variable(tf.truncated_normal([5, 5, 1, 6]))

bias1 = tf.Variable(tf.truncated_normal([6]))

conv1 = tf.nn.conv2d(x_image, filter1, strides=[1, 1, 1, 1], padding='SAME')

h_conv1 = tf.nn.relu(conv1 + bias1)

maxPool2 = tf.nn.max_pool(h_conv1, ksize=[1, 2, 2, 1],strides=[1, 2, 2, 1], padding='SAME')

filter2 = tf.Variable(tf.truncated_normal([5, 5, 6, 16]))

bias2 = tf.Variable(tf.truncated_normal([16]))

conv2 = tf.nn.conv2d(maxPool2, filter2, strides=[1, 1, 1, 1], padding='SAME')

h_conv2 = tf.nn.relu(conv2 + bias2)

maxPool3 = tf.nn.max_pool(h_conv2, ksize=[1, 2, 2, 1],strides=[1, 2, 2, 1], padding='SAME')

filter3 = tf.Variable(tf.truncated_normal([5, 5, 16, 120]))

bias3 = tf.Variable(tf.truncated_normal([120]))

conv3 = tf.nn.conv2d(maxPool3, filter3, strides=[1, 1, 1, 1], padding='SAME')

h_conv3 = tf.nn.relu(conv3 + bias3)

# 全连接层

# 权值参数

W_fc1 = tf.Variable(tf.truncated_normal([7 * 7 * 120, 80]))

# 偏置值

b_fc1 = tf.Variable(tf.truncated_normal([80]))

# 将卷积的产出展开

h_pool2_flat = tf.reshape(h_conv3, [-1, 7 * 7 * 120])

# 神经网络计算,并添加relu激活函数

h_fc1 = tf.nn.relu(tf.matmul(h_pool2_flat, W_fc1) + b_fc1)

# 输出层,使用softmax进行多分类

W_fc2 = tf.Variable(tf.truncated_normal([80, 10]))

b_fc2 = tf.Variable(tf.truncated_normal([10]))

y_conv = tf.nn.softmax(tf.matmul(h_fc1, W_fc2) + b_fc2)

# 损失函数

cross_entropy = -tf.reduce_sum(y_ * tf.log(y_conv))

# 使用GDO优化算法来调整参数

train_step = tf.train.GradientDescentOptimizer(0.0001).minimize(cross_entropy)

sess = tf.InteractiveSession()

# 测试正确率

correct_prediction = tf.equal(tf.argmax(y_conv, 1), tf.argmax(y_, 1))

accuracy = tf.reduce_mean(tf.cast(correct_prediction, "float"))

# 所有变量进行初始化

sess.run(tf.initialize_all_variables())

# 获取mnist数据

mnist_data_set = input_data.read_data_sets('F:\\TensorFlow_deep_learn\\MNIST\\', one_hot=True)

# 进行训练

start_time = time.time()

for i in range(20000):

    # 获取训练数据

    batch_xs, batch_ys = mnist_data_set.train.next_batch(200)

    # 每迭代100个 batch,对当前训练数据进行测试,输出当前预测准确率

    if i % 2 == 0:

        train_accuracy = accuracy.eval(feed_dict={x: batch_xs, y_: batch_ys})

        print("step %d, training accuracy %g" % (i, train_accuracy))

        # 计算间隔时间

        end_time = time.time()

        print('time: ', (end_time - start_time))

        start_time = end_time

    # 训练数据

    train_step.run(feed_dict={x: batch_xs, y_: batch_ys})

# 关闭会话

sess.close()
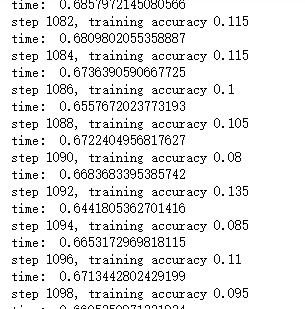
import time

import tensorflow as tf

import matplotlib.pyplot as plt

from tensorflow.examples.tutorials.mnist import input_data

def weight_variable(shape):

    initial = tf.truncated_normal(shape, stddev=0.1)

    return tf.Variable(initial)

#初始化单个卷积核上的偏置值

def bias_variable(shape):

    initial = tf.constant(0.1, shape=shape)

    return tf.Variable(initial)

#输入特征x,用卷积核W进行卷积运算,strides为卷积核移动步长,

#padding表示是否需要补齐边缘像素使输出图像大小不变

def conv2d(x, W):

    return tf.nn.conv2d(x, W, strides=[1, 1, 1, 1], padding='SAME')

#对x进行最大池化操作,ksize进行池化的范围,

def max_pool_2x2(x):

    return tf.nn.max_pool(x, ksize=[1, 2, 2, 1],strides=[1, 2, 2, 1], padding='SAME')

sess = tf.InteractiveSession()

# 声明输入图片数据,类别

x = tf.placeholder('float32', [None, 784])

y_ = tf.placeholder('float32', [None, 10])

# 输入图片数据转化

x_image = tf.reshape(x, [-1, 28, 28, 1])

W_conv1 = weight_variable([5, 5, 1, 6])

b_conv1 = bias_variable([6])

h_conv1 = tf.nn.relu(conv2d(x_image, W_conv1) + b_conv1)

h_pool1 = max_pool_2x2(h_conv1)

W_conv2 = weight_variable([5, 5, 6, 16])

b_conv2 = bias_variable([16])

h_conv2 = tf.nn.relu(conv2d(h_pool1, W_conv2) + b_conv2)

h_pool2 = max_pool_2x2(h_conv2)

W_fc1 = weight_variable([7*7*16,120])

# 偏置值

b_fc1 = bias_variable([120])

# 将卷积的产出展开

h_pool2_flat = tf.reshape(h_pool2, [-1, 7 * 7 * 16])

# 神经网络计算,并添加relu激活函数

h_fc1 = tf.nn.relu(tf.matmul(h_pool2_flat, W_fc1) + b_fc1)

W_fc2 = weight_variable([120,10])

b_fc2 = bias_variable([10])

y_conv = tf.nn.softmax(tf.matmul(h_fc1, W_fc2) + b_fc2)

# 代价函数

cross_entropy = -tf.reduce_sum(y_ * tf.log(y_conv))

# 使用Adam优化算法来调整参数

train_step = tf.train.GradientDescentOptimizer(1e-4).minimize(cross_entropy)

# 测试正确率

correct_prediction = tf.equal(tf.argmax(y_conv, 1), tf.argmax(y_, 1))

accuracy = tf.reduce_mean(tf.cast(correct_prediction, "float32"))

# 所有变量进行初始化

sess.run(tf.initialize_all_variables())

# 获取mnist数据

mnist_data_set = input_data.read_data_sets('F:\\TensorFlow_deep_learn\\MNIST\\', one_hot=True)

c = []

# 进行训练

start_time = time.time()

for i in range(1000):

    # 获取训练数据

    batch_xs, batch_ys = mnist_data_set.train.next_batch(200)

    # 每迭代10个 batch,对当前训练数据进行测试,输出当前预测准确率

    if i % 2 == 0:

        train_accuracy = accuracy.eval(feed_dict={x: batch_xs, y_: batch_ys})

        c.append(train_accuracy)

        print("step %d, training accuracy %g" % (i, train_accuracy))

        # 计算间隔时间

        end_time = time.time()

        print('time: ', (end_time - start_time))

        start_time = end_time

    # 训练数据

    train_step.run(feed_dict={x: batch_xs, y_: batch_ys})

sess.close()

plt.plot(c)

plt.tight_layout()

plt.savefig('F:\\cnn-tf-cifar10-2.png', dpi=200)

plt.show()
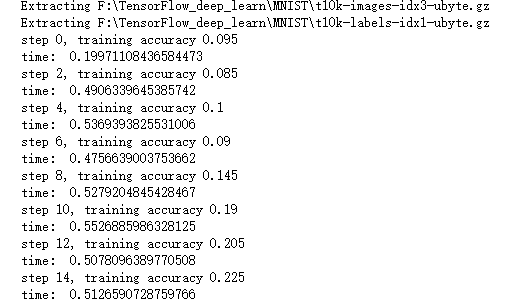
import time

import tensorflow as tf

import matplotlib.pyplot as plt

from tensorflow.examples.tutorials.mnist import input_data

def weight_variable(shape):

    initial = tf.truncated_normal(shape, stddev=0.1)

    return tf.Variable(initial)

#初始化单个卷积核上的偏置值

def bias_variable(shape):

    initial = tf.constant(0.1, shape=shape)

    return tf.Variable(initial)

#输入特征x,用卷积核W进行卷积运算,strides为卷积核移动步长,

#padding表示是否需要补齐边缘像素使输出图像大小不变

def conv2d(x, W):

    return tf.nn.conv2d(x, W, strides=[1, 1, 1, 1], padding='SAME')

#对x进行最大池化操作,ksize进行池化的范围,

def max_pool_2x2(x):

    return tf.nn.max_pool(x, ksize=[1, 2, 2, 1],strides=[1, 2, 2, 1], padding='SAME')

sess = tf.InteractiveSession()

# 声明输入图片数据,类别

x = tf.placeholder('float32', [None, 784])

y_ = tf.placeholder('float32', [None, 10])

# 输入图片数据转化

x_image = tf.reshape(x, [-1, 28, 28, 1])

W_conv1 = weight_variable([5, 5, 1, 32])

b_conv1 = bias_variable([32])

h_conv1 = tf.nn.relu(conv2d(x_image, W_conv1) + b_conv1)

h_pool1 = max_pool_2x2(h_conv1)

W_conv2 = weight_variable([5, 5, 32, 64])

b_conv2 = bias_variable([64])

h_conv2 = tf.nn.relu(conv2d(h_pool1, W_conv2) + b_conv2)

h_pool2 = max_pool_2x2(h_conv2)

W_fc1 = weight_variable([7*7*64,1024])

# 偏置值

b_fc1 = bias_variable([1024])

# 将卷积的产出展开

h_pool2_flat = tf.reshape(h_pool2, [-1, 7 * 7 * 64])

# 神经网络计算,并添加relu激活函数

h_fc1 = tf.nn.relu(tf.matmul(h_pool2_flat, W_fc1) + b_fc1)

W_fc2 = weight_variable([1024,10])

b_fc2 = bias_variable([10])

y_conv = tf.nn.softmax(tf.matmul(h_fc1, W_fc2) + b_fc2)

# 代价函数

cross_entropy = -tf.reduce_sum(y_ * tf.log(y_conv))

# 使用Adam优化算法来调整参数

train_step = tf.train.GradientDescentOptimizer(1e-4).minimize(cross_entropy)

# 测试正确率

correct_prediction = tf.equal(tf.argmax(y_conv, 1), tf.argmax(y_, 1))

accuracy = tf.reduce_mean(tf.cast(correct_prediction, "float32"))

# 所有变量进行初始化

sess.run(tf.initialize_all_variables())

# 获取mnist数据

mnist_data_set = input_data.read_data_sets('F:\\TensorFlow_deep_learn\\MNIST\\', one_hot=True)

c = []

# 进行训练

start_time = time.time()

for i in range(1000):

    # 获取训练数据

    batch_xs, batch_ys = mnist_data_set.train.next_batch(200)

    # 每迭代10个 batch,对当前训练数据进行测试,输出当前预测准确率

    if i % 2 == 0:

        train_accuracy = accuracy.eval(feed_dict={x: batch_xs, y_: batch_ys})

        c.append(train_accuracy)

        print("step %d, training accuracy %g" % (i, train_accuracy))

        # 计算间隔时间

        end_time = time.time()

        print('time: ', (end_time - start_time))

        start_time = end_time

    # 训练数据

    train_step.run(feed_dict={x: batch_xs, y_: batch_ys})

sess.close()

plt.plot(c)

plt.tight_layout()

plt.savefig('F:\\cnn-tf-cifar10-1.png', dpi=200)

plt.show()
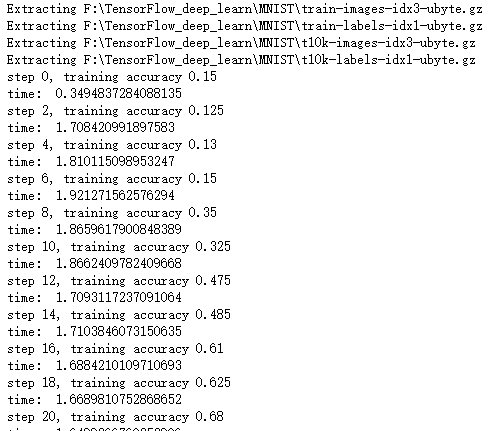
import time

import tensorflow as tf

import matplotlib.pyplot as plt

from tensorflow.examples.tutorials.mnist import input_data

def weight_variable(shape):

    initial = tf.truncated_normal(shape, stddev=0.1)

    return tf.Variable(initial)

#初始化单个卷积核上的偏置值

def bias_variable(shape):

    initial = tf.constant(0.1, shape=shape)

    return tf.Variable(initial)

#输入特征x,用卷积核W进行卷积运算,strides为卷积核移动步长,

#padding表示是否需要补齐边缘像素使输出图像大小不变

def conv2d(x, W):

    return tf.nn.conv2d(x, W, strides=[1, 1, 1, 1], padding='SAME')

#对x进行最大池化操作,ksize进行池化的范围,

def max_pool_2x2(x):

    return tf.nn.max_pool(x, ksize=[1, 2, 2, 1],strides=[1, 2, 2, 1], padding='SAME')

sess = tf.InteractiveSession()

# 声明输入图片数据,类别

x = tf.placeholder('float32', [None, 784])

y_ = tf.placeholder('float32', [None, 10])

# 输入图片数据转化

x_image = tf.reshape(x, [-1, 28, 28, 1])

W_conv1 = weight_variable([5, 5, 1, 32])

b_conv1 = bias_variable([32])

h_conv1 = tf.nn.relu(conv2d(x_image, W_conv1) + b_conv1)

h_pool1 = max_pool_2x2(h_conv1)

W_conv2 = weight_variable([5, 5, 32, 64])

b_conv2 = bias_variable([64])

h_conv2 = tf.nn.relu(conv2d(h_pool1, W_conv2) + b_conv2)

h_pool2 = max_pool_2x2(h_conv2)

W_fc1 = weight_variable([7*7*64,1024])

# 偏置值

b_fc1 = bias_variable([1024])

# 将卷积的产出展开

h_pool2_flat = tf.reshape(h_pool2, [-1, 7 * 7 * 64])

# 神经网络计算,并添加relu激活函数

h_fc1 = tf.nn.relu(tf.matmul(h_pool2_flat, W_fc1) + b_fc1)

W_fc2 = weight_variable([1024,128])

b_fc2 = bias_variable([128])

h_fc2 = tf.nn.relu(tf.matmul(h_fc1, W_fc2) + b_fc2)

W_fc3 = weight_variable([128,10])

b_fc3 = bias_variable([10])

y_conv = tf.nn.softmax(tf.matmul(h_fc2, W_fc3) + b_fc3)

# 代价函数

cross_entropy = -tf.reduce_sum(y_ * tf.log(y_conv))

# 使用Adam优化算法来调整参数

train_step = tf.train.GradientDescentOptimizer(1e-5).minimize(cross_entropy)

# 测试正确率

correct_prediction = tf.equal(tf.argmax(y_conv, 1), tf.argmax(y_, 1))

accuracy = tf.reduce_mean(tf.cast(correct_prediction, "float32"))

# 所有变量进行初始化

sess.run(tf.initialize_all_variables())

# 获取mnist数据

mnist_data_set = input_data.read_data_sets('F:\\TensorFlow_deep_learn\\MNIST\\', one_hot=True)

c = []

# 进行训练

start_time = time.time()

for i in range(1000):

    # 获取训练数据

    batch_xs, batch_ys = mnist_data_set.train.next_batch(200)

    # 每迭代10个 batch,对当前训练数据进行测试,输出当前预测准确率

    if i % 2 == 0:

        train_accuracy = accuracy.eval(feed_dict={x: batch_xs, y_: batch_ys})

        c.append(train_accuracy)

        print("step %d, training accuracy %g" % (i, train_accuracy))

        # 计算间隔时间

        end_time = time.time()

        print('time: ', (end_time - start_time))

        start_time = end_time

    # 训练数据

    train_step.run(feed_dict={x: batch_xs, y_: batch_ys})

sess.close()

plt.plot(c)

plt.tight_layout()

plt.savefig('F:\\cnn-tf-cifar10-11.png', dpi=200)

plt.show()
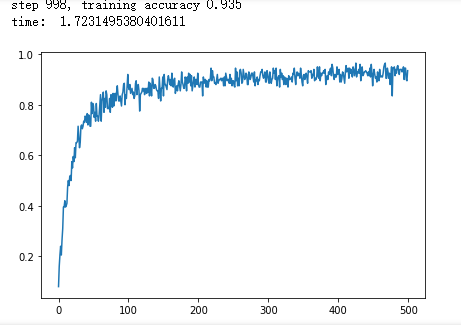
吴裕雄 python深度学习与实践(17)的更多相关文章
- 吴裕雄 python深度学习与实践(12)
import tensorflow as tf q = tf.FIFOQueue(,"float32") counter = tf.Variable(0.0) add_op = t ...
- 吴裕雄 python深度学习与实践(18)
# coding: utf-8 import time import numpy as np import tensorflow as tf import _pickle as pickle impo ...
- 吴裕雄 python深度学习与实践(16)
import struct import numpy as np import matplotlib.pyplot as plt dateMat = np.ones((7,7)) kernel = n ...
- 吴裕雄 python深度学习与实践(15)
import tensorflow as tf import tensorflow.examples.tutorials.mnist.input_data as input_data mnist = ...
- 吴裕雄 python深度学习与实践(14)
import numpy as np import tensorflow as tf import matplotlib.pyplot as plt threshold = 1.0e-2 x1_dat ...
- 吴裕雄 python深度学习与实践(13)
import numpy as np import matplotlib.pyplot as plt x_data = np.random.randn(10) print(x_data) y_data ...
- 吴裕雄 python深度学习与实践(11)
import numpy as np from matplotlib import pyplot as plt A = np.array([[5],[4]]) C = np.array([[4],[6 ...
- 吴裕雄 python深度学习与实践(10)
import tensorflow as tf input1 = tf.constant(1) print(input1) input2 = tf.Variable(2,tf.int32) print ...
- 吴裕雄 python深度学习与实践(9)
import numpy as np import tensorflow as tf inputX = np.random.rand(100) inputY = np.multiply(3,input ...
随机推荐
- USD在CentOS7.0操作系统下的安装方法
最近Pixar的开源USD软件很火,官方在Introduce中明确讲到这个软件的设计开发目标是增强艺术家协作,减少不确定因素,最大化资产版本迭代效率,追求更大的承载能力. 当今行业中传统的线性的制作方 ...
- 动态调用WebService的代理类
using System; using System.Collections; using System.ComponentModel; using System.Data; using System ...
- centos7 安装php gd库
yum install php-gd vi /etc/php.ini 添加: extension=/usr/lib64/php/modules/gd.so
- 学习MeteoInfo二次开发教程(十)
1.复制文件cloud_1009271330.000,I-01.pal 2.改: GridData cloud = aDataInfo.GetGridData(""); 为: Gr ...
- OO第三次博客
规格化设计的发展历史 在计算机的早期发展中,软件开发没有可以遵循的系统方法,往往只有源代码而没有软件说明书等文档,因此这段时期的软件通用性时很有限的.后来到了20世纪60年代,软件开始被广泛使用,软件 ...
- day1.接口测试(概念、Postman、SoapUI、jmeter)
一.什么是接口测试 接口测试是测试系统组件间接口的一种测试.接口测试主要用于检测外部系统与系统之间以及内部各个子系统之间的交互点.测试的重点是要检查数据的交换,传递和控制管理过程,以及系统间的相互逻辑 ...
- 事件&表达式
typeFaqs.ForEach(async p => { var results = await ; p.Results = results; }); https://stackoverfl ...
- 采用自定义协议代替OCX组件
事情起源:公司视频播放一直是采用的嵌入浏览器组件实现视频的预览回放等功能.这种实现方式要求客户使用IE浏览器. 最近上线项目使用Html 5开发,要求IE11.项目中使用了视频播放功能,如果全部升级到 ...
- (转)Windows下cmd nginx的启动,重启,关闭功能
转自:http://www.cnblogs.com/derekchen/archive/2011/02/17/1957209.html cls @ECHO OFF SET NGINX_PATH=D:\ ...
- flink入门:01 构建简单运行程序
1. mac平台安装flink(默认最新版) brew install apache-flink 安装结果: Version 1.7.1, commit ID: 89eafb4 2. jdk版本,我尝 ...