UINavigationController详解一(转)UIBarButtonItem
本文出自:http://www.cnblogs.com/smileEvday/archive/2012/05/14/2495153.html 特别感谢。
1、UINavigationController导航控制器如何使用
UINavigationController可以翻译为导航控制器,在iOS里经常用到。
我们看看它的如何使用:
下面的图显示了导航控制器的流程。最左侧是根视图,当用户点击其中的General项时 ,General视图会滑入屏幕;当用户继续点击Auto-Lock项时,Auto-Lock视图将滑入屏幕。相应地,在对象管理上,导航控制器使用了导航堆栈。根视图控制器在堆栈最底层,接下来入栈的是General视图控制器和Auto-Lock视图控制器。可以调用pushViewControllerAnimated:方法将视图控制器推入栈顶,也可以调用popViewControllerAnimated:方法将视图控制器弹出堆栈。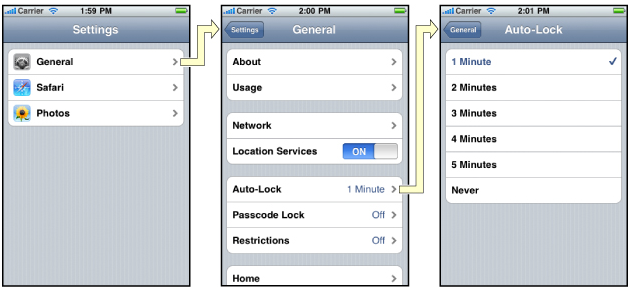
上图来自苹果官网。
2、UINavigationController的结构组成
看下图,UINavigationController有Navigation bar ,Navigation View ,Navigation toobar等组成。

现在我们建立一个例子,看看如何使用UINavigationController
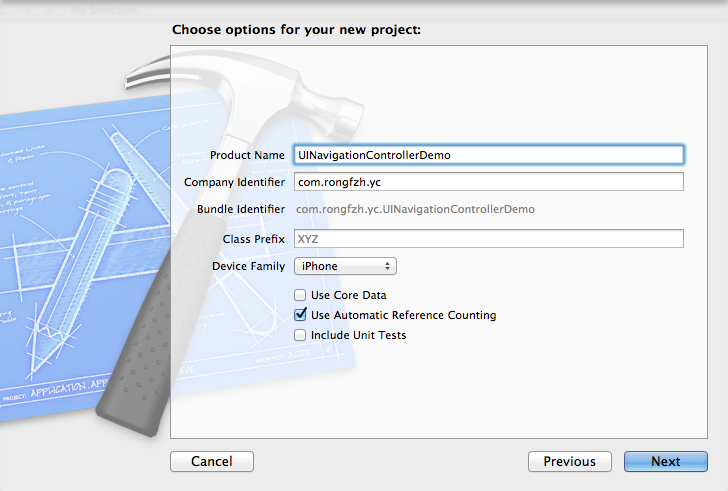
3、新建一个项目
命名为UINavigationControllerDemo,为了更好理解UINavigationController,我们选择Empty Application模板
4、创建一个View Controller,命名为RootViewController:依次选择File——New——New File,默认勾上With XIB for user interface.
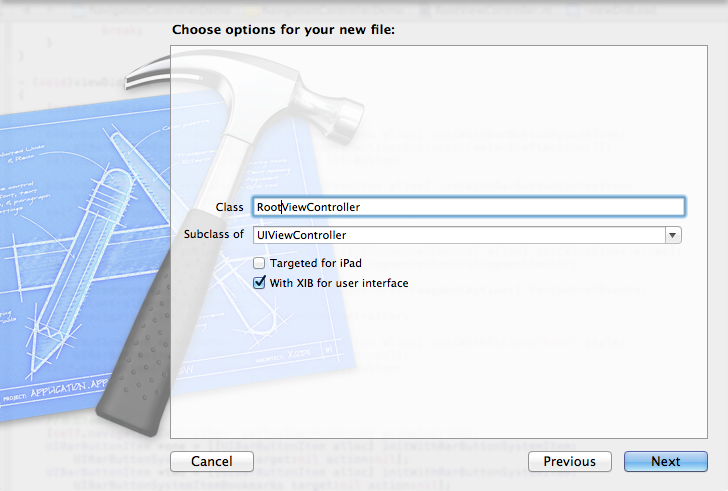
选择正确位置创建完成,这时项目里多了三个文件,分别是RootViewController.h RootViewController.m RootViewController.xib文件。
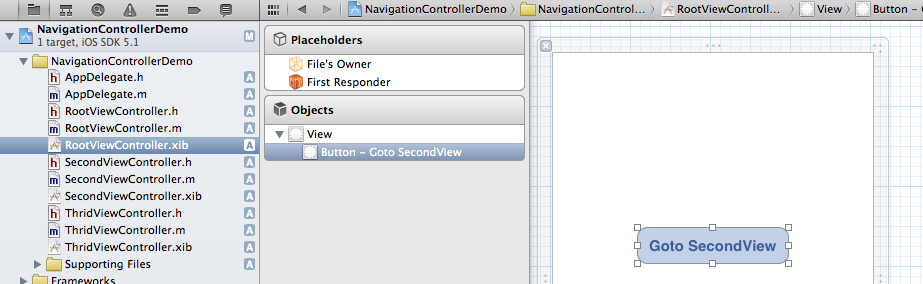
打开RootViewController.xib,添加一个按钮控件,按钮Button改成 :Goto SecondView,为跳转做准备
5、打开AppDelegate.h,向其中添加属性:
- @property (strong, nonatomic) UINavigationController *navController;
添加后AppDelegate.h文件代码如下:
- #import <UIKit/UIKit.h>
- @class ViewController;
- @interface AppDelegate : UIResponder <UIApplicationDelegate>
- @property (strong, nonatomic) UIWindow *window;
- @property (strong, nonatomic) ViewController *viewController;
- @property (strong, nonatomic) UINavigationController *navController;
- @end
6、在AppDelegate.m 文件的didFinishLaunchingWithOptions方法中创建添加navController,RootViewController视图。
- - (BOOL)application:(UIApplication *)application didFinishLaunchingWithOptions:(NSDictionary *)launchOptions
- {
- self.window = [[UIWindow alloc] initWithFrame:[[UIScreen mainScreen] bounds]];
- RootViewController *rootView = [[RootViewController alloc] init];
- rootView.title = @"Root View";
- self.navController = [[UINavigationController alloc] init];
- [self.navController pushViewController:rootView animated:YES];
- [self.window addSubview:self.navController.view];
- [self.window makeKeyAndVisible];
- return YES;
- }
给rootView的titie命名为 Root View,好识别View直接的切换关系。用pushViewController把rootView加入到navController的视图栈中。
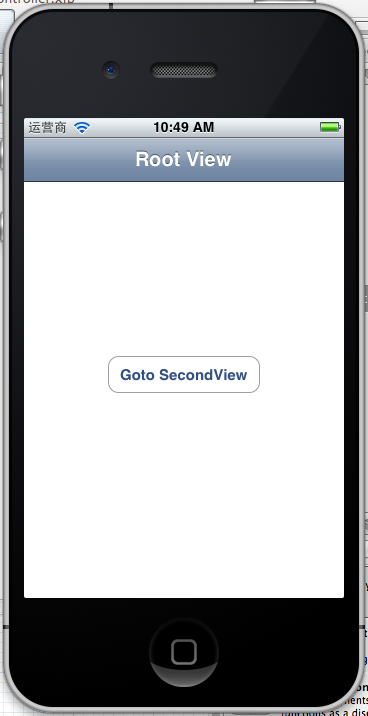
7、现在Root视图添加完成
看看效果:
 '
'
现在还没有Navigation bar 。只有title。
8、添加UIBarButtonItem
bar ButtonItem分左右UIBarButtonItem。我们把左右的都添加上去。
在RootViewController.m中添加代码如下:
- - (void)viewDidLoad
- {
- [super viewDidLoad];
- UIBarButtonItem *leftButton = [[UIBarButtonItem alloc] initWithBarButtonSystemItem:UIBarButtonSystemItemAction target:self action:@selector(selectLeftAction:)];
- self.navigationItem.leftBarButtonItem = leftButton;
- UIBarButtonItem *rightButton = [[UIBarButtonItem alloc] initWithBarButtonSystemItem:UIBarButtonSystemItemAdd target:self action:@selector(selectRightAction:)];
- self.navigationItem.rightBarButtonItem = rightButton;<p class="p1">}</p>
这样添加了UIBarButtonItem了,效果如下:

这里重点介绍下
UIBarButtonItem *leftButton = [[UIBarButtonItemalloc]initWithBarButtonSystemItem:UIBarButtonSystemItemActiontarget:selfaction:@selector(selectLeftAction:)];
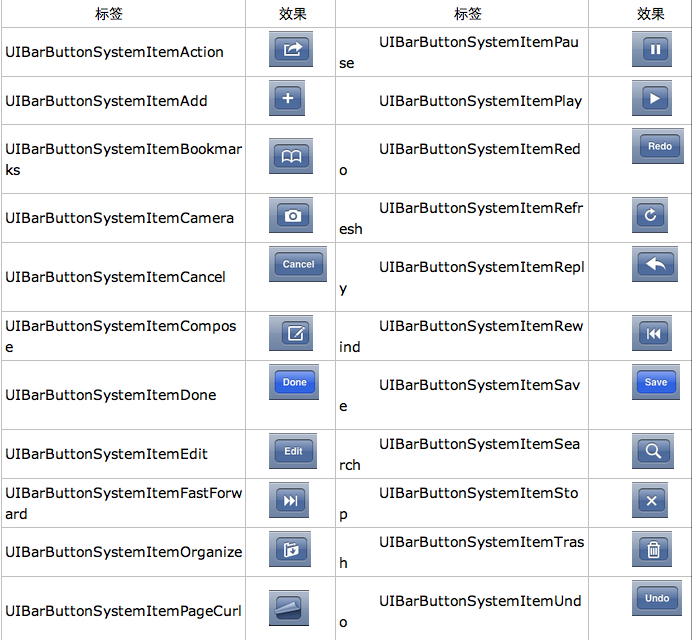
UIBarButtonSystemItemAction的风格,这是系统自带的按钮风格,看下图,你不用一个个试验,你也知道想用那个item,如下图:
9、响应UIBarButtonItem的事件的实现
我们在 action:@selector(selectLeftAction:);
action添加了selectLeftAction和selectRightAction
在RootViewController.m文件中添加代码实现:
- -(void)selectLeftAction:(id)sender
- {
- UIAlertView *alter = [[UIAlertView alloc] initWithTitle:@"提示" message:@"你点击了导航栏左按钮" delegate:self cancelButtonTitle:@"确定" otherButtonTitles:nil, nil];
- [alter show];
- }
- -(void)selectRightAction:(id)sender
- {
- UIAlertView *alter = [[UIAlertView alloc] initWithTitle:@"提示" message:@"你点击了导航栏右按钮" delegate:self cancelButtonTitle:@"确定" otherButtonTitles:nil, nil];
- [alter show];
- }
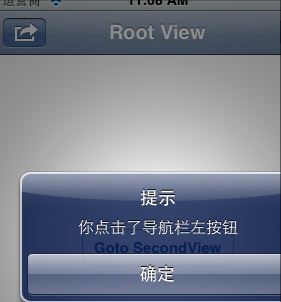
这样在点击左右的UIBarButtonItem时,弹出提示:
这篇先讲添加UIBarButtonItem,下篇讲解页面跳转和添加UISegmentedControl
下篇:iOS学习之UINavigationController详解与使用(二)页面切换和segmentedController
例子代码:https://github.com/schelling/YcDemo
UINavigationController详解一(转)UIBarButtonItem的更多相关文章
- iOS学习之UINavigationController详解与使用(一)添加UIBarButtonItem
http://blog.csdn.net/totogo2010/article/details/7681879 1.UINavigationController导航控制器如何使用 UINavigati ...
- [转]iOS学习之UINavigationController详解与使用(三)ToolBar
转载地址:http://blog.csdn.net/totogo2010/article/details/7682641 iOS学习之UINavigationController详解与使用(二)页面切 ...
- [转]iOS学习之UINavigationController详解与使用(二)页面切换和segmentedController
转载地址:http://blog.csdn.net/totogo2010/article/details/7682433 iOS学习之UINavigationController详解与使用(一)添加U ...
- iOS学习之UINavigationController详解与使用(三)ToolBar
1.显示Toolbar 在RootViewController.m的- (void)viewDidLoad方法中添加代码,这样Toobar就显示出来了. [cpp] view plaincopy [ ...
- iOS学习之UINavigationController详解与使用(二)页面切换和segmentedController
iOS学习之UINavigationController详解与使用(一)添加UIBarButtonItem是上篇,我们接着讲UINavigationController的重要作用,页面的管理和切换. ...
- UI第六节——UINavigationController 详解
1. UINavigationController 是一个容器类.里面盛放的是UIViewController. 容器的意思是,如果你不放入UIViewController,里面就是空的,什么也没有. ...
- IOS开发之UINavigationController详解
UINavigationController是IOS编程中比较常用的一种容器view controller,很多系统的控件(如UIImagePickerViewController)以及很多有名的AP ...
- [转]iOS学习之UINavigationController详解与使用(一)添加UIBarButtonItem
转载地址:http://blog.csdn.net/totogo2010/article/details/7681879 1.UINavigationController导航控制器如何使用 UINav ...
- iOS 的UINavigationController详解与使用添加UIBarButtonItem
转发自:http://blog.csdn.net/totogo2010/article/details/7681879 分类: iOS开发入门2012-06-21 11:10 53077人阅读 评论( ...
随机推荐
- css 清除浮动(转)
转自http://hi.baidu.com/kongcheng2012/item/2b1250d4452e802538f6f705 为什么浮动这么难? 因为浮动会使当前标签产生向上浮的效果,同时会影响 ...
- js跳转方法
很有用的东西,参考自http://www.zhuoda.org/lunzi/66097.html 第一种 <script language="javascript" type ...
- synzhronized原理3
1.java中的每个对象都可作为锁,有三种表现形式: 对于普通方法,锁的是当前this对象. 对于静态方法,锁的是class对象 对于方法块,锁的是synchronized指定的对象. 2.JVM基于 ...
- iOS8 UIAlertController弹出框中添加视图(例如日期选择器等等)
UIDatePicker *datePicker = [[UIDatePicker alloc] init]; datePicker.datePickerMode = UIDatePickerMode ...
- iOS: 悬浮的条件筛选下拉框的使用
1.介绍 app中条件筛选视图是很常用的功能,一般它搭配着tableView的表头悬浮滚动使用,点击按钮时,就会弹出下拉框显示条件,选择一个条件后,下拉框自动隐藏. 2.效果图如下 从中间点击弹出,然 ...
- Java遇见HTML——JSP篇之JavaWeb简介
一.什么是WEB应用程序 Web应用程序是一种可以通过Web(互联网)访问的应用程序.Web应用程序的一个最大好处是用户很容易访问应用程序.用户只需要有浏览器即可,不需要再安装其他软件. 为什么要学习 ...
- VMWare虚拟机下为Ubuntu 12.04.1配置静态IP_转
转自:http://www.cnblogs.com/objectorl/archive/2012/09/27/vmware-ubuntu-nat-static-ip-settings.html 背景在 ...
- [MVCSharp]开始使用MVC#
Getting started with MVC# framework The source code of this example can be found under "Example ...
- 手动内存管理与ARC互相转换问题
- 在相同的主机上创建一个duplicate数据库
在相同的主机上创建一个duplicate数据库 source db:dbtest auxiliary db:dupdb duplicate database会自动分配一个新的DBID要确保auxili ...