
照着官网来安装openstack pike之glance安装
镜像服务image service(glance)的安装还是在控制节点上进行:
# mysql -u root -p

MariaDB [(none)]> CREATE DATABASE glance;

MariaDB [(none)]> GRANT ALL PRIVILEGES ON glance.* TO 'glance'@'localhost' IDENTIFIED BY 'glance';

MariaDB [(none)]> GRANT ALL PRIVILEGES ON glance.* TO 'glance'@'%'IDENTIFIED BY 'glance';
2、在为glance在keystone上创建用户项目等时,需要先连接keystone,这里使用keystone的admin账号来登录
# source admin-openrc
然后在创建glance用户:
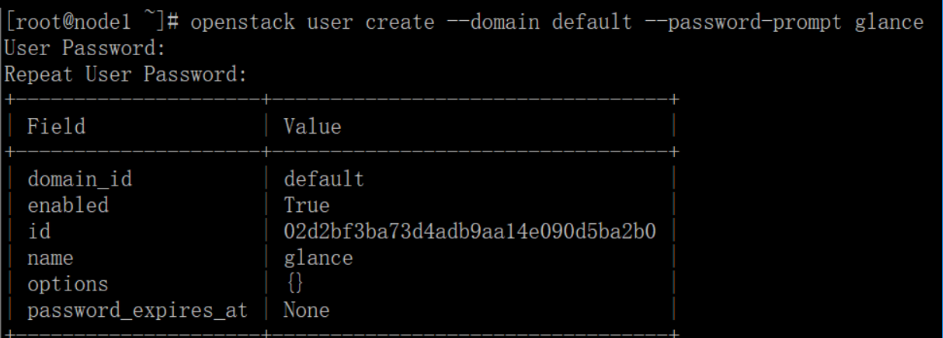
# openstack user create --domain default --password-prompt glance
输入密码:glance
# openstack role add --project service --user glance admin
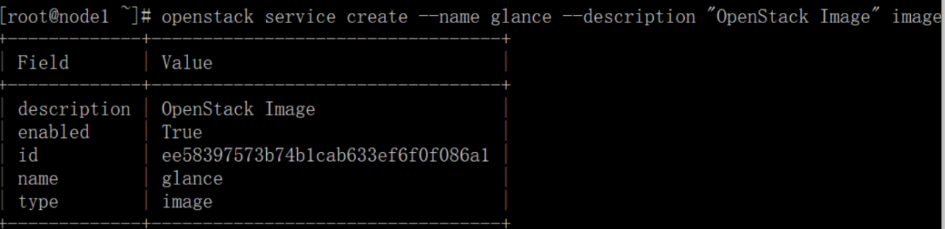
为glance创建服务实体:
# openstack service create --name glance --description "OpenStack Image" image
# openstack endpoint create --region RegionOne image public http://192.168.101.10:9292

# openstack endpoint create --region RegionOne image internal http://192.168.101.10:9292

# openstack endpoint create --region RegionOne image admin http://192.168.101.10:9292
安装和配置glance:
# yum install openstack-glance
修改配置文件:/etc/glance/glance-api.conf,在[database]部分:
connection = mysql+pymysql://glance:glance@192.168.101.10/glance
在[keystone_authtoken]和[paste_deploy]分别做如下设置:
[keystone_authtoken]

auth_uri = http://192.168.101.10:5000

auth_url = http://192.168.101.10:35357

memcached_servers = 192.168.101.10:11211

auth_type = password

project_domain_name = default

user_domain_name = default

project_name = service

username = glance

password = glance

[paste_deploy]

flavor = keystone
在[glance_store]部分设置一个本地文件系统用来存储本地镜像:
[glance_store]

stores = file,http

default_store = file

filesystem_store_datadir = /var/lib/glance/images/
修改配置文件:/etc/glance/glance-registry.conf,在[database]配置数据库的连接:
connection = mysql+pymysql://glance:glance@192.168.101.10/glance
在[keystone_authtoken]和[paste_deploy]配置如下内容:
[keystone_authtoken]

auth_uri = http://192.168.101.10:5000

auth_url = http://192.168.101.10:35357

memcached_servers = 192.168.101.10:11211

auth_type = password

project_domain_name = default

user_domain_name = default

project_name = service

username = glance

password = glance

[paste_deploy]

flavor = keystone
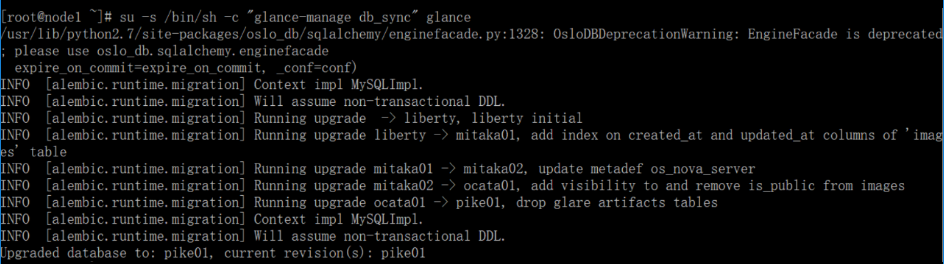
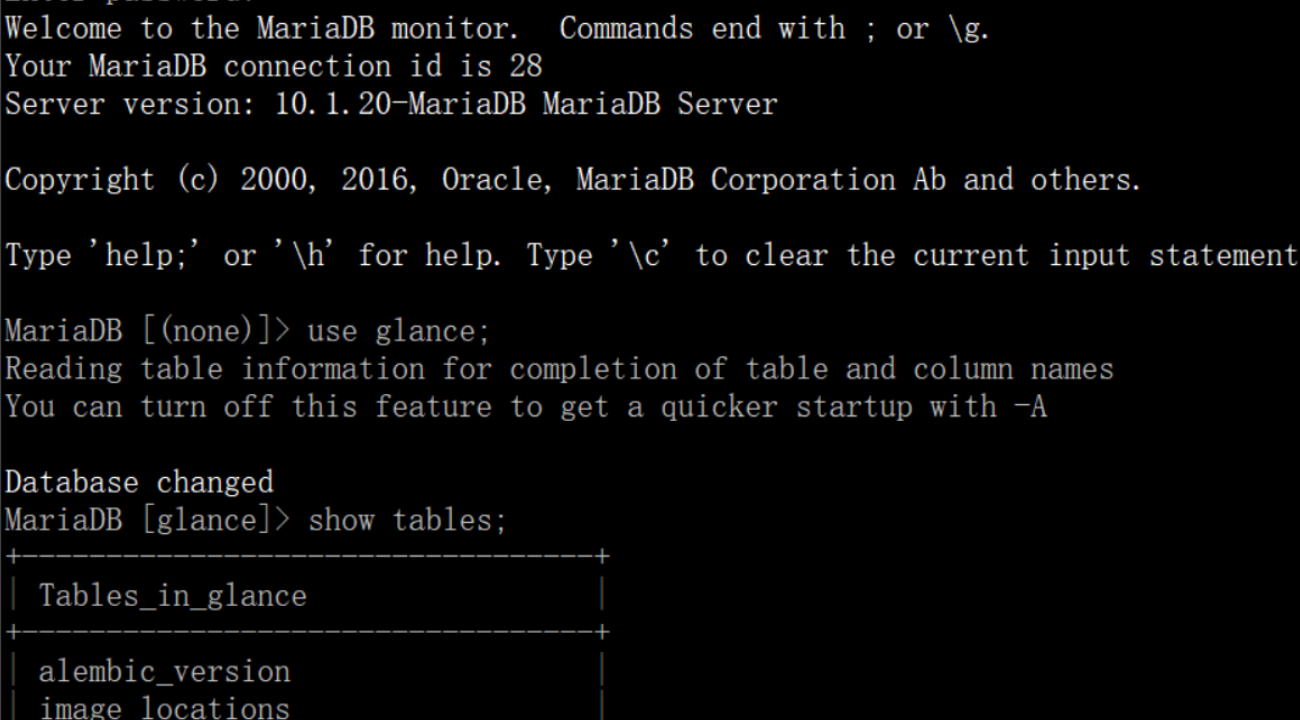
向glance库导入填充数据:
# su -s /bin/sh -c "glance-manage db_sync" glance
Ignore any deprecation messages in this output.
# systemctl enable openstack-glance-api.service openstack-glance-registry.service

# systemctl start openstack-glance-api.service openstack-glance-registry.service
校验glance:校验image service是否安装成功?
# source admin-openrc

# wget http://download.cirros-cloud.net/0.3.5/cirros-0.3.5-x86_64-disk.img

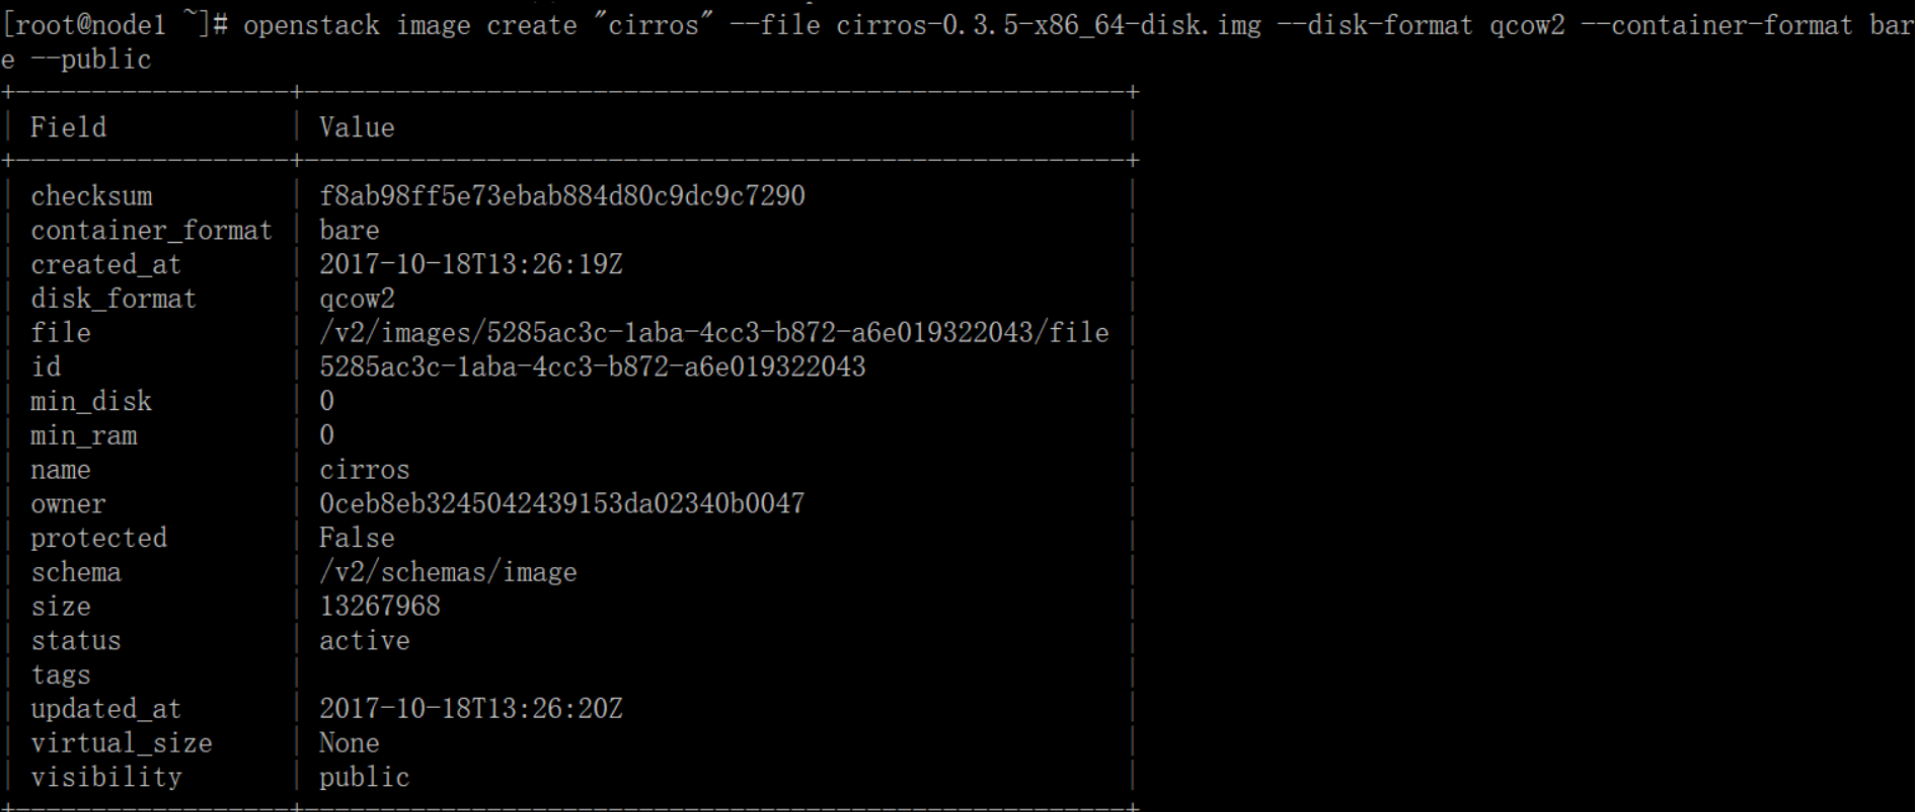
# openstack image create "cirros" --file cirros-0.3.5-x86_64-disk.img --disk-format qcow2 --container-format bare --public
上传镜像到镜像服务上,使用格式qcow2磁盘格式,权限为public,所有的项目都能访问它
# openstack image list 查看镜像列表
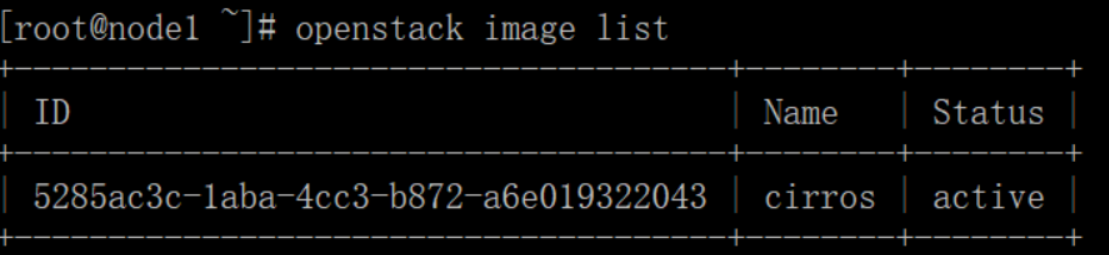
至此glance的image service组件安装成功
贴出glance两个配置文件的配置:
1、/etc/glance/glance-api.conf
[root@node1 ~]# egrep -v "^$|^#" /etc/glance/glance-api.conf

[DEFAULT]

[cors]

[database]

connection = mysql+pymysql://glance:glance@192.168.101.10/glance

[glance_store]

stores = file,http

default_store = file

filesystem_store_datadir = /var/lib/glance/images/

[image_format]

[keystone_authtoken]

auth_uri = http://192.168.101.10:5000

auth_url = http://192.168.101.10:35357

memcached_servers = 192.168.101.10:11211

auth_type = password

project_domain_name = default

user_domain_name = default

project_name = service

username = glance

password = glance

[matchmaker_redis]

[oslo_concurrency]

[oslo_messaging_amqp]

[oslo_messaging_kafka]

[oslo_messaging_notifications]

[oslo_messaging_rabbit]

[oslo_messaging_zmq]

[oslo_middleware]

[oslo_policy]

[paste_deploy]

flavor = keystone

[profiler]

[store_type_location_strategy]

[task]

[taskflow_executor]
2、配置文件/etc/glance/glance-registry.conf
[root@node1 ~]# egrep -v "^$|^#" /etc/glance/glance-registry.conf

[DEFAULT]

[database]

connection = mysql+pymysql://glance:glance@192.168.101.10/glance

[keystone_authtoken]

auth_uri = http://192.168.101.10:5000

auth_url = http://192.168.101.10:35357

memcached_servers = 192.168.101.10:11211

auth_type = password

project_domain_name = default

user_domain_name = default

project_name = service

username = glance

password = glance

[matchmaker_redis]

[oslo_messaging_amqp]

[oslo_messaging_kafka]

[oslo_messaging_notifications]

[oslo_messaging_rabbit]

[oslo_messaging_zmq]

[oslo_policy]

[paste_deploy]

flavor = keystone

[profiler]
照着官网来安装openstack pike之glance安装的更多相关文章
- 照着官网来安装openstack pike之nova安装
nova组件安装分为控制节点和计算节点,还是先从控制节点安装 1.前提条件,数据库为nova创建库和账户密码来连接数据库 # mysql -u root -p MariaDB [(none)]> ...
- 照着官网来安装openstack pike之keystone安装
openstack基础环境安装完成后,现在开启安装keystone服务(在控制节点上执行下面所有操作) 1.为keystone创建数据库 mysql -u root -p MariaDB [(none ...
- 照着官网来安装openstack pike之neutron安装
neutron组件安装分为控制节点和计算节点,还是先从控制节点安装 1.前提条件,数据库为nova创建库和账户密码来连接数据库 # mysql -u root -p MariaDB [(none)]& ...
- 照着官网来安装openstack pike之创建并启动instance
有了之前组件(keystone.glance.nova.neutron)的安装后,那么就可以在命令行创建并启动instance了 照着官网来安装openstack pike之environment设置 ...
- openstack pike 单机 一键安装 shell
#openstack pike 单机 centos 一键安装 shell #openstack pike 集群高可用 安装部署 汇总 http://www.cnblogs.com/elvi/p/7 ...
- 照着官网来安装openstack pike之environment设置
安装openstack前的准备环境: 两个centos7系统的环境:192.168.101.10 node1,192.168.101.11 node2 控制节点node1,计算节点node2 1.统一 ...
- 照着官网来安装openstack pike之安装dashboard
上文提到了利用命令行下使用openstack的命令来创建虚拟机,这里选择安装dashboard来安装基于web界面的openstack平台 利用dashboard界面来创建虚拟机 dashboard这 ...
- Devstack 安装OpenStack Pike版本(单机环境)
问题背景 最近在研究OpenStack的时候,需要对其源代码进行调试,公司服务器上部署的OpenStack环境又不能随意的进行折腾,为了研究的持续性和方便性,就决定再自己的虚拟机上面使用Devstac ...
- CentOS7安装OpenStack(Rocky版)-05.安装一个nova计算节点实例
上一篇文章分享了控制节点的nova计算服务的安装方法,在实际生产环境中,计算节点通常会安装一些单独的节点提供服务,本文分享单独的nova计算节点的安装方法 ---------------- 完美的分 ...
随机推荐
- deviceready has not fired after 5 seconds
deviceready has not fired after 5 seconds 建议用手机连上电脑,用真机进行调试:
- JAVA NIO使用非阻塞模式实现高并发服务器
参考:http://blog.csdn.net/zmx729618/article/details/51860699 https://zhuanlan.zhihu.com/p/23488863 ht ...
- axios post传参后台无法接收问题
起因是在angular项目中使用axios发送post请求,向后台传参后台一直无法接收,网上查了有说是请求头设置不对,需要把Content-Type:application/x-www-form-ur ...
- Aggregate (GROUP BY) Function Descriptions
w Table 13.25 Aggregate (GROUP BY) Functions Name Description AVG() Return the average value of the ...
- Mustache 中的html转义问题处理
避免在使用Mustache引擎是发生html字符转义 1,模板代码示例: var xml= " <?xml version="1.0" encoding=&q ...
- Blue Jeans---poj3080(kmp+暴力求子串)
题目链接:http://poj.org/problem?id=3080 题意就是求n个长度为60的串中求最长公共子序列(长度>=3):如果有多个输出字典序最小的: 我们可以暴力求出第一个串的所有 ...
- Django接收自定义http header(转)
add by zhj: Django将所有http header(包括你自定义的http header)都放在了HttpRequest.META这个Python标准字典中,当然HttpRequest. ...
- Incorrect key file for table ' '; try to repair it
场景:为有150W的数据表增加字段时,报错 解决:在my.ini配置临时目录configure tmpdir. Where MySQL Stores Temporary Files
- linux 实用命令
从一台机器远程连接到另一台机器: ssh platform@192.168.155.116 从一台机器发送文件到另一台机器: scp /home/weihuang/vie-zyzj.jar platf ...
- linux内核介绍
linux系统可以分为:包括用户空间和内核空间两个部分. 现代cpu通常实现了不同的工作模式,以ARM为例,实现了7种工作模式: 用户模式.快速中断.外部中断.管理模式.数据访问中止.系统模式.未定义 ...