
Android物联网应用程序开发(智慧园区)—— 登录界面开发
效果:
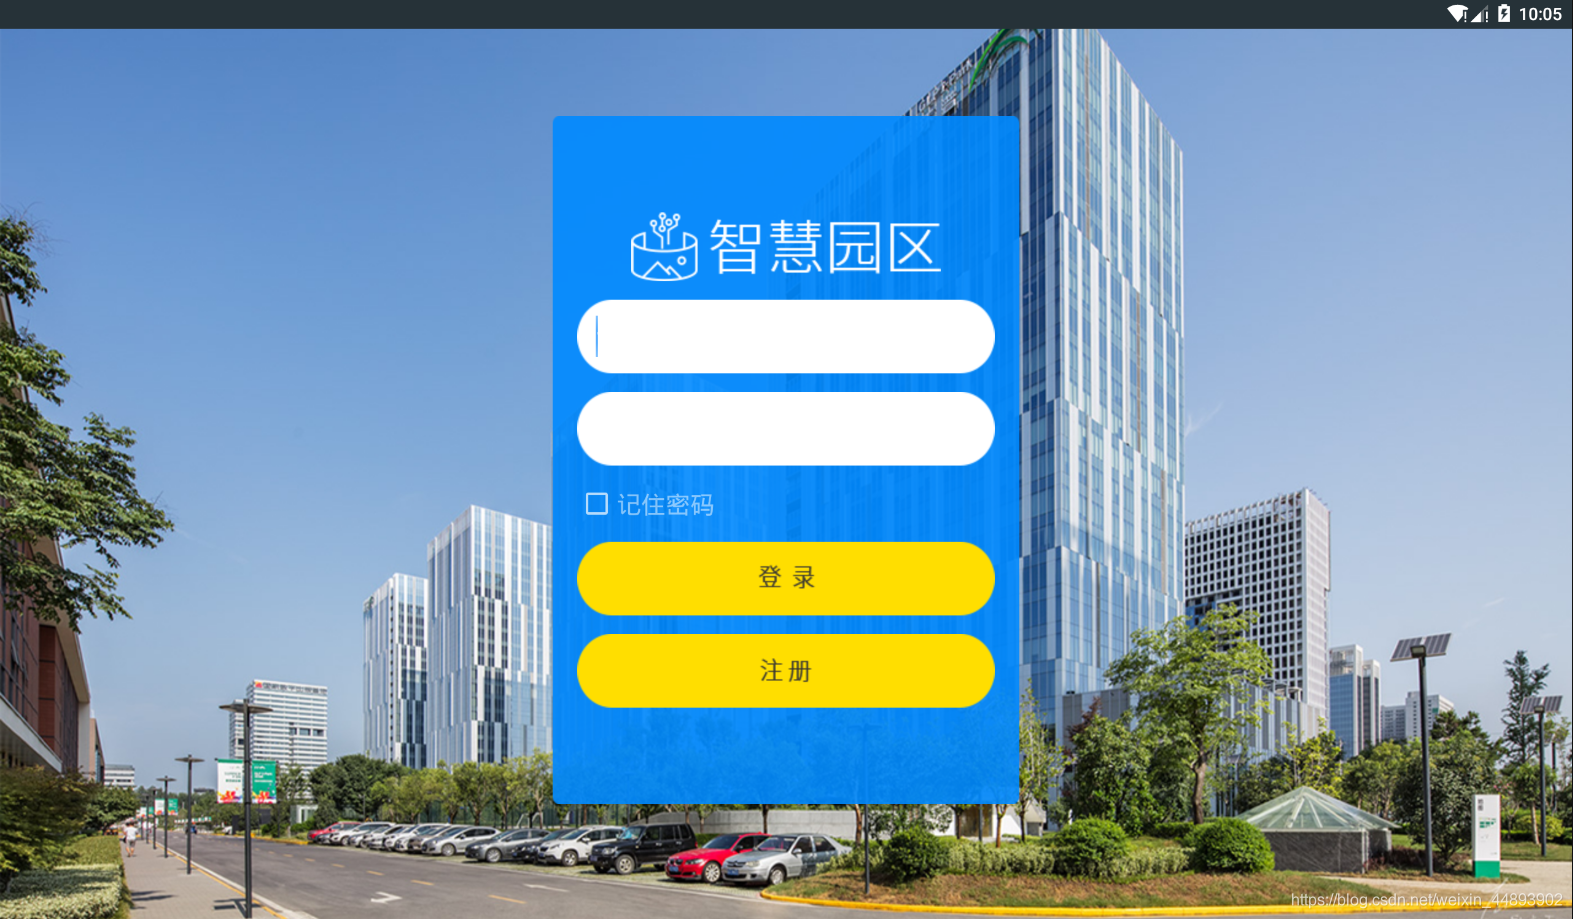
布局代码:
<?xml version="1.0" encoding="utf-8"?>

<LinearLayout xmlns:android="http://schemas.android.com/apk/res/android"

    android:layout_width="match_parent"

    android:layout_height="match_parent"

    android:background="@drawable/bg_out"

    android:gravity="center"

    android:orientation="vertical">

    <LinearLayout

        android:layout_width="380dp"

        android:layout_height="560dp"

        android:background="@drawable/bg_login"

        android:gravity="center"

        android:orientation="vertical"

        android:padding="20dp">

        <ImageView

            android:layout_width="wrap_content"

            android:layout_height="wrap_content"

            android:src="@drawable/icon_smart_park" />

        <EditText

            android:layout_width="match_parent"

            android:layout_height="wrap_content"

            android:layout_marginTop="15dp"

            android:background="@drawable/input_normal"

            android:hint="请输入账号"

            android:paddingLeft="15dp"

            android:textSize="25sp" />

        <EditText

            android:layout_width="match_parent"

            android:layout_height="wrap_content"

            android:layout_marginTop="15dp"

            android:background="@drawable/input_normal"

            android:hint="请输入密码"

            android:inputType="textPassword"

            android:paddingLeft="15dp"

            android:textSize="25sp" />

        <CheckBox

            android:layout_width="match_parent"

            android:layout_height="wrap_content"

            android:layout_marginLeft="15dp"

            android:layout_marginTop="15dp"

            android:text="记住密码"

            android:textColor="#ffffff"

            android:textSize="20sp" />

        <Button

            android:layout_width="match_parent"

            android:layout_height="wrap_content"

            android:layout_marginTop="15dp"

            android:background="@drawable/btn_login_normal" />

        <Button

            android:layout_width="match_parent"

            android:layout_height="wrap_content"

            android:layout_marginTop="15dp"

            android:background="@drawable/btn_register_normal" />

    </LinearLayout>

</LinearLayout>
Android物联网应用程序开发(智慧园区)—— 登录界面开发的更多相关文章
- Android studio 开发一个用户登录界面
Android studio 开发一个用户登录界面 activity_main.xml <?xml version="1.0" encoding="utf-8&qu ...
- [转]Android:布局实例之模仿QQ登录界面
Android:布局实例之模仿QQ登录界面 预览图: 准备: 1.找到模仿对象 QQ登陆界面UI下载>>>>> 2.导入工程 3.查看布局结构和使用控件 其对应效果图分布 ...
- Android:布局实例之模仿QQ登录界面
预览图: 准备: 1.找到模仿对象 QQ登陆界面UI下载>>>>> 2.导入工程 3.查看布局结构和使用控件 其对应效果图分布为 4.分析样式选择器 下拉箭头2种样式:点 ...
- Android:布局实例之模仿京东登录界面
预览图及布局结构参考: 布局: <?xml version="1.0" encoding="utf-8"?> <RelativeLayout ...
- Android物联网应用程序开发(智慧园区)—— 图片预览界面
效果图: 实现步骤: 1.首先在 build.gradle 文件中引入 RecycleView implementation 'com.android.support:recyclerview-v7: ...
- Android物联网应用程序开发(智慧园区)—— 设置传感器阈值对话框界面
效果图: 自定义对话框布局: <?xml version="1.0" encoding="utf-8"?> <LinearLayout xml ...
- Android物联网应用程序开发(智慧园区)—— 园区监控系统界面
效果图: 布局代码: <?xml version="1.0" encoding="utf-8"?> <LinearLayout xmlns:a ...
- Android物联网应用程序开发(智慧城市)—— 查询购物信息界面开发
效果: 布局代码: <RelativeLayout xmlns:android="http://schemas.android.com/apk/res/android" xm ...
- Android物联网应用程序开发(智慧城市)—— 用户注册界面开发
效果: 布局代码: <?xml version="1.0" encoding="utf-8"?> <RelativeLayout xmlns: ...
随机推荐
- CSS相关,手画三角形,正方形,扇形
三角形 实现一个三角形 <!DOCTYPE html> <html> <head> <title>三角形</title> <style ...
- window ntp服务
一.确定服务端和客户端处于同一网段,能相互 Ping 通. 二.服务器端(Server)配置 1.选择一台服务器(Windows 系统)作为时间同步服务器: 2.Win + R (运行 cmd 命令行 ...
- Virtual functions in derived classes
In C++, once a member function is declared as a virtual function in a base class, it becomes virtual ...
- shiro免认证的路径配置
– ?:匹配一个字符,如/admin? 将匹配/admin1,但不匹配/admin 或/admin/:– *:匹配零个或多个字符串,如/admin 将匹配/admin./admin123,但不匹配/a ...
- 35、搜索插入位置 | 算法(leetode,附思维导图 + 全部解法)300题
零 标题:算法(leetode,附思维导图 + 全部解法)300题之(35)搜索插入位置 一 题目描述 二 解法总览(思维导图) 三 全部解法 1 方案1 1)代码: // 方案1 "无视要 ...
- Linux下安装数据库sqlite3
目录 一.简介 二.安装 三.测试 一.简介 SQLite 是一个软件库,实现了自给自足的.无服务器的.零配置的.事务性的 SQL 数据库引擎.SQLite 是在世界上最广泛部署的 SQL 数据库引擎 ...
- pf4j及pf4j-spring
什么是PF4J 一个插件框架,用于实现插件的动态加载,支持的插件格式(zip.jar). 核心组件 Plugin:是所有插件类型的基类.每个插件都被加载到一个单独的类加载器中以避免冲突. Plugin ...
- 【web】php文件包含(利用phpinfo)
Docker搭建复现环境 地址:https://github.com/vulhub/vulhub/tree/master/php/inclusion ps. github单独下载一个文件夹的方法: 安 ...
- CF628B New Skateboard 题解
Content 有一个长度为 \(n\) 的数字串 \(s\),求出有多少个子串能够被 \(4\) 整除. 数据范围:\(1\leqslant n\leqslant 3\times 10^5\). S ...
- Django的安全机制 CSRF 跨站请求访问
跨站请求伪造 一.简介 django为用户实现防止跨站请求伪造的功能,通过中间件 django.middleware.csrf.CsrfViewMiddleware 来完成.而对于django中设置防 ...