
[js高手之路] html5 canvas系列教程 - 线形渐变,径向渐变与阴影设置
接着上文[js高手之路] html5 canvas系列教程 - 像素操作(反色,黑白,亮度,复古,蒙版,透明)继续.
一、线形渐变
线形渐变指的是一条直线上发生的渐变。
用法:
var linear = cxt.createLinearGradient( x1, y1, x2, y2 );
linear.addColorStop( value1, color1 );
linear.addColorStop( value2, color2 );
.....
oGc.fillStyle = linear
oGc.fill();
1) createLinearGradient创建一个线形渐变对象. x1, y1表示渐变的起点. x2, y2表示渐变的终点.
2)addColorStop在某处添加渐变颜色值
3)fillStyle:把渐变对象作为填充样式
4)调用fill及其他相关图形进行渐变填充
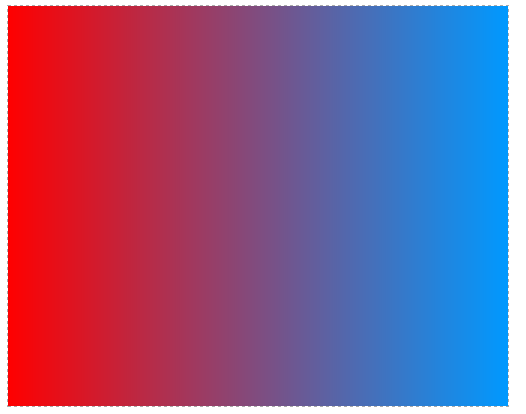
水平渐变
 <head>

 <meta charset='utf-8' />

 <style>

 #canvas{

     border:1px dashed #aaa;

 }

 </style>

 <script>

 window.onload = function(){

     var oCanvas = document.querySelector( "#canvas" ),

         oGc = oCanvas.getContext( '2d' );

     var linear = oGc.createLinearGradient( 0, 400, 500, 400 );

     linear.addColorStop( 0, 'red' );

     linear.addColorStop( 1, '#09f' );

     oGc.fillStyle = linear;

     oGc.fillRect( 0, 0, 500, 400 );

 }

 </script>

 </head>

 <body>

 <canvas id="canvas" width="500" height="400"></canvas>

 </body>
垂直渐变:
 <head>

     <meta charset='utf-8' />

     <style>

     #canvas{

         border:1px dashed #aaa;

     }

     </style>

     <script>

     window.onload = function(){

         var oCanvas = document.querySelector( "#canvas" ),

             oGc = oCanvas.getContext( '2d' );

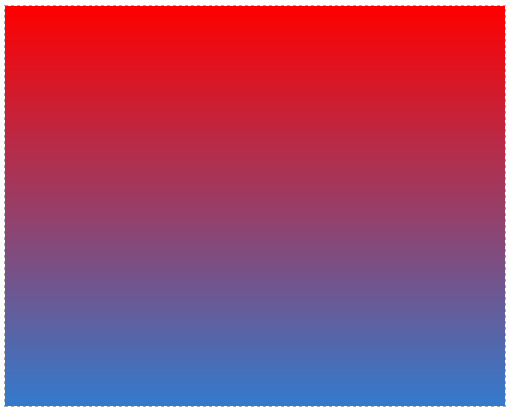
         var linear = oGc.createLinearGradient( 400, 0, 400, 500 );

         linear.addColorStop( 0, 'red' );

         linear.addColorStop( 1, '#09f' );

         oGc.fillStyle = linear;

         oGc.fillRect( 0, 0, 500, 400 );

     }

     </script>

 </head>

 <body>

     <canvas id="canvas" width="500" height="400"></canvas>

 </body>
对角线渐变:
 <head>

     <meta charset='utf-8' />

     <style>

     #canvas{

         border:1px dashed #aaa;

     }

     </style>

     <script>

     window.onload = function(){

         var oCanvas = document.querySelector( "#canvas" ),

             oGc = oCanvas.getContext( '2d' );

         var linear = oGc.createLinearGradient( 0, 0, 400, 500 );

         linear.addColorStop( 0, 'red' );

         linear.addColorStop( 1, '#09f' );

         oGc.fillStyle = linear;

         oGc.fillRect( 0, 0, 500, 400 );

     }

     </script>

 </head>

 <body>

     <canvas id="canvas" width="500" height="400"></canvas>

 </body>

为文字添加线形渐变效果
 <head>

     <meta charset='utf-8' />

     <style>

     #canvas{

         border:1px dashed #aaa;

     }

     </style>

     <script>

     window.onload = function(){

         var oCanvas = document.querySelector( "#canvas" ),

             oGc = oCanvas.getContext( '2d' ),

             text = '跟着ghostwu学习html5 canvas教程';

             oGc.font = '22px bold 微软雅黑';

         var linear = oGc.createLinearGradient( 20, 100, 400, 100 );

         linear.addColorStop( 0, 'red' );

         linear.addColorStop( 1, '#09f' );

         oGc.fillStyle = linear;

         oGc.fillText( text, 50, 100 );

     }

     </script>

 </head>

 <body>

     <canvas id="canvas" width="500" height="400"></canvas>

 </body>

二、径向渐变
颜色渐变从一个起点向各个方向渐变,用法跟线形渐变差不多,只不过创建渐变的时候用的是另一个函数
var radial = cxt.createRadialGradient( x1, y1, r1, x2, y2, r2 )
....下面的步骤跟线形渐变一样,不再重复了
x1, y1起始点的圆心坐标,r1: 起始点 圆的半径
x2,y2结束点的圆心坐标,r2:结束点 圆所在的半径
 <head>

     <meta charset='utf-8' />

     <style>

     #canvas{

         border:1px dashed #aaa;

     }

     </style>

     <script>

     window.onload = function(){

         var oCanvas = document.querySelector( "#canvas" ),

             oGc = oCanvas.getContext( '2d' ),

             width = oCanvas.width, height = oCanvas.height;

         oGc.beginPath();

         oGc.arc( 100, 100, 100, 0, 360 * Math.PI / 180, false );

         oGc.closePath();

         var radial = oGc.createRadialGradient( 150, 50, 10, 100, 100, 100 );

         radial.addColorStop( 0.1, 'white' );

         radial.addColorStop( 0.6, 'orange' );

         radial.addColorStop( 1, 'red' );

         oGc.fillStyle = radial;

         oGc.fill();

         oGc.beginPath();

         oGc.arc( 320, 100, 100, 0, 360 * Math.PI / 180, false );

         oGc.closePath();

         var radial2 = oGc.createRadialGradient( 280, 50, 10, 320, 100, 100 );

         radial2.addColorStop( 0.1, 'white' );

         radial2.addColorStop( 0.6, 'orange' );

         radial2.addColorStop( 1, 'rgba( 255, 0, 0, 0.5 )' );

         oGc.fillStyle = radial2;

         oGc.fill();

         oGc.beginPath();

         oGc.lineWidth = 1;

         oGc.strokeStyle = '#eee';

         for( var i = 0; i < width; i += 10 ){

             oGc.moveTo( i, 0 );

             oGc.lineTo( i, height );

         }

         for( var j = 0; j < height; j += 10 ){

             oGc.moveTo( 0, j );

             oGc.lineTo( width, j );

         }

         oGc.closePath();

         oGc.stroke();

         oGc.beginPath();

         oGc.fillStyle = 'red';

         oGc.strokeStyle = 'blue';

         oGc.moveTo( 150, 0 );

         oGc.lineTo( 150, height );

         oGc.moveTo( 0, 50 );

         oGc.lineTo( width, 50 );

         oGc.fillText( '(150,50)', 170, 30 );

         oGc.stroke();

         oGc.closePath();

         oGc.beginPath();

         oGc.strokeStyle = 'yellow';

         oGc.fillStyle = 'black';

         oGc.moveTo( 100, 0 );

         oGc.lineTo( 100, height );

         oGc.moveTo( 0, 100 );

         oGc.lineTo( width, 100 );

         oGc.fillText( '(100,100)', 30, 120 );

         oGc.stroke();

     }

     </script>

 </head>

 <body>

     <canvas id="canvas" width="500" height="400"></canvas>

 </body>
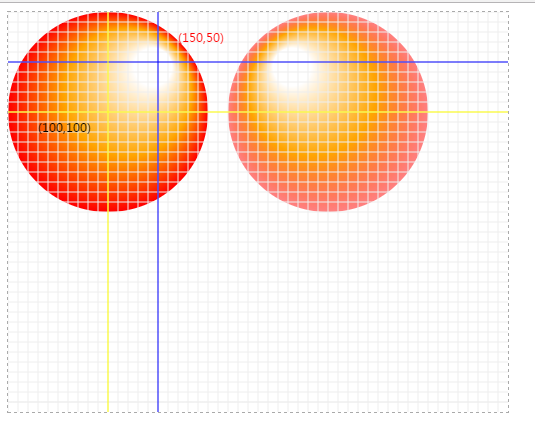
我在图中做出了第一个径向渐变的圆心坐标,便于观看
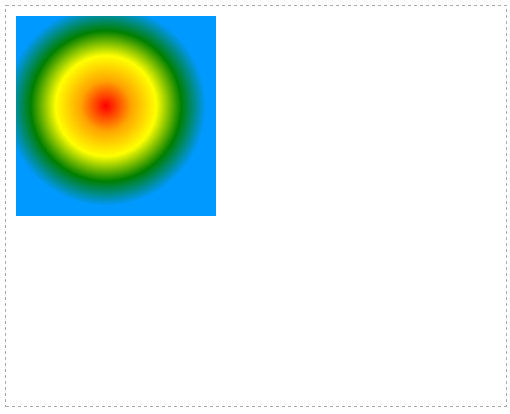
同心圆渐变:
 <head>

     <meta charset='utf-8' />

     <style>

     #canvas{

         border:1px dashed #aaa;

     }

     </style>

     <script>

     window.onload = function(){

         var oCanvas = document.querySelector( "#canvas" ),

             oGc = oCanvas.getContext( '2d' ),

             width = oCanvas.width, height = oCanvas.height;

         var radial = oGc.createRadialGradient( 100, 100, 0, 100, 100, 100 );

         radial.addColorStop( 0, 'red' );

         radial.addColorStop( 0.25, 'orange' );

         radial.addColorStop( 0.5, 'yellow' );

         radial.addColorStop( 0.75, 'green' );

         radial.addColorStop( 1, '#09f' );

         oGc.fillStyle = radial;

         oGc.fillRect( 10, 10, 200, 200 );

     }

     </script>

 </head>

 <body>

     <canvas id="canvas" width="500" height="400"></canvas>

 </body>
三、阴影设置
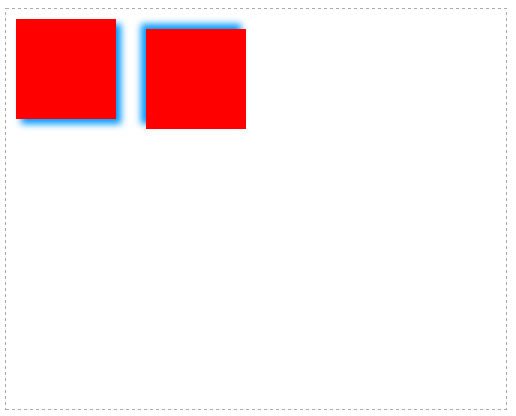
跟css3的边框阴影用法差不多.
cxt.shadowOffsetX: 水平阴影,可以设置正负数, 正数->向右偏移,负数->向左偏移
cxt.shadowOffsetY: 垂直阴影,可以设置正负数,正数->向下偏移,负数->向上偏移
cxt.shadowColor: 阴影的颜色
cxt.shadowBlur: 阴影的模糊范围
 <head>

     <meta charset='utf-8' />

     <style>

     #canvas{

         border:1px dashed #aaa;

     }

     </style>

     <script>

     window.onload = function(){

         var oCanvas = document.querySelector( "#canvas" ),

             oGc = oCanvas.getContext( '2d' ),

             width = oCanvas.width, height = oCanvas.height;

             oGc.shadowOffsetX = 5;

             oGc.shadowOffsetY = 5;

             oGc.shadowColor = '#09f';

             oGc.shadowBlur = 10;

             oGc.fillStyle = 'red';

             oGc.fillRect( 10, 10, 100, 100 );

             oGc.shadowOffsetX = -5;

             oGc.shadowOffsetY = -5;

             oGc.shadowColor = '#09f';

             oGc.shadowBlur = 10;

             oGc.fillStyle = 'red';

             oGc.fillRect( 140, 20, 100, 100 );

     }

     </script>

 </head>

 <body>

     <canvas id="canvas" width="500" height="400"></canvas>

 </body>
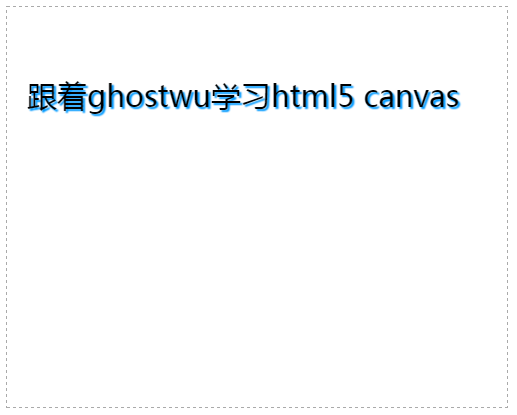
给文字设置阴影:
 <head>

     <meta charset='utf-8' />

     <style>

     #canvas{

         border:1px dashed #aaa;

     }

     </style>

     <script>

     window.onload = function(){

         var oCanvas = document.querySelector( "#canvas" ),

             oGc = oCanvas.getContext( '2d' ),

             width = oCanvas.width, height = oCanvas.height;

             oGc.shadowOffsetX = 2;

             oGc.shadowOffsetY = 2;

             oGc.shadowColor = '#09f';

             oGc.shadowBlur = 1;

             oGc.font = '30px bold 微软雅黑';

             oGc.fillText( '跟着ghostwu学习html5 canvas', 20, 100 );

     }

     </script>

 </head>

 <body>

     <canvas id="canvas" width="500" height="400"></canvas>

 </body>
给图片设置阴影
 <head>

     <meta charset='utf-8' />

     <style>

     #canvas{

         border:1px dashed #aaa;

     }

     </style>

     <script>

     window.onload = function(){

         var oCanvas = document.querySelector( "#canvas" ),

             oGc = oCanvas.getContext( '2d' ),

             width = oCanvas.width, height = oCanvas.height;

             var oImg = new Image();

             oImg.src = './img/mv.jpg';

             oImg.onload = function(){

                 oGc.shadowOffsetX = 5;

                 oGc.shadowOffsetY = 5;

                 // oGc.shadowOffsetX = 0;

                 // oGc.shadowOffsetY = 0;

                 oGc.shadowColor = '#888';

                 oGc.shadowBlur = 20;

                 oGc.fillRect( 50, 20, 200, 200 );

                 oGc.drawImage( oImg, 50, 20 );

             }

     }

     </script>

 </head>

 <body>

     <canvas id="canvas" width="500" height="400"></canvas>

 </body>
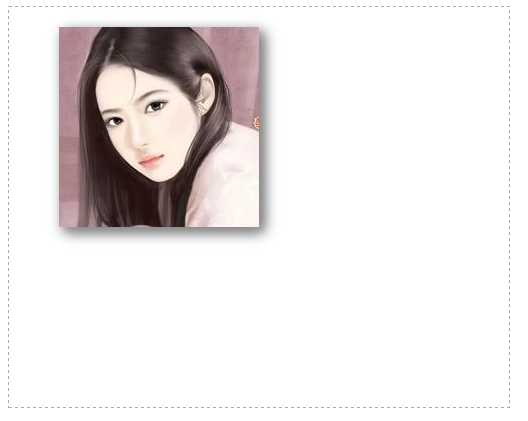
给图片的四周设置阴影:
把shadowOffsetX和shadowOffsetY都设置为0,那么就会在四周产生阴影效果
 <head>

     <meta charset='utf-8' />

     <style>

     #canvas{

         border:1px dashed #aaa;

     }

     </style>

     <script>

     window.onload = function(){

         var oCanvas = document.querySelector( "#canvas" ),

             oGc = oCanvas.getContext( '2d' ),

             width = oCanvas.width, height = oCanvas.height;

             var oImg = new Image();

             oImg.src = './img/mv.jpg';

             oImg.onload = function(){

                 oGc.shadowOffsetX = 0;

                 oGc.shadowOffsetY = 0;

                 oGc.shadowColor = '#888';

                 oGc.shadowBlur = 20;

                 oGc.fillRect( 50, 20, 200, 200 );

                 oGc.drawImage( oImg, 50, 20 );

             }

     }

     </script>

 </head>

 <body>

     <canvas id="canvas" width="500" height="400"></canvas>

 </body>

[js高手之路] html5 canvas系列教程 - 线形渐变,径向渐变与阴影设置的更多相关文章
- [js高手之路] html5 canvas系列教程 - 掌握画直线图形的常用API
我们接着上文[js高手之路] html5 canvase系列教程 - 认识canvas以及基本使用方法继续. 一.直线的绘制 cxt.moveTo( x1, y1 ): 将画笔移动到x1, y1这个点 ...
- [js高手之路] html5 canvas系列教程 - arcTo(弧度与二次,三次贝塞尔曲线以及在线工具)
之前,我写了一个arc函数的用法:[js高手之路] html5 canvas系列教程 - arc绘制曲线图形(曲线,弧线,圆形). arcTo: cxt.arcTo( cx, cy, x2, y2, ...
- [js高手之路] html5 canvas系列教程 - arc绘制曲线图形(曲线,弧线,圆形)
绘制曲线,经常会用到路径的知识,如果你对路径有疑问,可以参考我的这篇文章[js高手之路] html5 canvas系列教程 - 开始路径beginPath与关闭路径closePath详解. arc:画 ...
- [js高手之路] html5 canvas系列教程 - 图片操作(drawImage,clip,createPattern)
接着上文[js高手之路] html5 canvas系列教程 - 文本样式(strokeText,fillText,measureText,textAlign,textBaseline)继续,本文介绍的 ...
- [js高手之路] html5 canvas系列教程 - 文本样式(strokeText,fillText,measureText,textAlign,textBaseline)
接着上文线条样式[js高手之路] html5 canvas系列教程 - 线条样式(lineWidth,lineCap,lineJoin,setLineDash)继续. canvas提供两种输出文本的方 ...
- [js高手之路] html5 canvas系列教程 - 线条样式(lineWidth,lineCap,lineJoin,setLineDash)
上文,写完弧度与贝塞尔曲线[js高手之路] html5 canvas系列教程 - arcTo(弧度与二次,三次贝塞尔曲线以及在线工具),本文主要是关于线条的样式设置 lineWidth: 设置线条的宽 ...
- [js高手之路] html5 canvas系列教程 - 像素操作(反色,黑白,亮度,复古,蒙版,透明)
接着上文[js高手之路] html5 canvas系列教程 - 状态详解(save与restore),相信大家都应该玩过美颜功能,而我们今天要讲的就是canvas强大的像素处理能力,通过像素处理,实现 ...
- [js高手之路] html5 canvas系列教程 - 状态详解(save与restore)
本文内容与路径([js高手之路] html5 canvas系列教程 - 开始路径beginPath与关闭路径closePath详解)是canvas中比较重要的概念.掌握理解他们是做出复杂canvas动 ...
- [js高手之路] html5 canvas系列教程 - 认识canvas以及基本使用方法
canvas是html5中引入的一个新元素,俗称画布,既然是画布,当然是用来画图的.canvas技术指的是利用javascript操作canvas元素绘制图形的技术,要使用canvas,一定要浏览器支 ...
随机推荐
- 关于DreamWeaver CS6.0 + PhoneGap 之移动开发环境搭建
原博客地址为:http://blog.csdn.net/alovebtoc/article/details/9315437 HTML5已经逆袭了移动开发,近期有幸布置PhoneGap的环境搭载,其实 ...
- RabbitMQ核心概念篇
RabbitMQ介绍 一.RabbitMQ使用场景 RabbitMQ他是一个消息中间件,说道消息中间件[最主要的作用:信息的缓冲区]还是的从应用场景来看下: 1.系统集成与分布式系统的设计 各种子系统 ...
- JavaScript实现省市联动
<!DOCTYPE html><html> <head> <meta charset="UTF-8"> <title>& ...
- 再起航,我的学习笔记之JavaScript设计模式19(状态模式)
状态模式 概念介绍 状态模式(State):当一个对象的内部状态发生改变时,会导致其行为的改变,这看起来像是改变了对象 示例演示 在我们写项目的过程中或多或少会遇到如下的多分支判断 function ...
- C# WinForm 跨线程访问控件
问题出现: 在WinForm 处理多线程访问主线程的控件时候,就会出现如图所示的错误对话框: 解决方案: 方案一:去掉线程访问主线程UI控件的安全检查,使用: Control.CheckFor ...
- 锤子坚果pro突破京东10万好评,还有什么是锤子科技做不出...
作为2017年手机圈明星产品的锤子科技坚果Pro,可是一点都不安分呢! 9月份锤子科技推出一款新机型--坚果Pro银魂定制版 这在动漫圈跟手机圈都掀起一股不小的浪潮. 外观漂亮,颜值超高,续航时间长. ...
- px,em,rem的关系
之前听人说过,网站制作中字体单位应该用em而不用px,为什么呢?原因简单来说就是em支持IE6下的字体缩放,在页面中按ctrl+滚轮,字体以px为单位的网站没有反应.px是绝对单位,不支持IE的缩放, ...
- Web编程:JSP环境安装与配置
Web服务器:Tomcat 数据库服务器:暂时未使用 集成开发环境:eclipse 要运行JSP程序,首先要安装JDK(Java Developer Kit),并且还要配置运行Java程序的环境变量. ...
- 201521123057 《Java程序设计》 第7周学习总结
1. 本周学习总结 以你喜欢的方式(思维导图或其他)归纳总结集合相关内容. 2. 书面作业 1.ArrayList代码分析 1.1 解释ArrayList的contains源代码 答:源代码: pub ...
- Java课程设计—学生成绩管理系统(201521123005 杨雪莹)
一.团队课程设计博客链接 学生成绩管理系统 二.个人负责模块或任务说明 学生成绩录入 显示所有学生信息 显示各科平均成绩 显示学生成绩(按降序排序) 三.自己的代码提交记录截图 四.自己负责模块或任务 ...