React Native商城项目实战04 - 封装TabNavigator.Item的创建
1.Main.js
/**

 * 主页面

 */

import React, { Component } from 'react';

import {

    StyleSheet,

    Text,

    View,

    Image,

    Platform,  //判断当前运行的系统

} from 'react-native';

/*=============导入外部组件类==============*/

import TabNavigator from 'react-native-tab-navigator';

import CustomerComponents, { Navigator } from 'react-native-deprecated-custom-components';

// 引入外部的组件(此处注意是相当于了项目根目录)

var Home = require('../Component/Home');

var Message = require('../Component/Message');

var Find = require('../Component/Find');

var Mine = require('../Component/Mine');

// ES5

var Main = React.createClass({

    // 初始化函数(变量是可以改变的,充当状态机的角色)

    getInitialState(){

        return{

            selectedTab:'home' // 默认选中的tabBar

        }

    },

    render() {

        return (

            <TabNavigator>

                {/*--首页--*/}

                {this.renderTabBarItem('首页','icon_tabbar_home','icon_tabbar_home_selected','home','首页',Home,1)}

                {/*--消息--*/}

                {this.renderTabBarItem('消息','icon_tabbar_message','icon_tabbar_message_selected','message','消息',Message,2)}

                {/*--发现--*/}

                {this.renderTabBarItem('发现','icon_tabbar_find','icon_tabbar_find_selected','find','发现',Find)}

                {/*--我的--*/}

                {this.renderTabBarItem('我的','icon_tabbar_mine','icon_tabbar_mine_selected','mine','我的',Mine)}

            </TabNavigator>

        );

    },

    // 封装tabBarItem

    renderTabBarItem(title,iconName,selectedIconName,selectedTab,componentName,component,badgeText){

        return(

            <TabNavigator.Item

                title={title}

                renderIcon={() => <Image source={{uri:iconName}} style={styles.iconStyle} />}

                renderSelectedIcon={() => <Image source={{uri:selectedIconName}} style={styles.iconStyle} />}

                selected={this.state.selectedTab === selectedTab}

                onPress={() => this.setState({ selectedTab: selectedTab })}

                selectedTitleStyle={styles.selectedTitleStyle} //tabBarItem选中的文字样式

                badgeText={badgeText}

            >

                <Navigator

                    initialRoute={{name: componentName, component:component}}

                    configureScene={()=>{

                        return Navigator.SceneConfigs.PushFromRight;

                    }}

                    renderScene={(route, navigator) =>{

                        let Component = route.component;

                        return <Component {...route.passProps} navigator={navigator} />

                    }}

                />

            </TabNavigator.Item>

        )

    }

});

const styles = StyleSheet.create({

    // icon默认样式

    iconStyle:{

        width: Platform.OS === 'ios' ? 30 : 25,

        height:Platform.OS === 'ios' ? 30 : 25,

    },

    // tabBarItem选中的文字样式

    selectedTitleStyle:{

        color: 'rgba(212,97,0,1)',

    }

});

// 输出

module.exports = Main;
简化代码
2.Home.js
/**

 * 首页

 */

import React, { Component } from 'react';

import {

    AppRegistry,

    StyleSheet,

    Text,

    View,

    Image,

    TouchableOpacity,

    Platform

} from 'react-native';

var Home = React.createClass({

    render() {

        return (

            <View style={styles.container}>

                {/*导航条*/}

                {this.renderNavBar()}

                <Text style={styles.welcome}>

                    首页

                </Text>

            </View>

        );

    },

    // 导航条

    renderNavBar(){

        return(

            <View style={styles.navOutViewStyle}>

                <Text style={{color:'white',fontSize:16,fontWeight:'bold'}}>首页</Text>

            </View>

        )

    }

});

const styles = StyleSheet.create({

    // 导航条视图

    navOutViewStyle:{

        height:Platform.OS === 'ios' ? 64 : 44,

        backgroundColor:'#468AFF',

        // 主轴方向

        flexDirection:'row',

        // 侧轴对齐方式 垂直居中

        alignItems:'center',

        // 主轴方向居中

        justifyContent:'center',

    },

    container: {

        flex: 1,

        backgroundColor: '#F5FCFF',

    },

    welcome: {

        fontSize: 20,

        textAlign: 'center',

        margin: 10,

    },

});

// 输出类

module.exports = Home;
3.Message.js
/**

 * 消息

 */

import React, { Component } from 'react';

import {

    AppRegistry,

    StyleSheet,

    Text,

    View,

    Image,

    TouchableOpacity,

    Platform

} from 'react-native';

var Message = React.createClass({

    render() {

        return (

            <View style={styles.container}>

                {/*导航条*/}

                {this.renderNavBar()}

                <Text style={styles.welcome}>

                    消息

                </Text>

            </View>

        );

    },

    // 导航条

    renderNavBar(){

        return(

            <View style={styles.navOutViewStyle}>

                <Text style={{color:'white',fontSize:16,fontWeight:'bold'}}>消息</Text>

            </View>

        )

    }

});

const styles = StyleSheet.create({

    // 导航条视图

    navOutViewStyle:{

        height:Platform.OS === 'ios' ? 64 : 44,

        backgroundColor:'#468AFF',

        // 主轴方向

        flexDirection:'row',

        // 侧轴对齐方式 垂直居中

        alignItems:'center',

        // 主轴方向居中

        justifyContent:'center',

    },

    container: {

        flex: 1,

        backgroundColor: '#F5FCFF',

    },

    welcome: {

        fontSize: 20,

        textAlign: 'center',

        margin: 10,

    },

});

// 输出类

module.exports = Message;
4.Find.js
/**

 * 发现

 */

import React, { Component } from 'react';

import {

    AppRegistry,

    StyleSheet,

    Text,

    View,

    Image,

    TouchableOpacity,

    Platform

} from 'react-native';

var Find = React.createClass({

    render() {

        return (

            <View style={styles.container}>

                {/*导航条*/}

                {this.renderNavBar()}

                <Text style={styles.welcome}>

                    发现

                </Text>

            </View>

        );

    },

    // 导航条

    renderNavBar(){

        return(

            <View style={styles.navOutViewStyle}>

                <Text style={{color:'white',fontSize:16,fontWeight:'bold'}}>发现</Text>

            </View>

        )

    }

});

const styles = StyleSheet.create({

    // 导航条视图

    navOutViewStyle:{

        height:Platform.OS === 'ios' ? 64 : 44,

        backgroundColor:'#468AFF',

        // 主轴方向

        flexDirection:'row',

        // 侧轴对齐方式 垂直居中

        alignItems:'center',

        // 主轴方向居中

        justifyContent:'center',

    },

    container: {

        flex: 1,

        backgroundColor: '#F5FCFF',

    },

    welcome: {

        fontSize: 20,

        textAlign: 'center',

        margin: 10,

    },

});

// 输出类

module.exports = Find;
5.Mine.js
/**

 * 我

 */

import React, { Component } from 'react';

import {

    AppRegistry,

    StyleSheet,

    Text,

    View,

    Image,

    TouchableOpacity,

    Platform

} from 'react-native';

var Mine = React.createClass({

    render() {

        return (

            <View style={styles.container}>

                {/*导航条*/}

                {this.renderNavBar()}

                <Text style={styles.welcome}>

                    我的

                </Text>

            </View>

        );

    },

    // 导航条

    renderNavBar(){

        return(

            <View style={styles.navOutViewStyle}>

                <Text style={{color:'white',fontSize:16,fontWeight:'bold'}}>我的</Text>

            </View>

        )

    }

});

const styles = StyleSheet.create({

    // 导航条视图

    navOutViewStyle:{

        height:Platform.OS === 'ios' ? 64 : 44,

        backgroundColor:'#468AFF',

        // 主轴方向

        flexDirection:'row',

        // 侧轴对齐方式 垂直居中

        alignItems:'center',

        // 主轴方向居中

        justifyContent:'center',

    },

    container: {

        flex: 1,

        backgroundColor: '#F5FCFF',

    },

    welcome: {

        fontSize: 20,

        textAlign: 'center',

        margin: 10,

    },

});

// 输出类

module.exports = Mine;
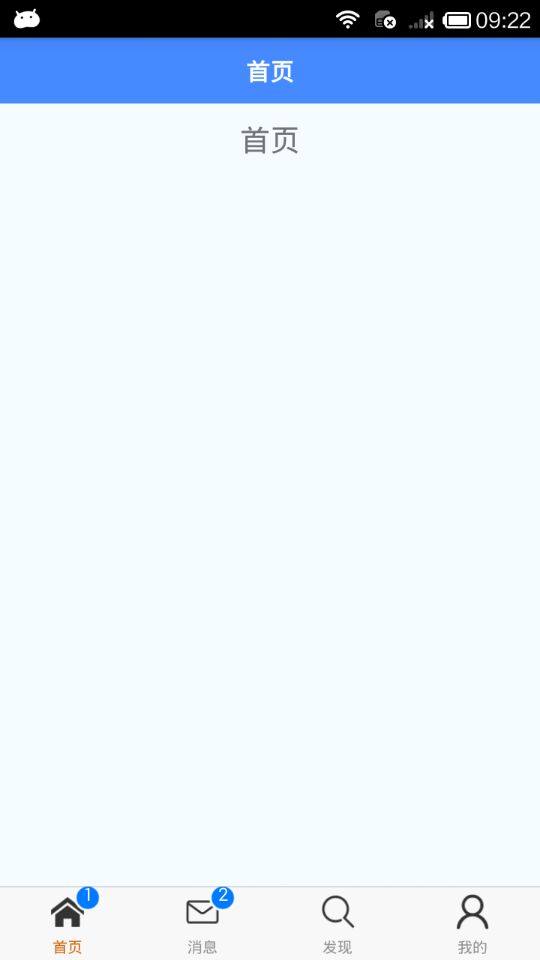
6.效果图
React Native商城项目实战04 - 封装TabNavigator.Item的创建的更多相关文章
- React Native商城项目实战02 - 主要框架部分(tabBar)
1.安装插件,cd到项目根目录下执行: $ npm i react-native-tab-navigator --save 2.主框架文件Main.js /** * 主页面 */ import Rea ...
- React Native商城项目实战03 - 包装Navigator
1.在Home目录下新建首页详细页HomeDetail.js /** * 首页详情页 */ import React, { Component } from 'react'; import { App ...
- React Native商城项目实战01 - 初始化设置
1.创建项目 $ react-native init BuyDemo 2.导入图片资源 安卓:把文件夹放到/android/app/src/main/res/目录下,如图: iOS: Xcode打开工 ...
- React Native商城项目实战11 - 个人中心头部内容
1.创建MineHeaderView.js /** * 个人中心头部内容 */ import React, { Component } from 'react'; import { AppRegist ...
- React Native商城项目实战10 - 个人中心中间内容设置
1.新建一个MineMiddleView.js,专门用于构建中间的内容 /** * 个人中心中间内容设置 */ import React, { Component } from 'react'; im ...
- React Native商城项目实战07 - 设置“More”界面导航条
1.More/More.js /** * 更多 */ import React, { Component } from 'react'; import { AppRegistry, StyleShee ...
- React Native商城项目实战05 - 设置首页的导航条
1.Home.js /** * 首页 */ import React, { Component } from 'react'; import { AppRegistry, StyleSheet, Te ...
- React Native商城项目实战06 - 设置安卓中的启动页
1.Main 目录下新建LaunchImage.js: /** * 启动页 */ import React, { Component } from 'react'; import { AppRegis ...
- React Native商城项目实战16 - 购物中心详细页
逻辑分析: 首页(Home)加载的购物中心组件(ShopCenter),传递url数据: ShopCenter里根据url加载购物中心详细页组件(ShopCenterDetail), ShopCent ...
随机推荐
- Freemarker模板的使用简介
需要的jar包: 在pom.xml文件中贴入 <dependency> <groupId>junit</groupId> <artifactId>jun ...
- NlData初学者开发篇(ORM)
一, 简介:NlData是一个个人开发的ORM,为了学习而学习,是基于表达式实现的一个ORM 二,先简单介绍使用,如下,配置是统一接口 NlClient client = new NlClient(n ...
- 9.css3动画-2D/3D变形--trasform
transform: None不转换. Translate(x,y)通过设置X轴的值进行移动. translateY(y)通过设置Y轴的值进行移动. Scale(x,y)定义2D缩放. ScaleX( ...
- vue项目--vuex状态管理器
本文取之官网和其他文章结合自己的理解用简单化的语言表达.用于自己的笔记记录,也希望能帮到其他小伙伴理解,学习更多的前端知识. Vuex 是什么? Vuex 是一个专为 Vue.js 应用程序开发的状态 ...
- js 元素offset,client , scroll 三大系列总结
1,element.offsetWidth : 包括 padding 和 边框 2,element.clientWidth : 包括 padding ,不包含边框 , 内容超出会溢出盒子的时候,就用s ...
- 使用html2canvas实现屏幕截图
相关文件(vue3.0) <script src="https://cdn.jsdelivr.net/bluebird/latest/bluebird.js">< ...
- Redis【1】Linux下安装~
先去Redis官网下载tar.gz文件.点击中间的[Check the downloads page.].再点击中间Stable 模块的[Download]下载 这把我做演示的文件是 redis-5. ...
- Redis重新配置集群
如果要重新配置集群,先停止集群,然后将cluster-config-file配置的所有文件删除,再重新启动集群,就可以重新配置集群 如果提示[ERR] Node 192.168.2.17:7000 i ...
- 基于双XCKU060+双C6678 的双FMC接口40G光纤传输加速计算卡
基于双XCKU060+双C6678 的双FMC接口40G光纤传输加速计算卡 一.板卡概述 板卡采用基于双FPGA+双DSP的信号采集综合处理硬件平台,板卡大小360mmx217mm.板卡两片FPGA提 ...
- 【ESXI6.0】 ESXI6.0安装时无法安装网卡驱动的解决方法及将网卡驱动加载进ISO
http://blog.163.com/xifanliang@yeah/blog/static/115078488201571584321787/ 若安装时提示如下图所示 之后安装无法完成,会提示没有 ...