
React Native商城项目实战02 - 主要框架部分(tabBar)
1.安装插件,cd到项目根目录下执行:
$ npm i react-native-tab-navigator --save
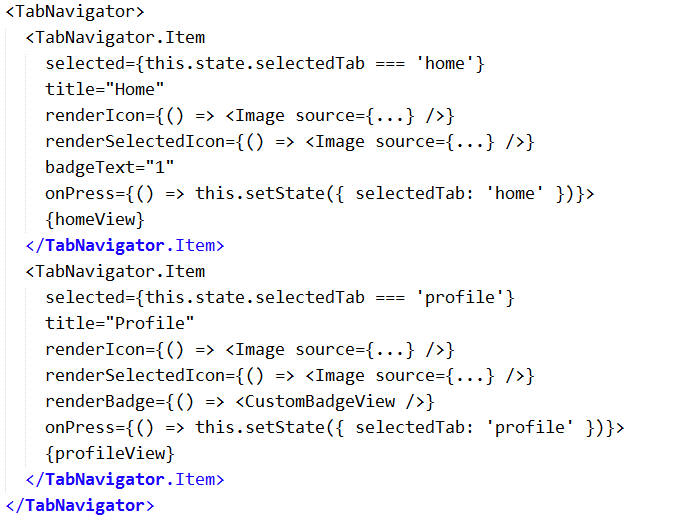
2.主框架文件Main.js
/**

 * 主页面

 */

import React, { Component } from 'react';

import {

    AppRegistry,

    StyleSheet,

    Text,

    View,

    Image,

    Platform  //判断当前运行的系统

} from 'react-native';

/*=============导入外部组件类==============*/

import TabNavigator from 'react-native-tab-navigator';

var Home = require('../Home/Home');

var Shop = require('../Shop/Shop');

var Mine = require('../Mine/Mine');

var More = require('../More/More');

// ES5

var Main = React.createClass({

    // 初始化函数(变量是可以改变的,充当状态机的角色)

    getInitialState(){

        return{

            selectedTab:'home' // 默认选中的tabBar

        }

    },

    render() {

        return (

            <TabNavigator>

                {/*--首页--*/}

                <TabNavigator.Item

                    title="首页"

                    renderIcon={() => <Image source={{uri:'icon_tabbar_homepage'}} style={styles.iconStyle} />}

                    renderSelectedIcon={() => <Image source={{uri:'icon_tabbar_homepage_selected'}} style={styles.selectedIconStyle} />}

                    badgeText="1"

                    selected={this.state.selectedTab === 'home'}

                    onPress={() => this.setState({ selectedTab: 'home' })}

                >

                    <Home />

                </TabNavigator.Item>

                {/*--商家--*/}

                <TabNavigator.Item

                    title="商家"

                    renderIcon={() => <Image source={{uri:'icon_tabbar_merchant_normal'}} style={styles.iconStyle} />}

                    renderSelectedIcon={() => <Image source={{uri:'icon_tabbar_merchant_selected'}} style={styles.selectedIconStyle} />}

                    badgeText="1"

                    selected={this.state.selectedTab === 'shop'}

                    onPress={() => this.setState({ selectedTab: 'shop' })}

                >

                    <Shop />

                </TabNavigator.Item>

                {/*--我的--*/}

                <TabNavigator.Item

                    title="我的"

                    renderIcon={() => <Image source={{uri:'icon_tabbar_mine'}} style={styles.iconStyle} />}

                    renderSelectedIcon={() => <Image source={{uri:'icon_tabbar_mine_selected'}} style={styles.selectedIconStyle} />}

                    badgeText="1"

                    selected={this.state.selectedTab === 'mine'}

                    onPress={() => this.setState({ selectedTab: 'mine' })}

                >

                    <Mine />

                </TabNavigator.Item>

                {/*--更多--*/}

                <TabNavigator.Item

                    title="更多"

                    renderIcon={() => <Image source={{uri:'icon_tabbar_misc'}} style={styles.iconStyle} />}

                    renderSelectedIcon={() => <Image source={{uri:'icon_tabbar_misc_selected'}} style={styles.selectedIconStyle} />}

                    badgeText="1"

                    onPress={() => this.setState({ selectedTab: 'more' })}

                    selected={this.state.selectedTab === 'more'}

                >

                    <More />

                </TabNavigator.Item>

            </TabNavigator>

        );

    }

});

const styles = StyleSheet.create({

    iconStyle:{

        width: Platform.OS === 'ios' ? 30 : 25,

        height:Platform.OS === 'ios' ? 30 : 25,

    },

    selectedIconStyle:{

        width:Platform.OS === 'ios' ? 30 : 25,

        height:Platform.OS === 'ios' ? 30 : 25,

    },

});

// 输出

module.exports = Main;
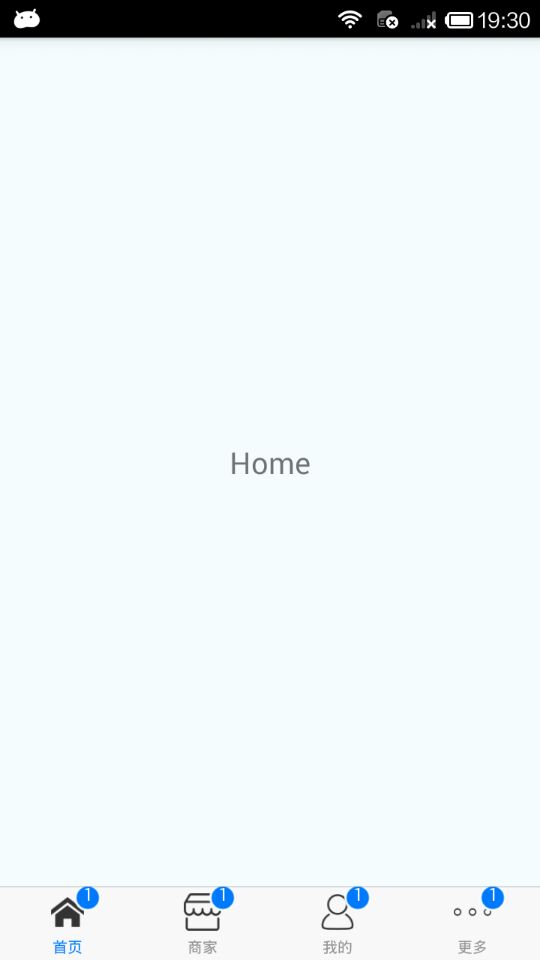
3.预览效果

React Native商城项目实战02 - 主要框架部分(tabBar)的更多相关文章
- React Native商城项目实战04 - 封装TabNavigator.Item的创建
1.Main.js /** * 主页面 */ import React, { Component } from 'react'; import { StyleSheet, Text, View, Im ...
- React Native商城项目实战01 - 初始化设置
1.创建项目 $ react-native init BuyDemo 2.导入图片资源 安卓:把文件夹放到/android/app/src/main/res/目录下,如图: iOS: Xcode打开工 ...
- React Native商城项目实战11 - 个人中心头部内容
1.创建MineHeaderView.js /** * 个人中心头部内容 */ import React, { Component } from 'react'; import { AppRegist ...
- React Native商城项目实战10 - 个人中心中间内容设置
1.新建一个MineMiddleView.js,专门用于构建中间的内容 /** * 个人中心中间内容设置 */ import React, { Component } from 'react'; im ...
- React Native商城项目实战07 - 设置“More”界面导航条
1.More/More.js /** * 更多 */ import React, { Component } from 'react'; import { AppRegistry, StyleShee ...
- React Native商城项目实战05 - 设置首页的导航条
1.Home.js /** * 首页 */ import React, { Component } from 'react'; import { AppRegistry, StyleSheet, Te ...
- React Native商城项目实战06 - 设置安卓中的启动页
1.Main 目录下新建LaunchImage.js: /** * 启动页 */ import React, { Component } from 'react'; import { AppRegis ...
- React Native商城项目实战03 - 包装Navigator
1.在Home目录下新建首页详细页HomeDetail.js /** * 首页详情页 */ import React, { Component } from 'react'; import { App ...
- React Native商城项目实战16 - 购物中心详细页
逻辑分析: 首页(Home)加载的购物中心组件(ShopCenter),传递url数据: ShopCenter里根据url加载购物中心详细页组件(ShopCenterDetail), ShopCent ...
随机推荐
- zuul开发实战(限流,超时解决)
什么是网关 API Gateway,是系统的唯一对外的入口,介于客户端和服务器端之间的中间层,处理非业务功能 提供路由请求.鉴权.监控.缓存.限流等功能 统一接入 * 智能路由 * AB测试.灰度测试 ...
- 在docker容器下利用数据卷实现在删除了mysql容器或者镜像的情况下恢复数据
当把mysql容器销毁,在新建一个容器,进行之前的数据恢复. 因为之前建立了数据卷,那么现在就可以利用这个数据卷进行数据恢复. 使用docker volume create volume_name命令 ...
- git 本地tag和远程tag对应不上 vscode里pull不下代码
vscode拉取代码是用 git pull --tags origin saas-xxx > git pull --tags origin saas-base From 172.16.0.xx ...
- 从零开始学MySQL(二)
鉴于上节篇幅以安装为主,因此对于调用mysql所需要使用的“命令”只是略微提及.随之而来就会带给读者诸多不解了,因为你会思考,这串长长的字符到底有什么特殊的含义呢?聪明的你可能早就抱着好奇心去“摆渡” ...
- git 命令解析
git 补丁 Git 提供了两种补丁方案: (1)用 git diff 生成的UNIX标准补丁.diff文件:.diff文件只是记录文件改变的内容,不带有commit记录信息,多个commit可以 ...
- php strip_tags() 函数去除 HTML、XML 以及 PHP 的标签。
strip_tags() 函数剥去 HTML.XML 以及 PHP 的标签.strip_tags(string,allow)参数 描述string 必需.规定要检查的字符串.allow ...
- Django学习系列4:编写第一个简单的应用代码
首页视图编写 lists/tests.py from django.test import TestCasefrom django.urls import resolvefrom lists.view ...
- fastjson的方法应用与java JSONObject
Fastjson是一个Java语言编写的高性能功能完善的JSON库.fastjson采用独创的算法,将parse的速度提升到极致,超过所有json库,包括曾经号称最快的jackson.并且还超越了go ...
- 流式布局和viewport
流式布局 百分比布局,非固定宽度,内容向两边填充,流动的布局. viewport(视口) PC端的网页在手机端的浏览器显示是不会出现网页的,这是因为移动端的网页不是直接放在移动端的浏览器中,而是放在移 ...
- 在vue下引入jquery bootstrap
在vue 项目中引入jquery bootstrap 引入jquery npm install jquery --save-dev 在项目根目录下的build/webpack.base.conf.js ...