
吴裕雄 python神经网络 水果图片识别(4)
# coding: utf-8
# In[1]:
import os
import numpy as np
from skimage import color, data, transform, io
# In[34]:
import tensorflow as tf
import numpy as np
train10_images = np.load('train10_images.npy')
train10_labels = np.load('train10_labels.npy')
y=tf.placeholder(tf.float32,[None,10])
def reformat(dataset, labels):
dataset = dataset.reshape((-1, 32, 32, 3)).astype(np.float32)
labels = (np.arange(10) == labels[:, None]).astype(np.float32)
return dataset, labels
train_x, train_y = reformat(train10_images, train10_labels)
## 配置神经网络的参数
n_classes = 10
batch_size = 64
kernel_h = kernel_w = 5
#dropout = 0.8
depth_in = 3
depth_out1 = 64
depth_out2 = 128
image_size = 32 ##图片尺寸
n_sample = len(train10_images) ##样本个数
x = tf.placeholder(tf.float32, [None, 32, 32, 3]) ##每张图片的像素大小为32*32
y_ = tf.placeholder(tf.float32, [None, n_classes])
keep_prob = tf.placeholder(tf.float32) ##dropout的placeholder(解决过拟合)
fla = int((image_size * image_size / 16) * depth_out2) # 扁平化用到
##定义权重变量
Weights = {"con1_w": tf.Variable(tf.random_normal([kernel_h, kernel_w, depth_in, depth_out1])),
"con2_w": tf.Variable(tf.random_normal([kernel_h, kernel_w, depth_out1, depth_out2])),
"fc_w1": tf.Variable(tf.random_normal([int((image_size * image_size / 16) * depth_out2), 512])),
"fc_w2": tf.Variable(tf.random_normal([512, 128])), "out": tf.Variable(tf.random_normal([128, n_classes]))}
##定义偏置变量
bias = {"conv1_b": tf.Variable(tf.random_normal([depth_out1])), "conv2_b": tf.Variable(tf.random_normal([depth_out2])),
"fc_b1": tf.Variable(tf.random_normal([512])), "fc_b2": tf.Variable(tf.random_normal([128])),
"out": tf.Variable(tf.random_normal([n_classes]))}
## 定义卷积层的生成函数
def conv2d(x, W, b, stride=1):
x = tf.nn.conv2d(x, W, strides=[1, stride, stride, 1], padding="SAME")
x = tf.nn.bias_add(x, b)
return tf.nn.relu(x)
## 定义池化层的生成函数
def maxpool2d(x, stride=2):
return tf.nn.max_pool(x, ksize=[1, stride, stride, 1], strides=[1, stride, stride, 1], padding="SAME")
## 定义卷积神经网络生成函数
def conv_net(x, weights, biases, dropout):
## Convolutional layer 1(卷积层1)
with tf.name_scope('convLayer1'):
conv1 = conv2d(x, Weights['con1_w'], bias['conv1_b']) ##32*32*64
tf.summary.histogram('convLayer1/weights1', Weights['con1_w'])
tf.summary.histogram('convLayer1/bias1', bias['conv1_b'])
tf.summary.histogram('convLayer1/conv1', conv1)
pool1 = maxpool2d(conv1, 2) ##经过池化层1 shape:16*16*64
## Convolutional layer 2(卷积层2)
with tf.name_scope('convLayer2'):
conv2 = conv2d(pool1, Weights['con2_w'], bias['conv2_b']) ##16*16*128
tf.summary.histogram('convLayer2/weights2', Weights['con2_w'])
tf.summary.histogram('convLayer2/bias2', bias['conv2_b'])
tf.summary.histogram('convLayer2/conv2', conv2)
pool2 = maxpool2d(conv2, 2) ##经过池化层2 shape:8*8*128
tf.summary.histogram('ConvLayer2/pool2', pool2)
flatten = tf.reshape(pool2, [-1, fla]) ##Flatten层,扁平化处理
fc1 = tf.add(tf.matmul(flatten, Weights['fc_w1']), bias['fc_b1'])
fc1r = tf.nn.relu(fc1) ##经过relu激活函数
## Fully connected layer 2(全连接层2)
fc2 = tf.add(tf.matmul(fc1r, Weights['fc_w2']), bias['fc_b2']) ##计算公式:输出参数=输入参数*权值+偏置
fc2 = tf.nn.relu(fc2) ##经过relu激活函数
## Dropout(Dropout层防止预测数据过拟合)
fc2 = tf.nn.dropout(fc2, dropout)
## Output class prediction
prediction = tf.add(tf.matmul(fc2, Weights['out']), bias['out']) ##输出预测参数
return prediction
## 优化预测准确率 0.005
prediction = conv_net(x, Weights, bias, keep_prob) ##生成卷积神经网络
cross_entropy = tf.reduce_mean(tf.nn.softmax_cross_entropy_with_logits(logits=prediction, labels=y)) ##交叉熵损失函数
optimizer = tf.train.AdamOptimizer(1e-4).minimize(cross_entropy) ##选择优化器以及学习率
merged = tf.summary.merge_all()
## 评估模型
correct_pred = tf.equal(tf.argmax(prediction, 1), tf.argmax(y, 1))
accuracy = tf.reduce_mean(tf.cast(correct_pred, tf.float32))
## 初始会话并开始训练过程
with tf.Session() as sess:
tf.global_variables_initializer().run()
# writer=tf.summary.FileWriter("./Fruits(0.001)",sess.graph)
for i in range(5):
for j in range(int(n_sample / batch_size) + 1):
start = (j * batch_size)
end = start + batch_size
x_ = train_x[start:end]
y_ = train_y[start:end]
##准备验证数据
sess.run(optimizer, feed_dict={x: x_, y: y_, keep_prob: 0.5})
loss, acc = sess.run([cross_entropy, accuracy], feed_dict={x: x_, y: y_, keep_prob: 1.})
print(
"Epoch:", '%04d' % (i + 1), "cost=", "{:.9f}".format(loss), "Training accuracy", "{:.5f}".format(acc*100))
print('Optimization Completed')
# coding: utf-8
import tensorflow as tf
from random import shuffle
INPUT_NODE = 32*32
OUT_NODE = 77
IMAGE_SIZE = 32
NUM_CHANNELS = 3
NUM_LABELS = 77
#第一层卷积层的尺寸和深度
CONV1_DEEP = 16
CONV1_SIZE = 5
#第二层卷积层的尺寸和深度
CONV2_DEEP = 32
CONV2_SIZE = 5
#全连接层的节点数
FC_SIZE = 512
def inference(input_tensor, train, regularizer):
#卷积
with tf.variable_scope('layer1-conv1'):
conv1_weights = tf.Variable(tf.random_normal([CONV1_SIZE,CONV1_SIZE,NUM_CHANNELS,CONV1_DEEP],stddev=0.1),name='weight')
tf.summary.histogram('convLayer1/weights1', conv1_weights)
conv1_biases = tf.Variable(tf.Variable(tf.random_normal([CONV1_DEEP])),name="bias")
tf.summary.histogram('convLayer1/bias1', conv1_biases)
conv1 = tf.nn.conv2d(input_tensor,conv1_weights,strides=[1,1,1,1],padding='SAME')
tf.summary.histogram('convLayer1/conv1', conv1)
relu1 = tf.nn.relu(tf.nn.bias_add(conv1,conv1_biases))
tf.summary.histogram('ConvLayer1/relu1', relu1)
#池化
with tf.variable_scope('layer2-pool1'):
pool1 = tf.nn.max_pool(relu1,ksize=[1,2,2,1],strides=[1,2,2,1],padding='SAME')
tf.summary.histogram('ConvLayer1/pool1', pool1)
#卷积
with tf.variable_scope('layer3-conv2'):
conv2_weights = tf.Variable(tf.random_normal([CONV2_SIZE,CONV2_SIZE,CONV1_DEEP,CONV2_DEEP],stddev=0.1),name='weight')
tf.summary.histogram('convLayer2/weights2', conv2_weights)
conv2_biases = tf.Variable(tf.random_normal([CONV2_DEEP]),name="bias")
tf.summary.histogram('convLayer2/bias2', conv2_biases)
#卷积向前学习
conv2 = tf.nn.conv2d(pool1,conv2_weights,strides=[1,1,1,1],padding='SAME')
tf.summary.histogram('convLayer2/conv2', conv2)
relu2 = tf.nn.relu(tf.nn.bias_add(conv2,conv2_biases))
tf.summary.histogram('ConvLayer2/relu2', relu2)
#池化
with tf.variable_scope('layer4-pool2'):
pool2 = tf.nn.max_pool(relu2,ksize=[1,2,2,1],strides=[1,2,2,1],padding='SAME')
tf.summary.histogram('ConvLayer2/pool2', pool2)
#变型
pool_shape = pool2.get_shape().as_list()
#计算最后一次池化后对象的体积(数据个数\节点数\像素个数)
nodes = pool_shape[1]*pool_shape[2]*pool_shape[3]
#根据上面的nodes再次把最后池化的结果pool2变为batch行nodes列的数据
reshaped = tf.reshape(pool2,[-1,nodes])
#全连接层
with tf.variable_scope('layer5-fc1'):
fc1_weights = tf.Variable(tf.random_normal([nodes,FC_SIZE],stddev=0.1),name='weight')
if(regularizer != None):
tf.add_to_collection('losses',tf.contrib.layers.l2_regularizer(0.03)(fc1_weights))
fc1_biases = tf.Variable(tf.random_normal([FC_SIZE]),name="bias")
#预测
fc1 = tf.nn.relu(tf.matmul(reshaped,fc1_weights)+fc1_biases)
if(train):
fc1 = tf.nn.dropout(fc1,0.5)
#全连接层
with tf.variable_scope('layer6-fc2'):
fc2_weights = tf.Variable(tf.random_normal([FC_SIZE,64],stddev=0.1),name="weight")
if(regularizer != None):
tf.add_to_collection('losses',tf.contrib.layers.l2_regularizer(0.03)(fc2_weights))
fc2_biases = tf.Variable(tf.random_normal([64]),name="bias")
#预测
fc2 = tf.nn.relu(tf.matmul(fc1,fc2_weights)+fc2_biases)
if(train):
fc2 = tf.nn.dropout(fc2,0.5)
#全连接层
with tf.variable_scope('layer7-fc3'):
fc3_weights = tf.Variable(tf.random_normal([64,NUM_LABELS],stddev=0.1),name="weight")
if(regularizer != None):
tf.add_to_collection('losses',tf.contrib.layers.l2_regularizer(0.03)(fc3_weights))
fc3_biases = tf.Variable(tf.random_normal([NUM_LABELS]),name="bias")
#预测
logit = tf.matmul(fc2,fc3_weights)+fc3_biases
return logit
import keras
import time
from keras.utils import np_utils
import numpy as np
trainDataList = np.load("E:\\tmp\\train_imgages.npy")
trainLabelNum = np.load("E:\\tmp\\train_labels.npy")
X = trainDataList
Y = (np.arange(77) == trainLabelNum[:,None]).astype(np.float32)
batch_size = 10
n_classes=77
epochs=16#循环次数
learning_rate=1e-4
batch_num=int(np.shape(X)[0]/batch_size)
dropout=0.75
x=tf.placeholder(tf.float32,[None,32,32,3])
y=tf.placeholder(tf.float32,[None,n_classes])
# keep_prob = tf.placeholder(tf.float32)
#加载测试数据集
testDataList = np.load("E:\\tmp\\test_imgages.npy")
testLabelNum = np.load("E:\\tmp\\test_labels.npy")
test_X = testDataList
test_Y = (np.arange(77) == testLabelNum[:,None]).astype(np.float32)
back = 64
ro = int(len(test_X)/back)
#调用神经网络方法
pred=inference(x,1,"regularizer")
cost=tf.reduce_mean(tf.nn.softmax_cross_entropy_with_logits(logits=pred,labels=y))
# 三种优化方法选择一个就可以
optimizer=tf.train.AdamOptimizer(1e-4).minimize(cost)
# train_step = tf.train.GradientDescentOptimizer(0.001).minimize(cost)
# train_step = tf.train.MomentumOptimizer(0.001,0.9).minimize(cost)
#将预测label与真实比较
correct_pred=tf.equal(tf.argmax(pred,1),tf.argmax(y,1))
#计算准确率
accuracy=tf.reduce_mean(tf.cast(correct_pred,tf.float32))
merged=tf.summary.merge_all()
#将tensorflow变量实例化
init=tf.global_variables_initializer()
start_time = time.time()
with tf.Session() as sess:
sess.run(init)
#保存tensorflow参数可视化文件
writer=tf.summary.FileWriter('C:/Fruit_graph', sess.graph)
for i in range(epochs):
for j in range(batch_num):
offset = (j * batch_size) % (Y.shape[0] - batch_size)
# 准备数据
batch_data = X[offset:(offset + batch_size), :]
batch_labels = Y[offset:(offset + batch_size), :]
sess.run(optimizer, feed_dict={x:batch_data,y:batch_labels})
result=sess.run(merged, feed_dict={x:batch_data,y:batch_labels})
writer.add_summary(result, i)
loss,acc = sess.run([cost,accuracy],feed_dict={x:batch_data,y:batch_labels})
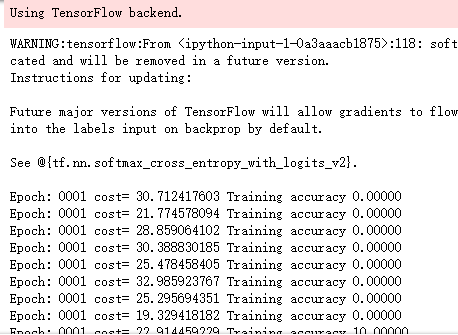
print("Epoch:", '%04d' % (i+1),"cost=", "{:.9f}".format(loss),"Training accuracy","{:.5f}".format(acc*100))
writer.close()
print("########################训练结束,下面开始测试###################")
for i in range(ro):
s = i*back
e = s+back
test_accuracy = sess.run(accuracy,feed_dict={x:test_X[s:e],y:test_Y[s:e]})
print("step:%d test accuracy = %.4f%%" % (i,test_accuracy*100))
print("Final test accuracy = %.4f%%" % (test_accuracy*100))
end_time = time.time()
print('Times:',(end_time-start_time))
print('Optimization Completed')
吴裕雄 python神经网络 水果图片识别(4)的更多相关文章
- 吴裕雄 python神经网络 水果图片识别(5)
#-*- coding:utf-8 -*-### required libaraiedimport osimport matplotlib.image as imgimport matplotlib. ...
- 吴裕雄 python神经网络 水果图片识别(3)
import osimport kerasimport timeimport numpy as npimport tensorflow as tffrom random import shufflef ...
- 吴裕雄 python神经网络 水果图片识别(2)
import osimport numpy as npimport matplotlib.pyplot as pltfrom skimage import color,data,transform,i ...
- 吴裕雄 python神经网络 水果图片识别(1)
import osimport numpy as npimport matplotlib.pyplot as pltfrom skimage import color,data,transform,i ...
- 吴裕雄 python神经网络 花朵图片识别(10)
import osimport numpy as npimport matplotlib.pyplot as pltfrom PIL import Image, ImageChopsfrom skim ...
- 吴裕雄 python神经网络 花朵图片识别(9)
import osimport numpy as npimport matplotlib.pyplot as pltfrom PIL import Image, ImageChopsfrom skim ...
- 吴裕雄 python 神经网络——TensorFlow图片预处理调整图片
import numpy as np import tensorflow as tf import matplotlib.pyplot as plt def distort_color(image, ...
- 吴裕雄 python 神经网络——TensorFlow 花瓣识别2
import glob import os.path import numpy as np import tensorflow as tf from tensorflow.python.platfor ...
- 吴裕雄 python 神经网络——TensorFlow图片预处理
import numpy as np import tensorflow as tf import matplotlib.pyplot as plt # 使用'r'会出错,无法解码,只能以2进制形式读 ...
随机推荐
- 《Linux 性能及调优指南》写在后面的话
感谢飞哥的翻译. 目前飞哥 (http://hi.baidu.com/imlidapeng)的网址已经不能访问了. <Linux 性能及调优指南>这本书的原文地址:http://www.r ...
- 为什么TCP比UDP可靠真正原因,以及并发编程的基础问题
一 为什么TCP协议比UDP协议传输数据可靠: 我们知道在传输数据的时候,数据是先存在操作系统的缓存中,然后发送给客户端,在客户端也是要经过客户端的操作系统的,因为这个过程涉及到计算机硬件,也就是物 ...
- Python并发编程二(多线程、协程、IO模型)
1.python并发编程之多线程(理论) 1.1线程概念 在传统操作系统中,每个进程有一个地址空间,而且默认就有一个控制线程 线程顾名思义,就是一条流水线工作的过程(流水线的工作需要电源,电源就相当于 ...
- python-初始化函数
#本次学习:初始化函数 #-*- coding:utf-8 -*- class SeniorTestingEngineer: #初始化函数,在创建对象的时候就设置初始值.例如我们在SeniorTest ...
- 字符串截取函数slice, substring, substr
在日常项目需求中,常常会遇到需要截取字符串操作的工作,而ECMAScript为我们提供了原生的截取字符串的函数,而且提供了三个:slice, substring, substr.我们怎么判断在什么时候 ...
- 剑指Offer(四):重建二叉树
说明: 1.本系列是根据<剑指Offer>这个系列做的一个小笔记. 2.直接动力是因为师兄师姐找工作很难,而且机械出生的我面试算法更难. 3.刚开始准备刷LeetCode.LintCode ...
- datetime模块的简单用法
import datetime print(datetime.datetime.today()) #2018-08-14 14:18:28.575412 print(datetime.date.tod ...
- uiautomator2.0的配置的两种方法
方法一(使用在线下载的方式导入依赖): 1.首先创建项目工程,创建的项目的android_api版本要与测试的android_api版本一致(24就是24 ,不能26或者17去兼容) 2.然后就是将本 ...
- [Unity移动端]Touch类
Touch类的信息只能在移动端(触摸屏)上能够获取,在编辑器上是不能获取到的.因此,为了方便测试,可以打包apk后在模拟器上跑: unity打包apk:https://www.jianshu.com/ ...
- python库:bs4,BeautifulSoup库、Requests库
Beautiful Soup https://www.crummy.com/software/BeautifulSoup/bs4/doc.zh/ Beautiful Soup 4.2.0 文档 htt ...